Introduction to AWS Guard Duty
AWS GuardDuty is a threat detection service offered by Amazon Web Services (AWS) that continuously monitors and analyzes AWS account activity and network traffic to identify potential security threats. It uses machine learning, anomaly detection, and threat intelligence to analyze data from AWS CloudTrail, VPC Flow Logs, and AWS DNS logs, and then generates security alerts for potential threats, such as unauthorized access, data exfiltration, or malware infections.
AWS GuardDuty provides a centralized AWS dashboard for security operations teams to view and investigate security findings, as well as integrations with other AWS services, such as AWS CloudWatch, AWS Lambda, and AWS Security Hub, for automated response and remediation. By using AWS GuardDuty, customers can improve their security posture and quickly identify and respond to potential security incidents, helping to protect their sensitive data and applications running on AWS.
In this blog, we will explore the key features and benefits of AWS GuardDuty, how to set up and configure the service using terraform script, and best practices for using this AWS Service to improve your AWS cloud security posture. We will also discuss the use cases of AWS GuardDuty.
Prerequisites
An IAM user is attached with the following permissions.
Procedure
Now it’s time to create AWS GuardDuty and some other related services like AWS CloudTrail using Terraform Script. Why need to create AWS CloudTrail? Enabling this AWS service on the CloudTrail log is essential because it allows customers to gain additional security insights and detect potential security threats in their AWS environment. It is a key step in improving the security posture of an AWS account and protecting valuable data and resources.
And also we are going to create AWS CloudWatch Event Rule and SNS Topic for sending email notifications from GuardDuty logs.
Also read: What is terraform?
Terraform Script to create AWS CloudTrail
Create a folder like AWS guard-duty and open VS Code editor in this folder.
Create a file called provider.tf and add the following code into the file.
provider "aws" {
  region     = "region_name"
  access_key = var.access_key
  secret_key = var.secret_key
}
Replace the region_name with the region name where you want to create CloudTrail.
Next, create another file called variables.tf and add the below code.
variable "access_key" {
  type        = string
  description = "AWS IAM Access key"
  default     = ""
}

variable "secret_key" {
  type        = string
  description = "AWS IAM Secret key"
  default     = ""
}

variable "name" {
  type    = string
  default = ""
}
All the variables’ default values need to be given inside the double quotes.
Finally, create a file named main.tf and enter the below code.
data "aws_caller_identity" "this" {}

locals {
  account_id = data.aws_caller_identity.this.account_id
}

resource "aws_cloudtrail" "this" {
  name                          = var.name
  s3_bucket_name                = aws_s3_bucket.this.id
  s3_key_prefix                 = "cloudtrail"
  enable_log_file_validation    = true
  include_global_service_events = true
  is_multi_region_trail         = true
  event_selector {
    read_write_type           = "All"
    include_management_events = true
    data_resource {
      type   = "AWS::S3::Object"
      values = ["arn:aws:s3:::"]
    }
  }
  event_selector {
    read_write_type           = "All"
    include_management_events = true
    data_resource {
      type   = "AWS::DynamoDB::Table"
      values = ["arn:aws:dynamodb"]
    }
    data_resource {
      type   = "AWS::Lambda::Function"
      values = ["arn:aws:lambda"]
    }
  }
  insight_selector {
    insight_type = "ApiCallRateInsight"
  }
}

resource "aws_s3_bucket" "this" {
  bucket        = "${lower(var.name)}-cloudtrail-${local.account_id}"
  force_destroy = true
}

data "aws_iam_policy_document" "bucket_policy" {
  statement {
    sid    = "AWSCloudTrailAclCheck"
    effect = "Allow"
    principals {
      type        = "Service"
      identifiers = ["cloudtrail.amazonaws.com"]
    }
    actions   = ["s3:GetBucketAcl"]
    resources = [aws_s3_bucket.this.arn]
  }
  statement {
    sid    = "AWSCloudTrailWrite"
    effect = "Allow"
    principals {
      type        = "Service"
      identifiers = ["cloudtrail.amazonaws.com"]
    }
    actions   = ["s3:PutObject"]
    resources = ["${aws_s3_bucket.this.arn}/cloudtrail/AWSLogs/${local.account_id}/*"]
    condition {
      test     = "StringEquals"
      variable = "s3:x-amz-acl"
      values   = ["bucket-owner-full-control"]
    }
  }
}

resource "aws_s3_bucket_policy" "this" {
  bucket = aws_s3_bucket.this.id
  policy = data.aws_iam_policy_document.bucket_policy.json
}
The above terraform code will create a AWS CloudTrail with multi-region enabled. And also it creates an AWS S3 Bucket for CloudTrail log storage.
Run Terraform Script for AWS CloudTrail
Now we have to run this script to create CloudTrail and S3 bucket.
Open the terminal in VS code editor and run the “terraform init” command. This init command should be run on every new terraform script.
Know more about terraform Init command

Now run the “terraform apply” command to deploy this script into your AWS account.
It will prompt you to Enter a value and enter yes to create CloudTrail.
It will create 3 resources like the picture below.

Open your AWS account and navigate to AWS CloudTrail. On the left side, panel choose AWS Dashboard and you can see the AWS CloudTrail could be created.

Add Terraform script to Create AWS GuardDuty
Once you successfully created AWS Cloudtrail, now you need to enable AWS GuardDuty.
So copy the below code and add it to the main.tf file under the existing code.
resource "aws_guardduty_detector" "this" {
  enable = true
  datasources {
    s3_logs {
      enable = true
    }
    kubernetes {
      audit_logs {
        enable = false
      }
    }
    malware_protection {
      scan_ec2_instance_with_findings {
        ebs_volumes {
          enable = true
        }
      }
    }
  }
}

resource "aws_cloudwatch_event_rule" "this" {
  name        = var.name
  description = "Event rule for trigger sns topic from AWS Guard duty"
  event_pattern = jsonencode(
    {
      "source" : ["aws.guardduty"],
      "detail-type" : ["GuardDuty Finding"]
    }
  )
}

resource "aws_cloudwatch_event_target" "this" {
  rule      = aws_cloudwatch_event_rule.this.name
  target_id = "SendToSNS"
  arn       = aws_sns_topic.this.arn
  input_transformer {
    input_paths = {
      severity            = "$.detail.severity",
      Finding_ID          = "$.detail.id",
      Finding_Type        = "$.detail.type",
      region              = "$.region",
      Finding_description = "$.detail.description"
    }
    input_template = "\"You have a severity <severity> GuardDuty finding type <Finding_Type> in the <region> region.\"\n \"Finding Description:\" \"<Finding_description>. \"\n \"For more details open the GuardDuty console at https://console.aws.amazon.com/guardduty/home?region=<region>#/findings?search=id%3D<Finding_ID>\""
  }
}

resource "aws_sns_topic" "this" {
  name = var.name
}

resource "aws_sns_topic_policy" "this" {
  arn    = aws_sns_topic.this.arn
  policy = data.aws_iam_policy_document.this.json
}

data "aws_iam_policy_document" "this" {
  statement {
    effect  = "Allow"
    actions = ["SNS:Publish"]
    principals {
      type        = "Service"
      identifiers = ["events.amazonaws.com"]
    }
    resources = [aws_sns_topic.this.arn]
  }
}
The above code will enable AWS GuardDuty and also create SNS Topic and Event Rule.
Run the “terraform apply” command to create these resources.

Once it runs successfully like in the above picture, navigate to the AWS GuardDuty console to see the changes.

Now it is enabled. But there are no logs to show. Now the next step we are going to generate logs to see how it works.
Generate Sample Findings in AWS GuardDuty
Now we are going to generate some sample findings.
On the left side navigation panel click Settings. On the right side, scroll down a little and click Generate sample findings.

Now again go to the findings page and you can see some of the sample logs are shown.
On the top right side, you can see three colors with indicated numbers.
These colors represent various severity stages of the reports.
-
Blue → Low
-
Orange → Medium
-
Red → High

Click one of the sample findings and it will show the full details about the Behavior activity.

AWS GuardDuty uses machine learning and mathematical algorithms. So it can find What action occurs and where it happens and Who did it with their location details like the below picture.

Create AWS SNS Email Subscription
Open the AWS SNS topic Console and on the left navigation panel click Topics. Then select the topic which is created by Terraform.
Under the Subscriptions section click Create Subscription.

Select the protocol to Email and for Endpoint, enter your email address.
Finally, click Create Subscription.
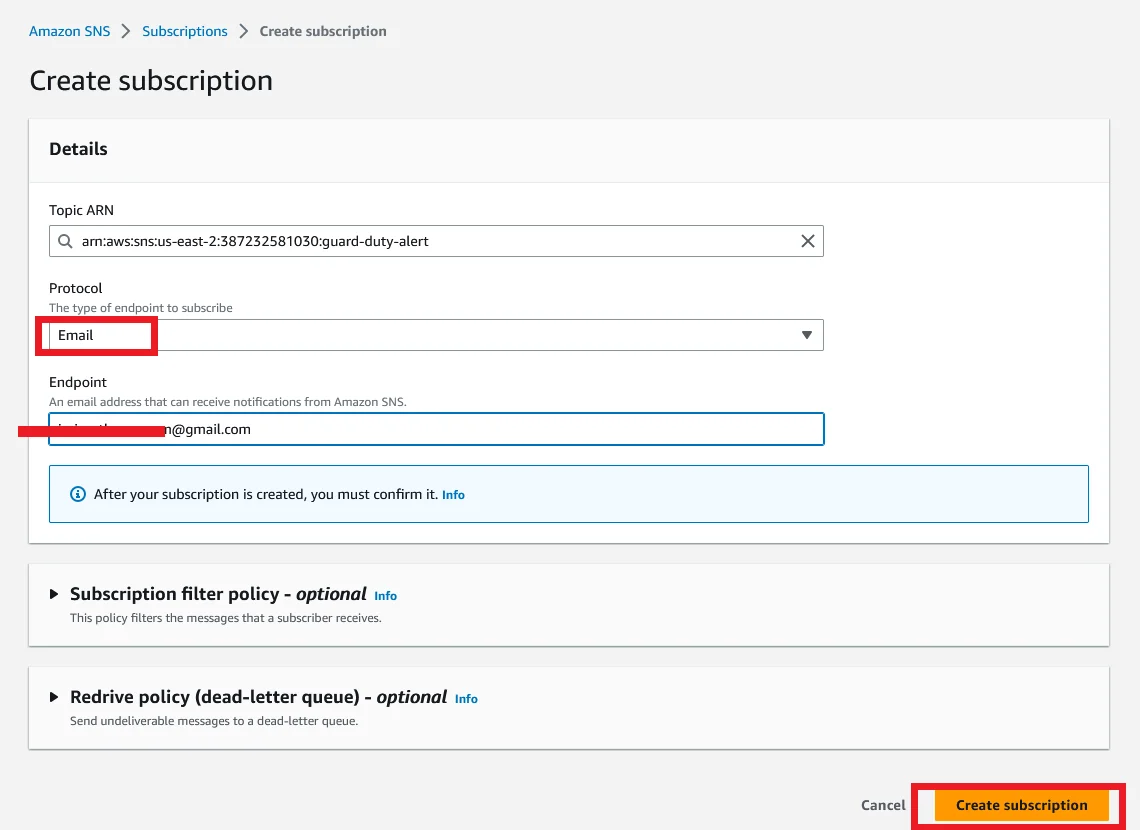
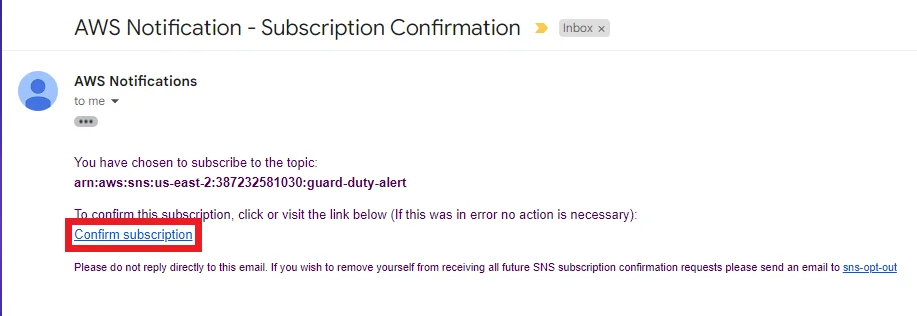
You should receive a subscription confirmation email like in the picture below.
Open the mail and click the confirm subscription link.
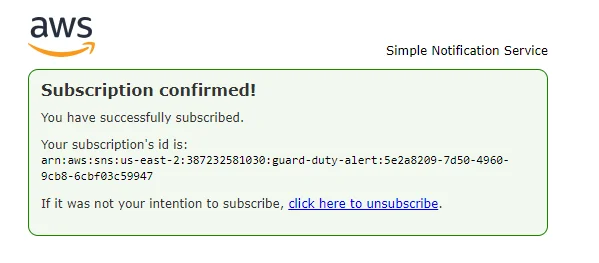
If you prompt to another page like the below picture, your email subscription is confirmed.
Get Alerts via Email
All setups are completed. But now we just trying to generate reports and get alerts via email notifications.
So first create an AWS S3 bucket for this testing purpose. So Leave all settings as default and create.
If you don’t know how to create an AWS S3 bucket Please check the below links.
Create S3 bucket from AWS console
Create S3 bucket using Terraform
Now select the newly created AWS S3 bucket and navigate to the Permissions section.
Under the Block public access settings, you can be able to see Block all public access could be On.
Click the Edit button. We are going to off this setting.

Disable the Block all public access and click Save changes like the below screenshot.

It asks a confirmation. So enter confirm and click Confirm button.

Now go to the AWS GuardDuty page. After a couple of minutes, there will be a report showing under the Findings section.
Click the report and it will show all the details about the report. It will show a detailed report like what action happens and where it happens and who did this.

And also you got an email like the below picture.

Use Cases of AWS GuardDuty
Here are some of the use cases of AWS GuardDuty:
- Continuous Monitoring: It continuously monitors the AWS environment for potential security threats, such as unauthorized access, data exfiltration, and malicious activity.
- Detecting Compromised Credentials: It can monitor your AWS account for unauthorized access attempts and compromised credentials by analyzing AWS CloudTrail logs, VPC Flow Logs, and DNS logs.
- Threat Detection: This AWS Service uses machine learning algorithms and threat intelligence to detect known and unknown threats in the AWS environment.
- Compliance Monitoring: AWS GuardDuty can help in maintaining compliance with various industry standards, by identifying potential security issues and providing actionable insights to remediate them.
- Incident Response: It can help in investigating security incidents by providing detailed logs and alerts, which can be used to identify the root cause of the incident and take appropriate remediation measures.
- Integration with Other AWS Services: AWS GuardDuty integrates with other AWS services such as AWS CloudTrail, Amazon S3, and AWS Lambda, to provide comprehensive security monitoring and threat detection capabilities.
Conclusion
In conclusion, creating AWS GuardDuty using Terraform is a straightforward process that can significantly enhance the security posture of your AWS environment. With the ability to detect and respond to potential threats in real-time, GuardDuty offers a valuable layer of security that can help protect your business from cyber-attacks. By leveraging the power of Infrastructure as Code (IaC) with Terraform, you can automate the process of setting up GuardDuty, enabling you to quickly and easily configure the service and scale it to meet the needs of your organization.
With AWS GuardDuty and Terraform, you can rest assured that your AWS environment is secure and protected and that you are well-equipped to respond to any potential Cloud security threats that may arise. So why not give it a try and see the benefits for yourself?
FAQ:
1. Why Terraform is used to enable AWS Guardduty?
Terraform is an Infrastructure management tool that helps to create and configure AWS Guardduty with a single click.
2. Why should you use AWS Guardduty for your AWS Account?
You can integrate with all other AWS monitoring services to manage within a single one with a machine learning algorithm.
3. Can AWS GuardDuty send alerts via email notifications?
Yes through AWS Guardduty you can send alerts via email notification.

