Bitbucket Pipeline is a continuous integration and continuous deployment (CI/CD) service, It helps you to automatically build, test and even deploy your code based on a configuration file in your repository.
In this blog , we are going to explore how to clone a Bitbucket repository in Bitbucket pipeline in simple way, just follow the below commands
Generate SSH key in pipeline repository
SSH keys are pair of public and private keys that are used to authenticate and establish an encrypted communication between a client and a remote machine over the internet.
Open your pipeline Bitbucket repository → click Repository settings

Also Learn: How bitbucket pipeline triggers only when changes made in a particular folder
Scroll down and click SSH keys under pipelines section

Now you can see a popup message like “pipelines must be enabled”

Click “go to settings” you will see the enable option like below screenshot and then enable the pipeline

Now we have successfully enabled the pipeline !

Now scroll down and click the same SSH keys option under the pipelines section → click Generate keys

Now it will automatically generate private & public key , then copy the public key for future reference, we want to add this public key in our source repository

Now open your source repository(which will contain your codes/files) → Repository settings → click Access keys under security section
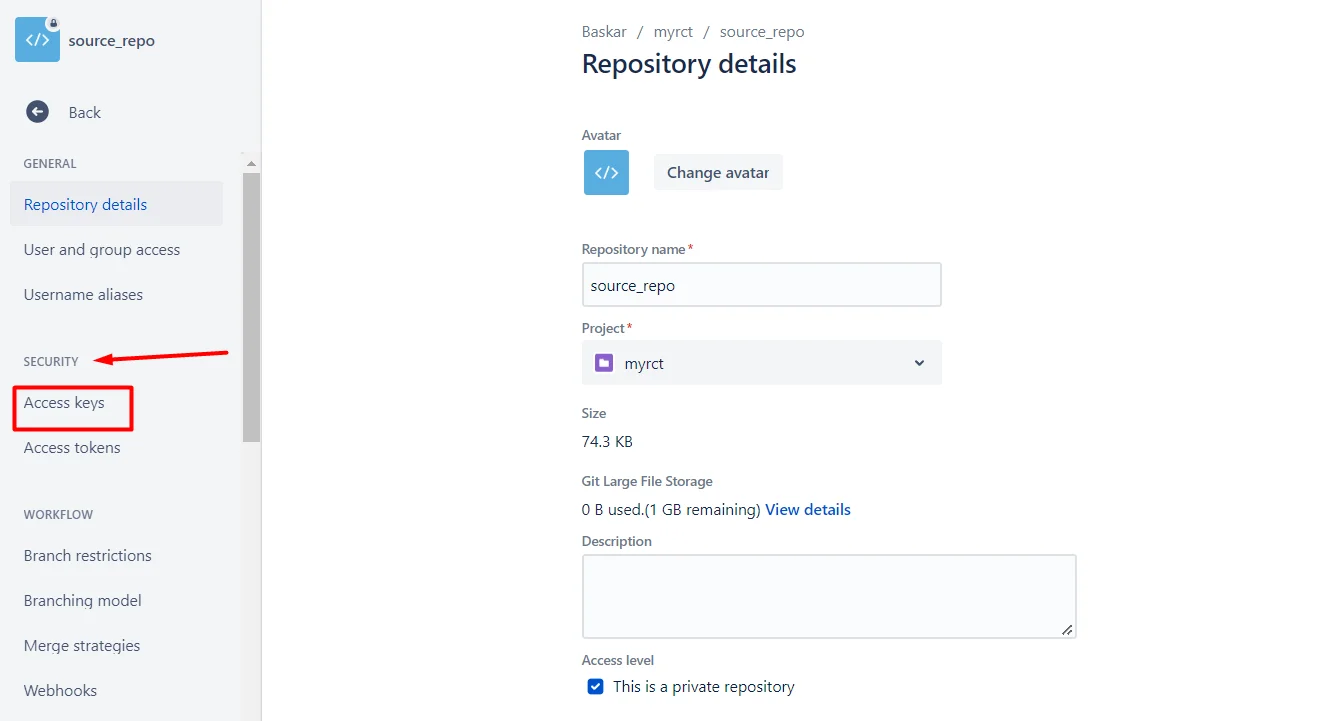
Now click Add key

Now Enter the label name → paste our public key under key section → click Add SSH key
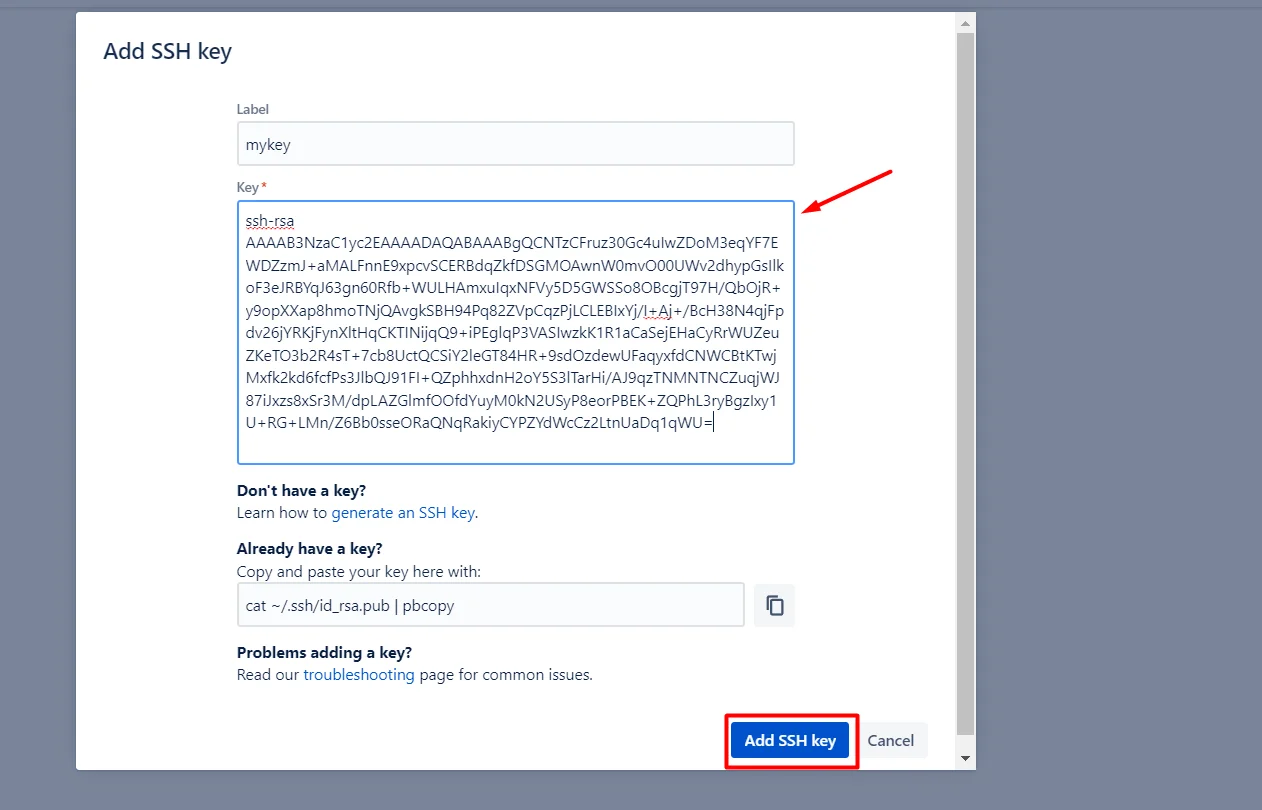
We have successfully added our Bitbucket pipeline repository SSH public key to our source repository
Create pipeline
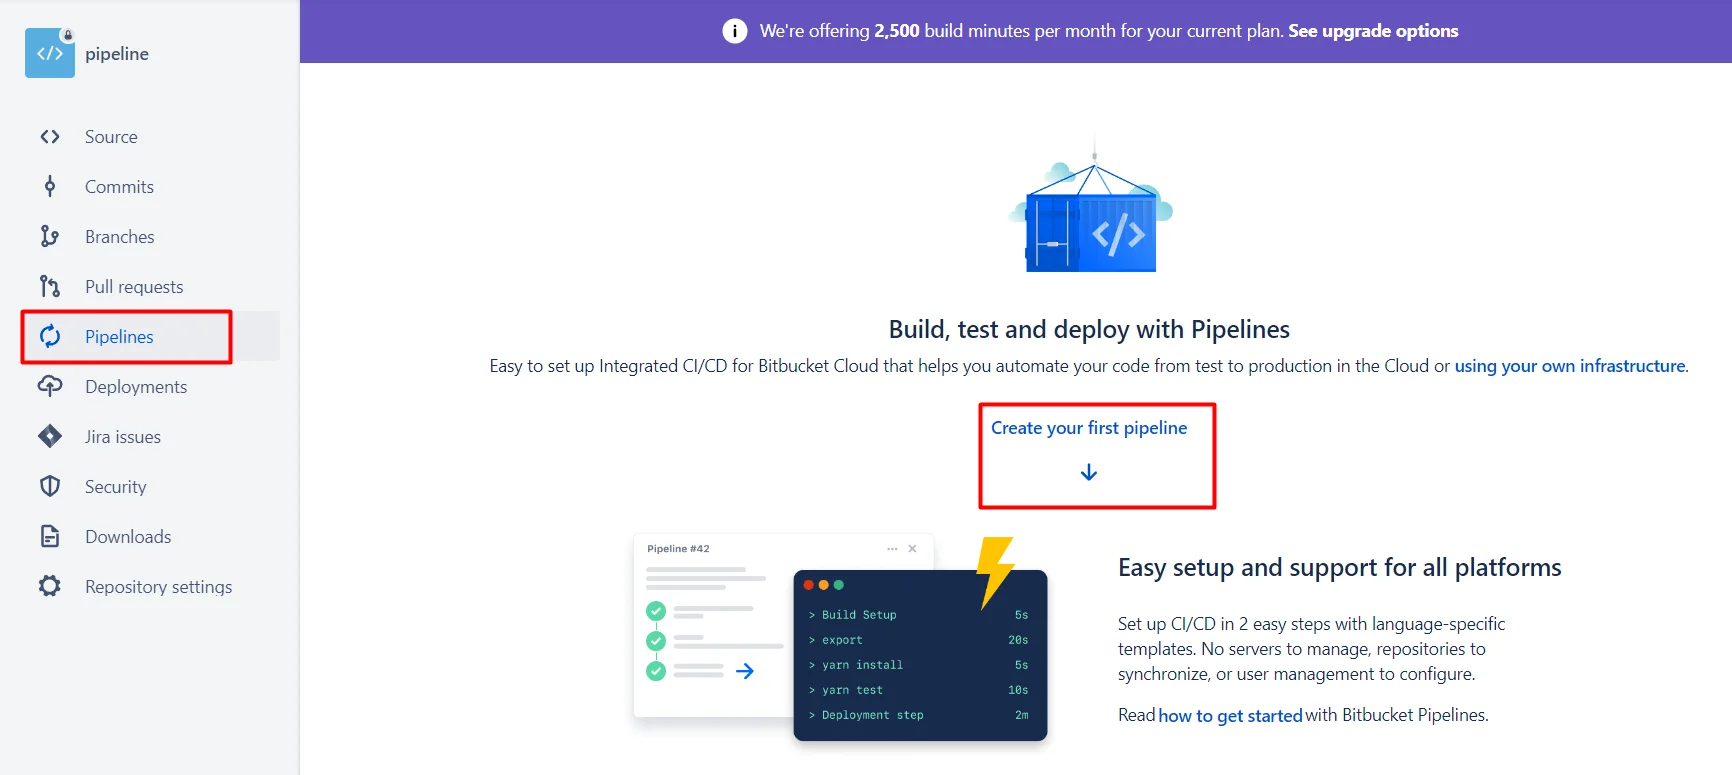
Now again open your pipeline repository → click pipelines → and then click create your first pipeline
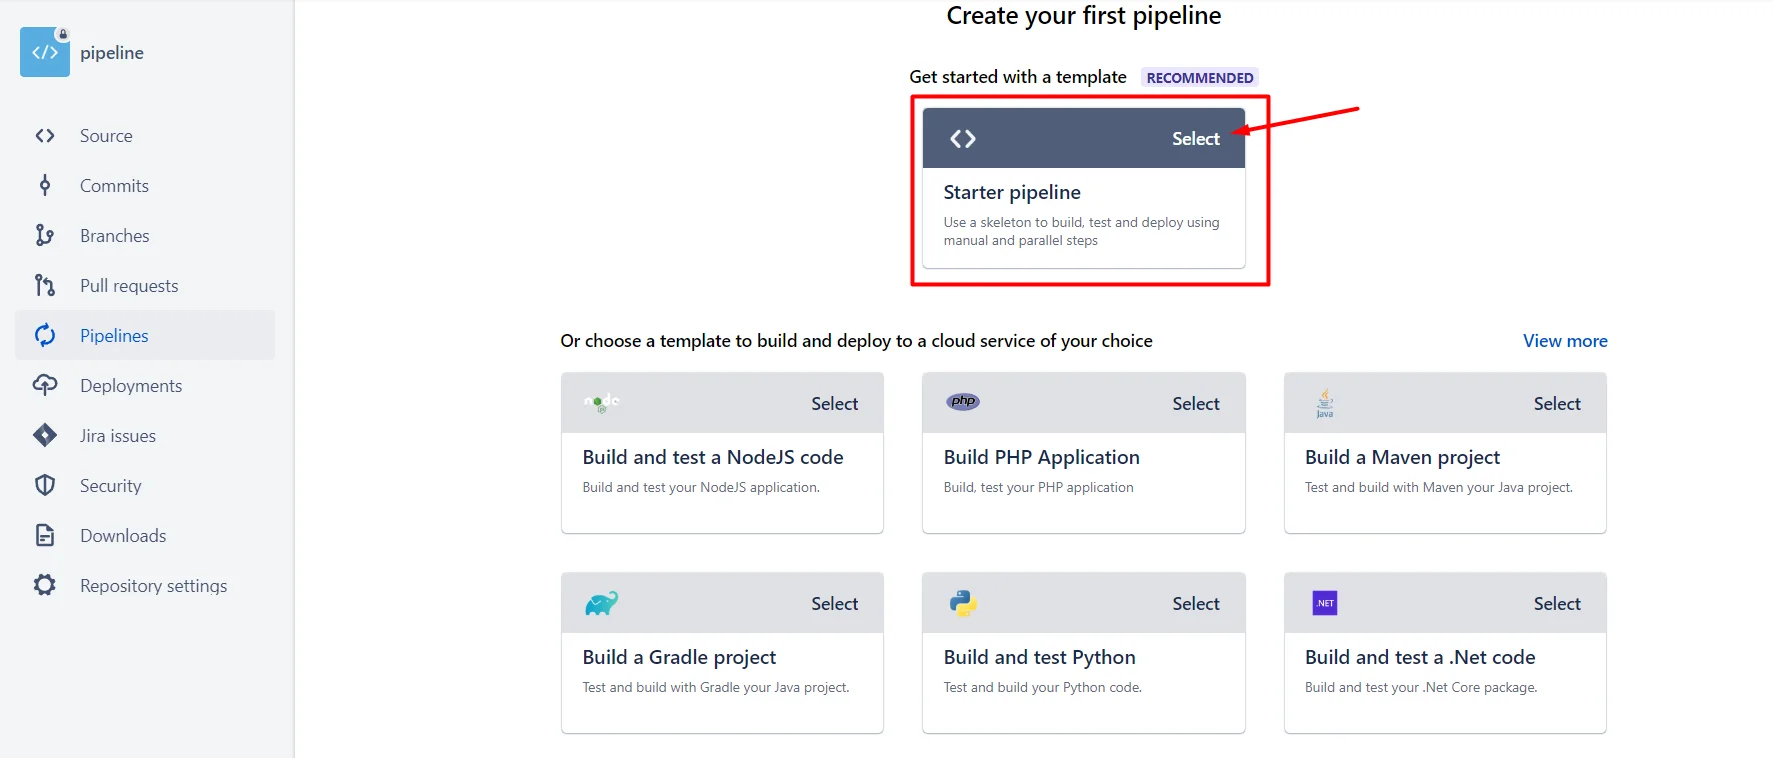
You will redirected to the content like below screen shot then click select on Started pipeline
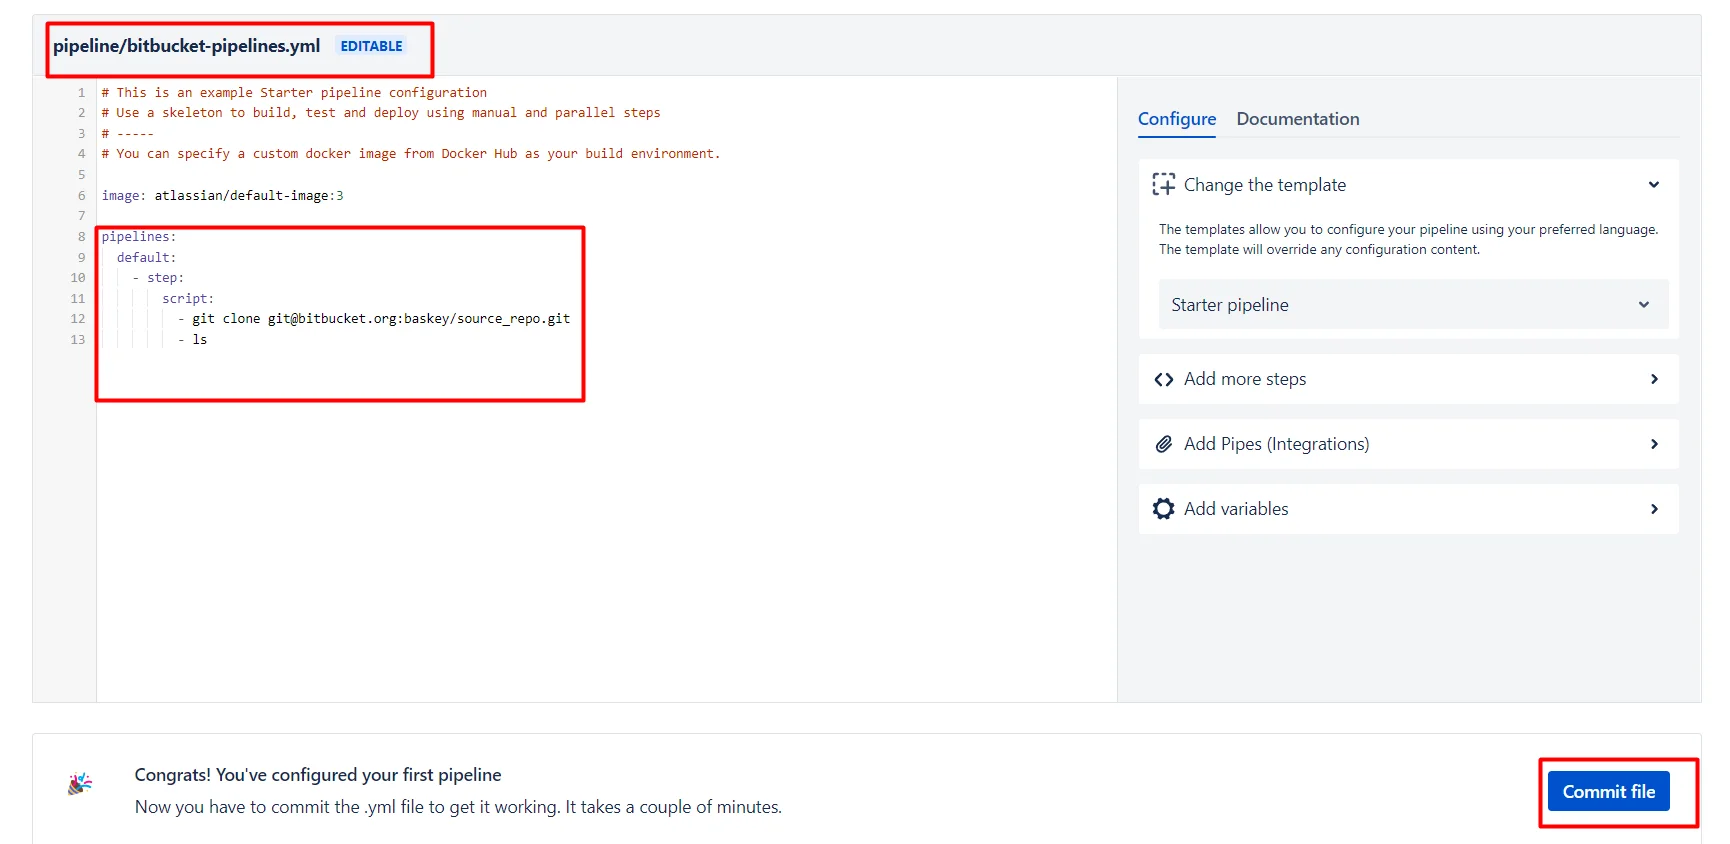
Now you will redirected to a bitbucket-pipelines.yml file
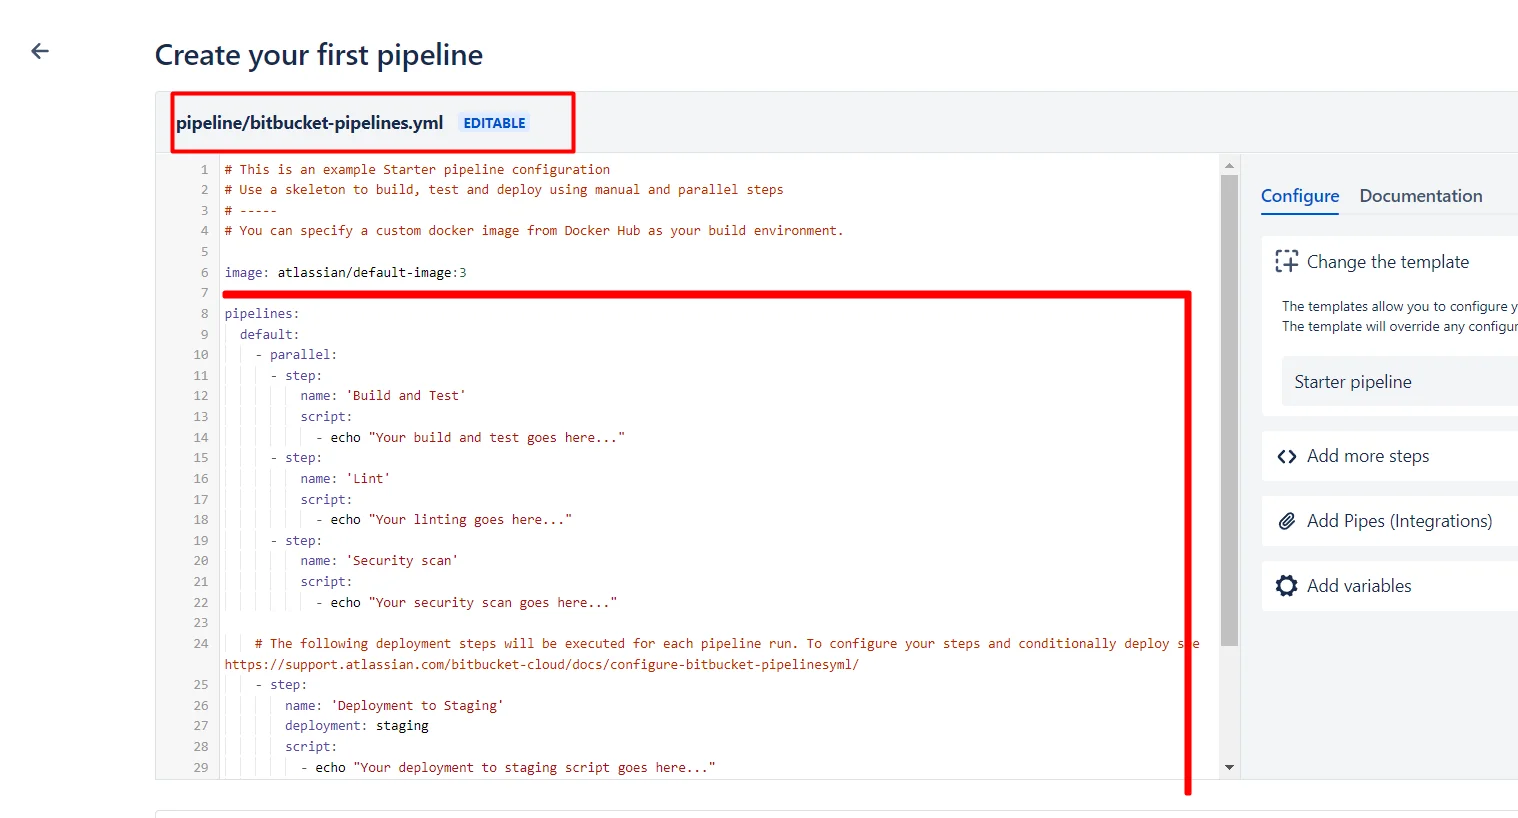
Just remove entire content below “image: atlassian/default-image:3” line ,
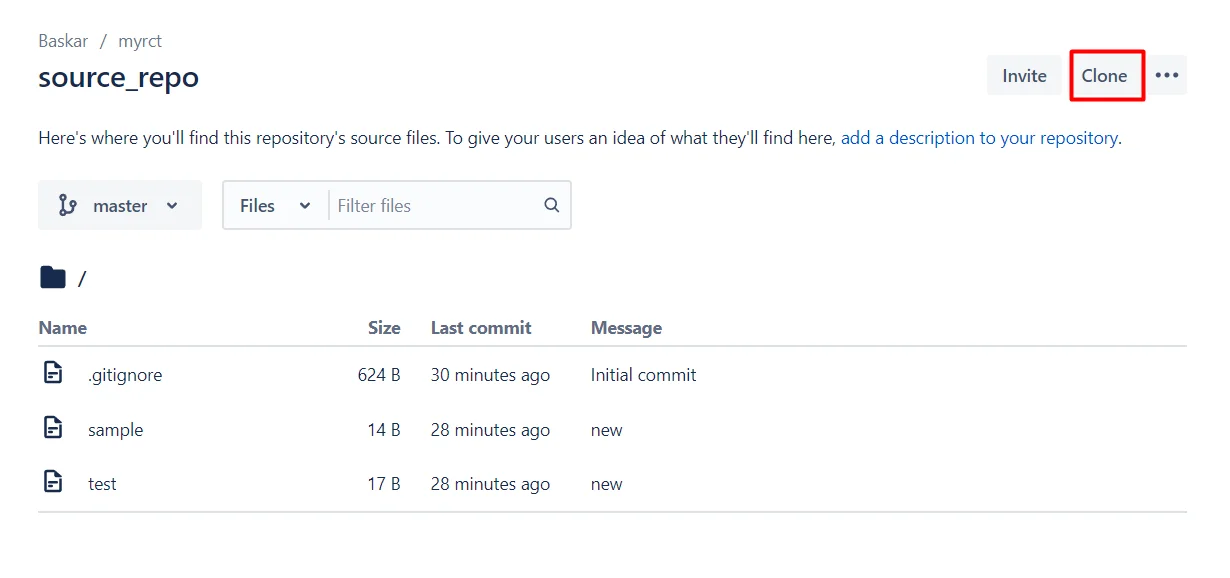
Open your source repository and click clone option
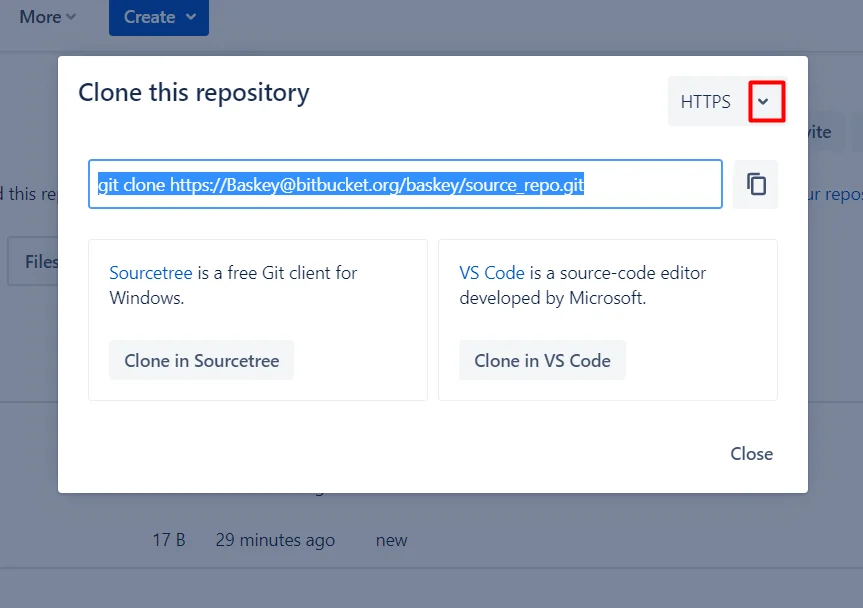
By default it will be in HTTPS option, but now we are going to use SSH option , so change the option from HTTPS to SSH by clicking the dropdown list icon
Switching to SSH and then copy the git clone URL , we will use this URL in next step, inside bitbucket-pipelines.yml file
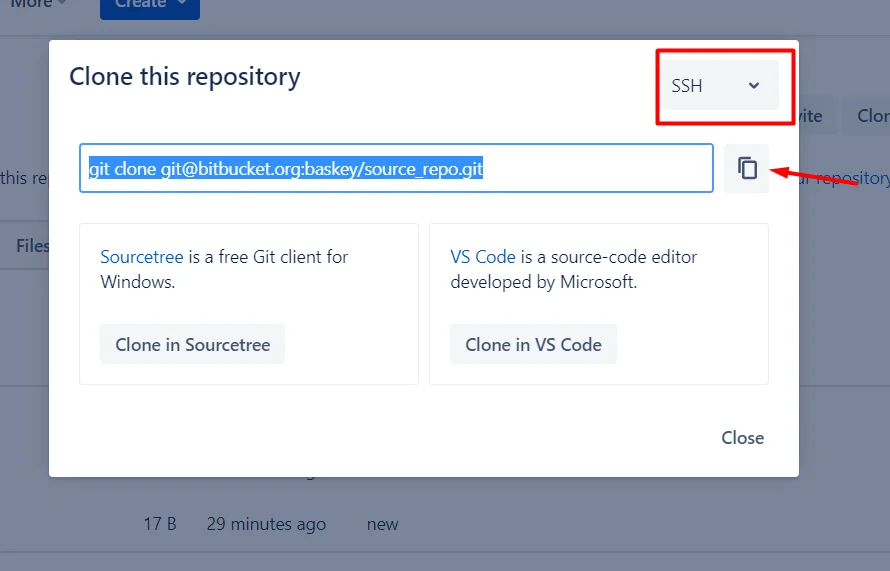
Now replace the 5th line with your source repository SSH URL , which was already copied in previous step
pipelines:
  default:
    - step:
        script:
          - git clone [email protected]:baskey/source_repo.git
          - ls
Copy the above script and then paste it in pipeline repository ,under the “image: atlassian/default-image:3” line , inside the bitbucket-pipelines.yml file , like below screenshot and click commit file
It will help us to clone another repository in our pipeline and by using “ls” we can view the cloned files
Now you will see the success status within few seconds

Just click the successful status, you will redirected to appropriate page and then by clicking each command you can see the list of process have done by the pipeline setup like below screen shot


