In this article we are going to learn about creation of Google Cloud functions in Google Cloud Platform. Basically, Google Cloud Functions is used to execute some code when an event happens. i.e, Consider that if you have uploaded a file in Cloud storage and an error happened in cloud logging. In this situation, if you want to run some code then you have to go for Cloud Functions.
Let’s get into this article and learn about the creation of Google Cloud Functions in GCP. It will be a step by step process for creating cloud functions. Stay tuned here, we will keep publishing a lot more articles on Google Cloud.
What are Google Cloud Functions?
According to Google docs ” Google Cloud Functions is a serverless execution environment for building and connecting cloud services. Your function is triggered when an event being watched is fired. Your code executes in a fully managed environment. There is no need to provision any infrastructure or worry about managing any servers.”
In simple words, Cloud functions make sure your application runs resiliently, cost effectively, and at planet scale, allowing you to only focus on your code.
With Cloud functions, you can apply artificial intelligence when new data shows up in your system. It only takes a few lines of code to understand what’s inside your images, video, or text.
In Cloud functions, you can innovate faster, focus on what really matters, and build great applications for the users.
Overview
Runs code in response to events – You can actually write your business logic for the cloud functions in Node.js, Python, Go, Ruby, Java, and .Net. The great thing about Cloud functions is that you don’t really need to worry about servers or scaling or availability. You have to worry about the coding part alone.
Cloud Functions can handle millions of requests which come in to it.
Pay only for what you use – You have to pay for the number of invocations, you pay for the compute time of the invocations and you will pay for the amount of memory and CPU that is configured for each invocation.
Basically, you are paying for the execution time of the invocation and the resources that are made use by the specific invocation.
Each execution runs in a separate instance – There is nothing that is shared between invocations.
Finally, You cannot use Cloud functions to run a big job i.e, if the job takes more than a hour then you cannot do that with Cloud Functions.
Steps for creating Cloud Functions
Enabling Cloud Build API
The first thing you have to do is to log into the Google Cloud Console and choose the project for creating the cloud function.
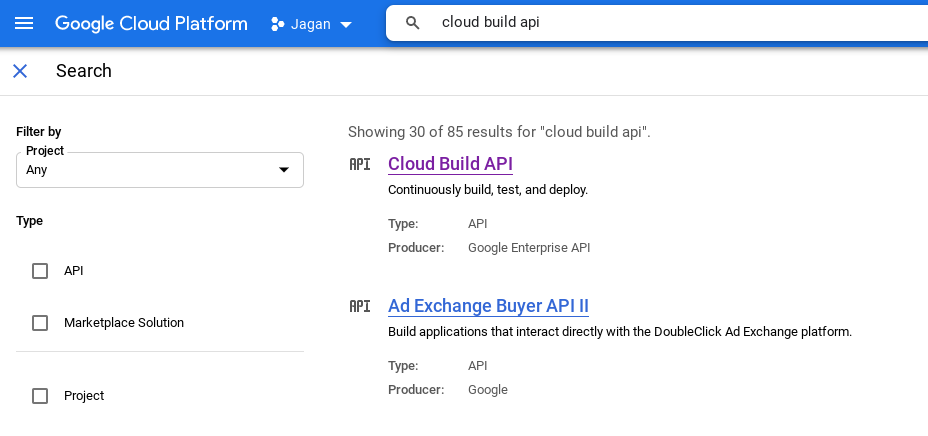
Then you have to enable the Cloud Build API to build libraries, IDE plugins and other tools to interact with google APIs. For this enter the Cloud Build API in the search bar and then click on the API button to enable the Cloud Build.
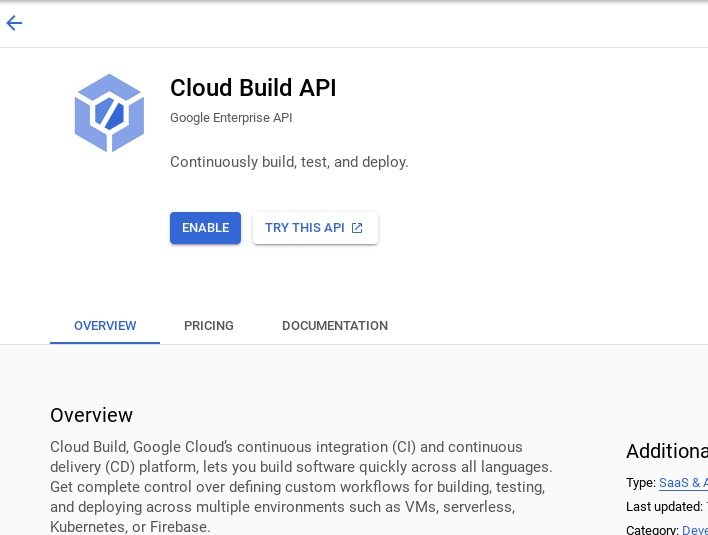
Now, In the below screen you have to click on the enable button to enable the Cloud Build API.
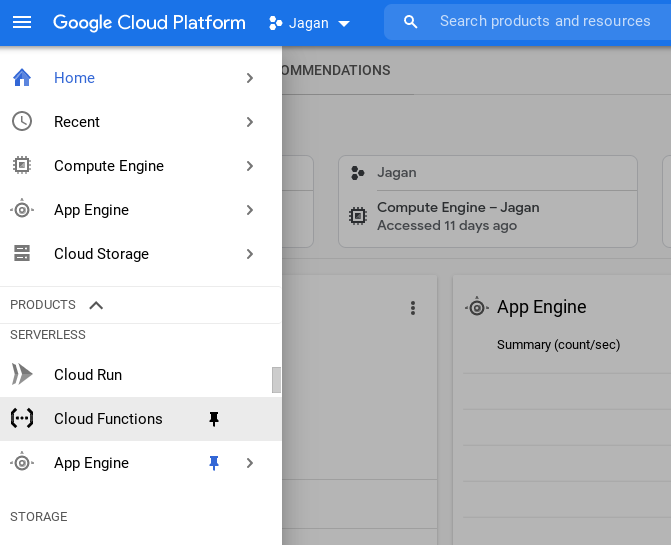
After enabling the Cloud Build API, you have to click on the navigation button and select the Cloud Function tab under the Serverless heading.
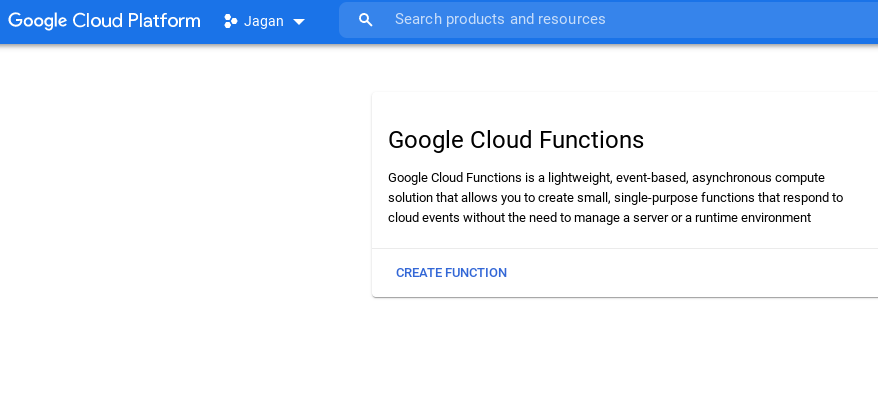
Now, you will get the screen below. Here you need to click on the create function button to enter into the Cloud Function interface.
Creating a Cloud Functions
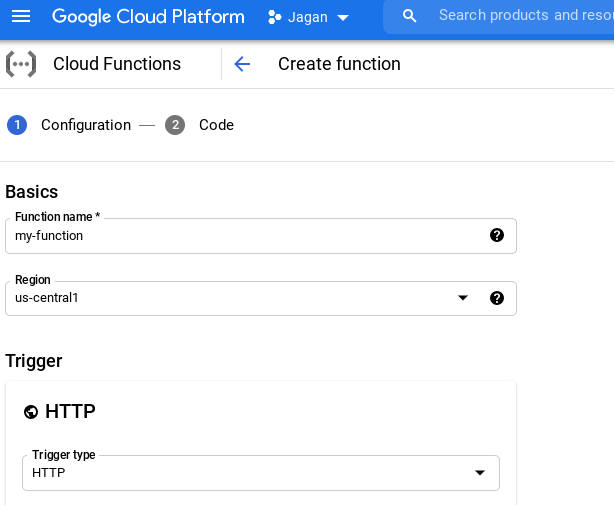
After clicking on the create function button you will get the below screen. Here you have to enter the function name, Region and select the trigger type as HTTP.
For authentication details you need to choose based upon your convenient. As of now you can select allow unauthenticated invocations because it can be used for website projects.
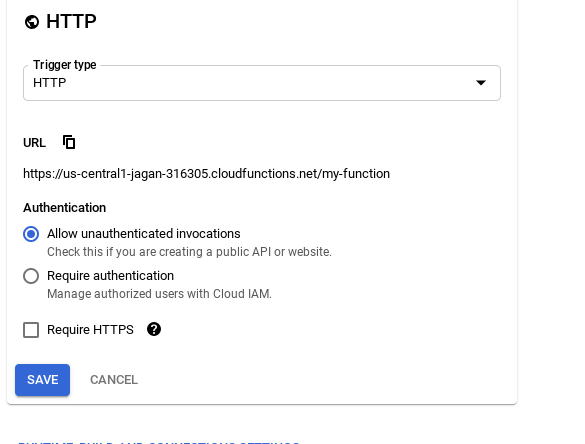
After selecting the Authentication you need to expand the Runtime settings and choose the Memory as well as the Timeout for that particular runtime.
Then select the Runtime service account based on your configurations.
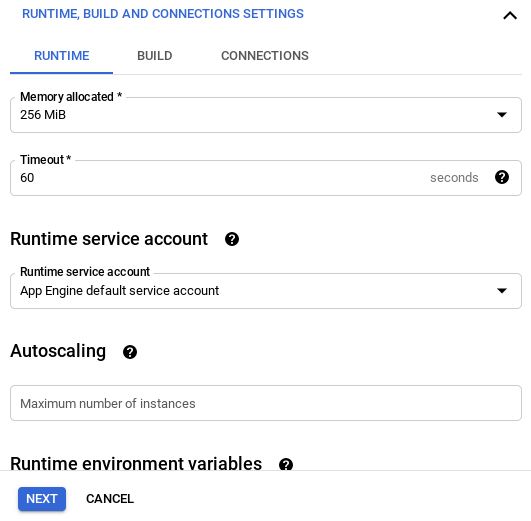
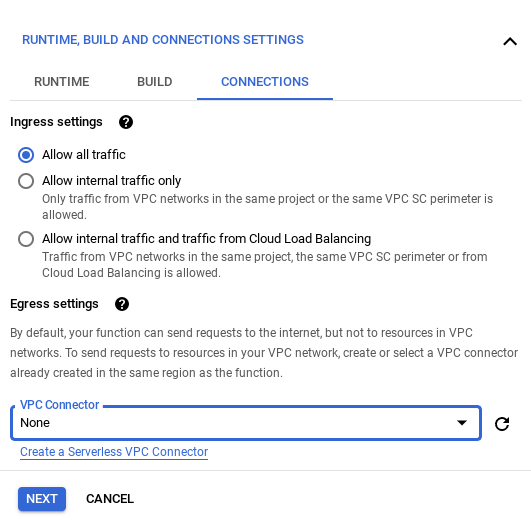
Then expand the Connections tab and select the Ingress settings as Allow all traffic. And click on the Next button at the last.
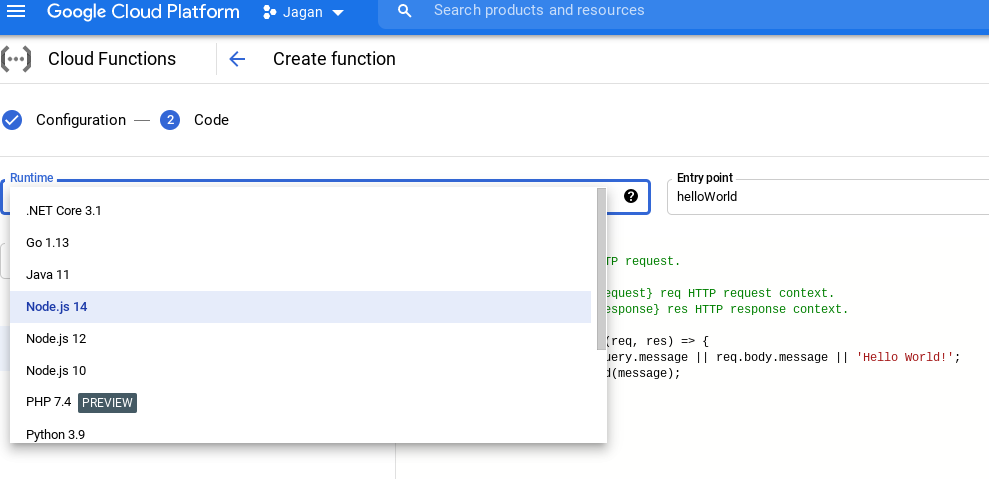
Choosing a Runtime in Cloud Functions
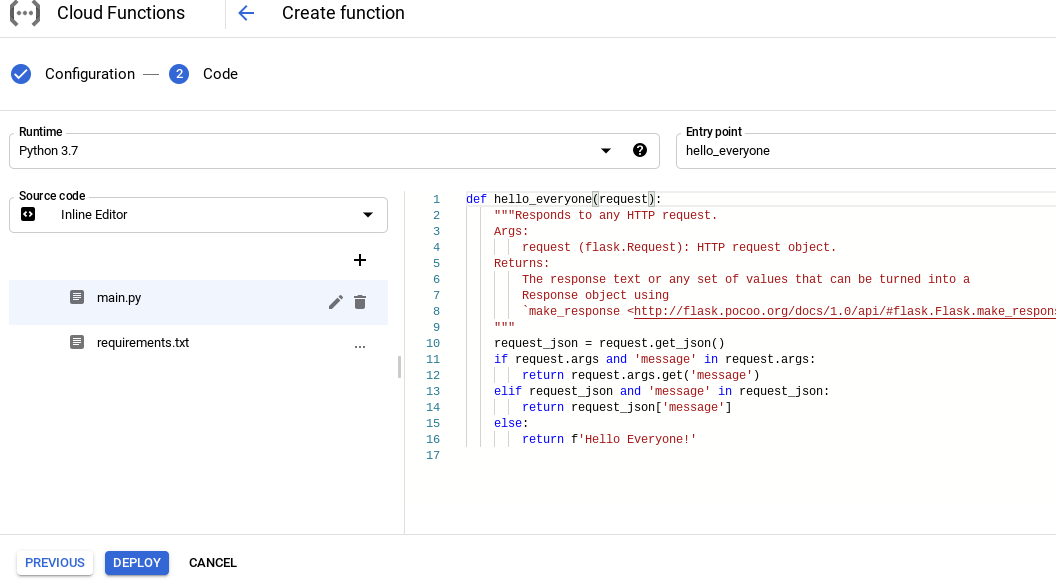
After clicking on the next button you will get the screen below. Here you need to write your code by choosing the Runtime of your choice.
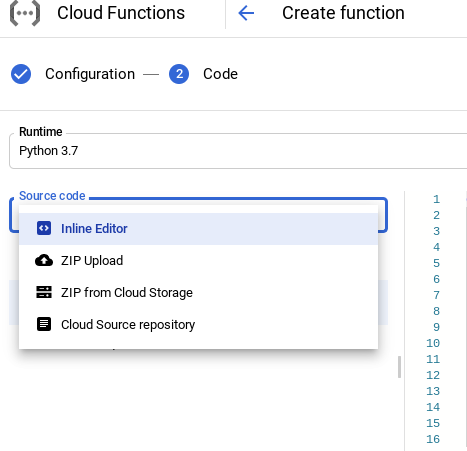
Choosing a Source code path
After choosing the runtime, you can choose the source code path from cloud storage, zip file or an inline editor.
By selecting your path you can import the code, or by choosing the inline editor you can write your own code.
Deploying a Cloud Function
After writing your own code, In the below screen you need to select the Deploy button at the last to deploy this code in the Cloud function.
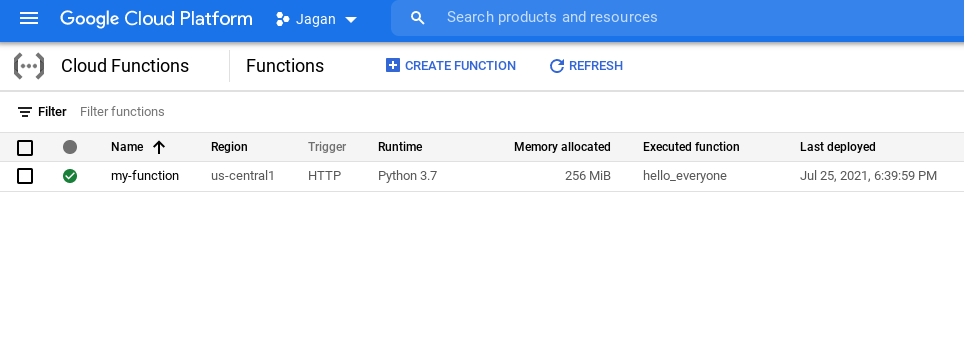
Created a Cloud Function
Therefore, By deploying the function you can see that the deployment has been completed successfully with region as us-central1 and runtime as Python.
After the creation you have to click on your function name under the Name tab to see all the details of this specific function.
Exploring Cloud function Metrics
After clicking on your function name you will get the screen below to see the detailed process of this specific function.
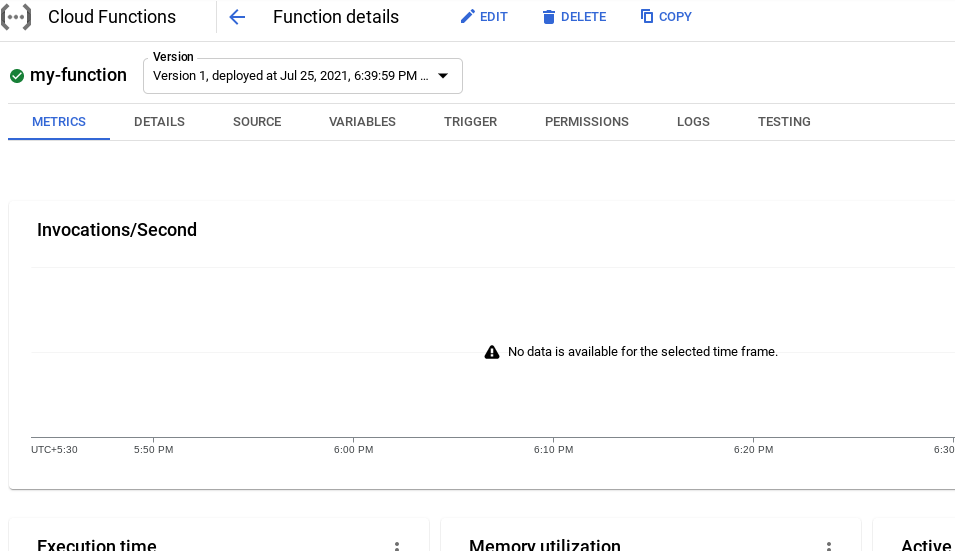
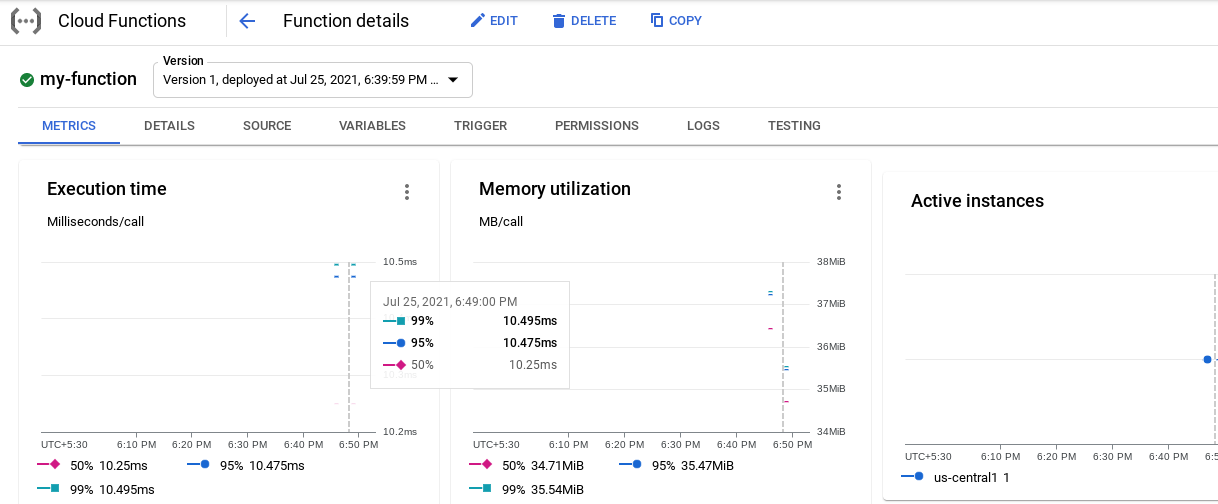
Here, In this Metrics tab you can see the Execution time, Memory utilization and Active instances running at this time.
In the Execution time you can see that 95% of the requests executed within 10.475 milliseconds. And, In Memory utilization you can see that 99% of requests used less than 35.54 MB.
Testing the Cloud Function
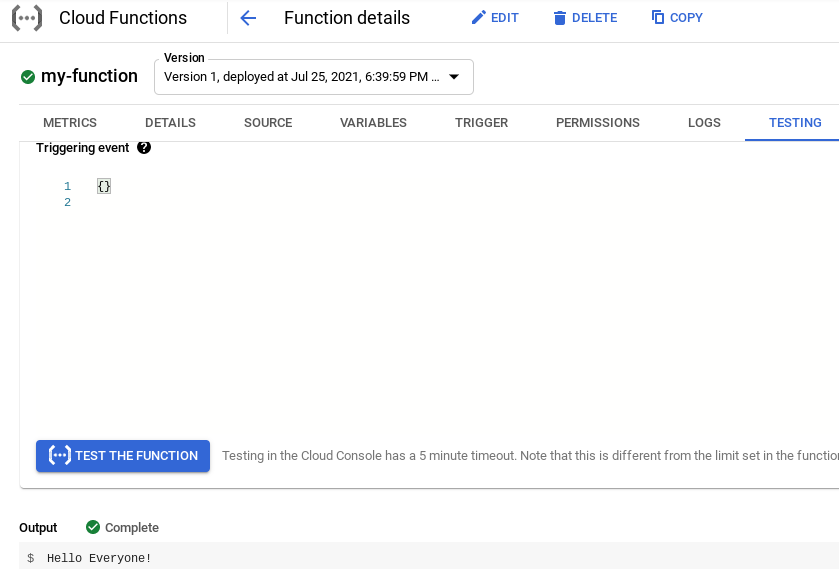
Now, In the below screen you have to select the Testing tab and click on the Test the function button. Actually, this Testing tab is for testing the function manually.
After clicking on the Test the function button you can see the response back from the function in the output box.
Exploring the Logs in Cloud Functions
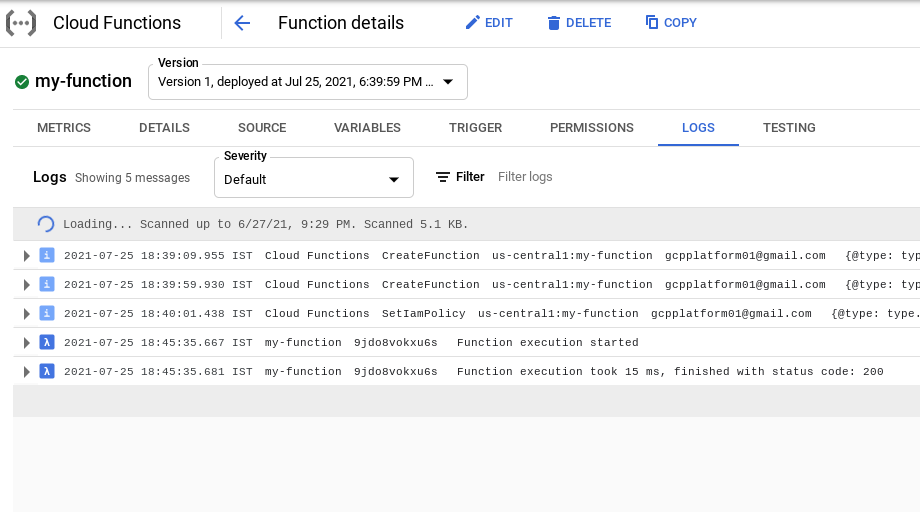
By clicking on the Logs tab you can see all the logs which has been done recently with the function name and the time.
Here, Cloud functions are automatically integrated with Cloud logging. So you can see all the logs in this Cloud function user interface itself.
Exploring the Source code
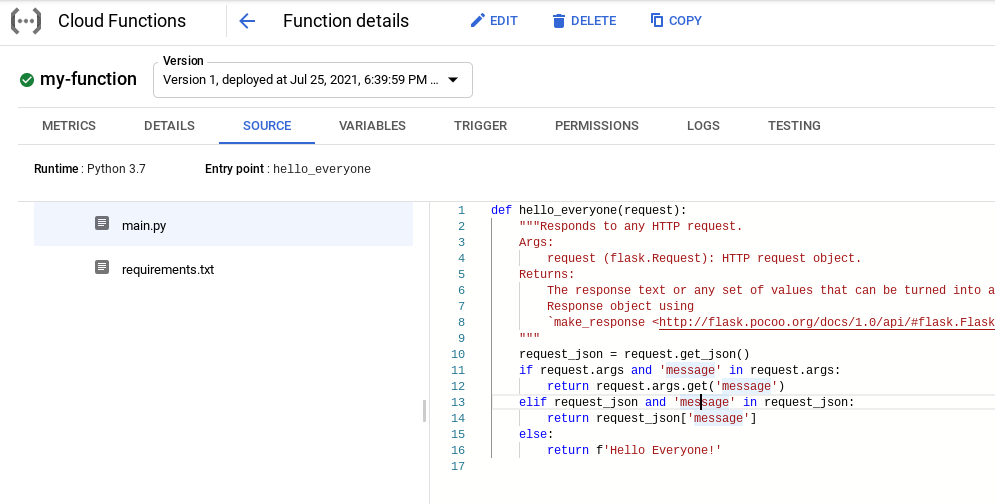
In the Source tab you can check the code of this specific function and if you want to edit the code you have to click on the edit button at the top to edit this particular code.
Triggering the Cloud function URL
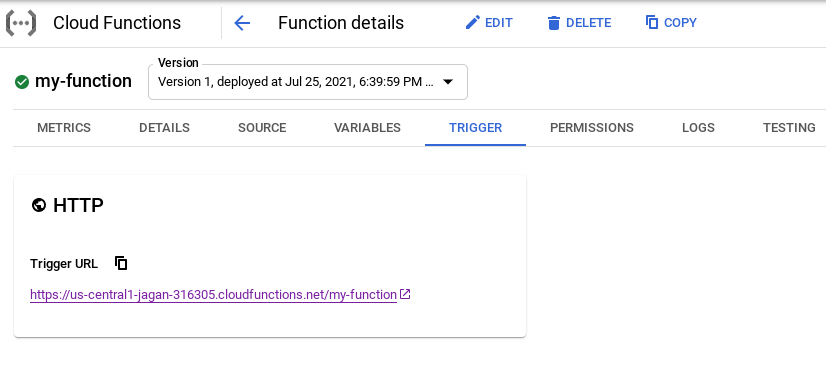
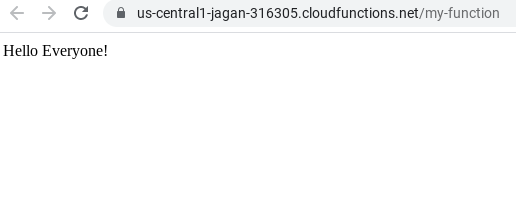
The Trigger tab will give you the access URL for this particular function. By accessing the below URL you can see the output in the browser.
Accessing the Cloud function URL
Then, Finally by accessing the URL you can see the Output of this specific function and this URL consists of region name-project name-cloud functions.net format.
Conclusion
Therefore, the best use case of this Cloud function is,it will just listen and respond to events when it is triggered. Cloud functions are serverless and you don’t have to worry about managing the infrastructure. The other thing about cloud functions is, it is easy to deploy, just write the code and it will build automatically and deploy it.
I hope this article will help you in Getting started with Cloud Functions. In the next blog, we are going to publish a few more articles on Google Cloud. Till that stay tuned with us!!!
Happy Learning!!!


