In this article, we will see how to create a load balancer and attach it to an instance group. As you are aware that if any of the applications are facing higher traffic then absolutely the server may work slow. To fix this problem we need to attach the load balancer to the instances in the instance group.
Before starting to learn this article I would recommend you to have a look at our previous blog on “How to create Instance groups in GCP” to have a better understanding of Instance groups.
It will be a step-by-step process for creating and attaching a load balancer to an instance group. Let’s get into this article and learn about the creation of load balancers in GCP. Stay tuned here, we will keep publishing a lot more articles on Google Cloud.
What is a Load Balancer?
According to Google “Load balancer scales the applications on Google Compute Engine from zero to full throttle with Cloud Load Balancing service. Cloud Load Balancing is a fully distributed, software-defined, managed service for all the traffic across the network.”
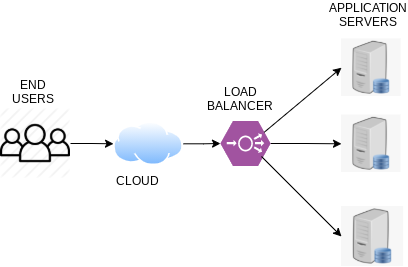
Load balancer distributes incoming traffic across multiple VM instances to help your application be scalable. In the below screen you can see the architecture of Load balancer.
Architecture of Load Balancer
Prerequisites for Configuring the Load balancer in GCP
- Before configuring the Load balancer you need to create an instance group with some metadata script configured already in the instance template.
- Then you have to ensure the instances in the instance group are running in the compute engine.
Ensuring the instance groups is created
Before creating the Load balancer you need to create an instance group from the instance template by adding some metadata script in it.
Because, Load balancer can be attached to one or more backend services. Here you will be attaching only one backend service i.e, Instance group.
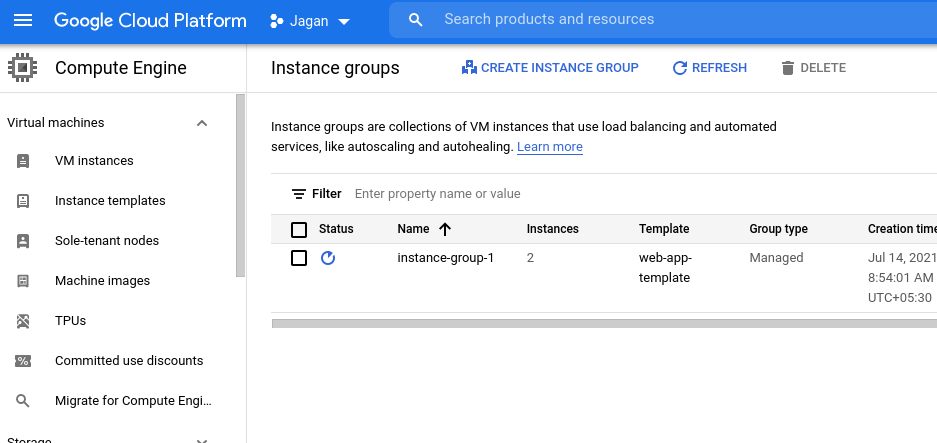
In the below screen you can see that the instance group is already created with two instances which are running in the Google compute engine.
Ensuring the instances in the instance group is running
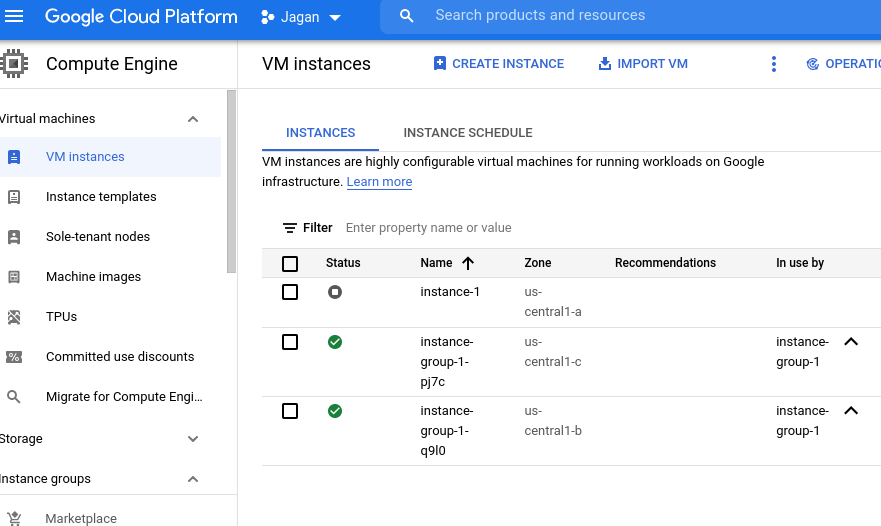
In the below screen you can see that the instances from the instance group are running in region us-central1-c and us-central1-b.
Creating the Load Balancer in GCP
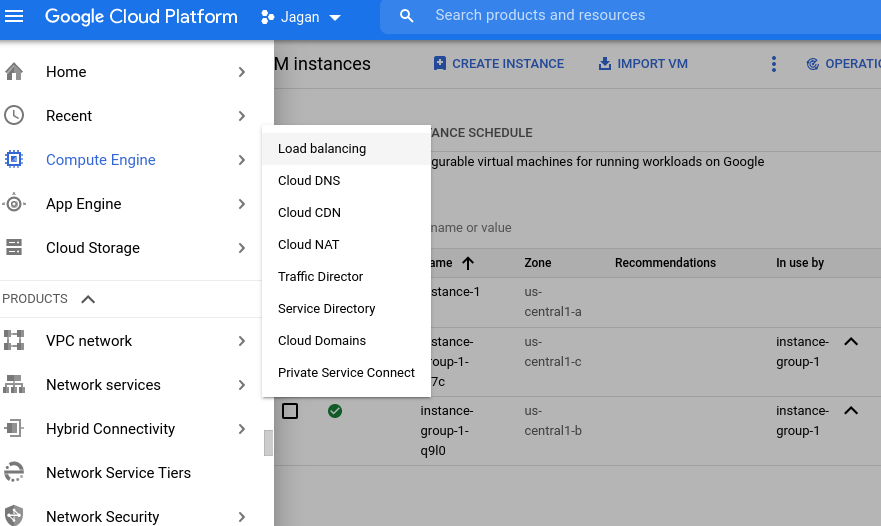
After ensuring the above steps you need to create a Load balancer by navigating to the network services and clicking on the Load balancing tab in the console.
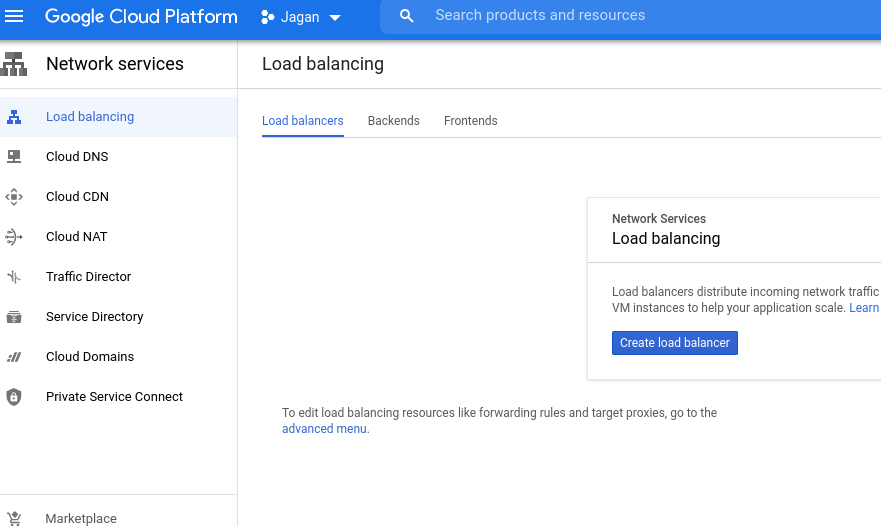
After clicking on the Load balancing tab you will get the screen below. Here, you need to click on the Create load balancer tab to create a load balancer for your instances.
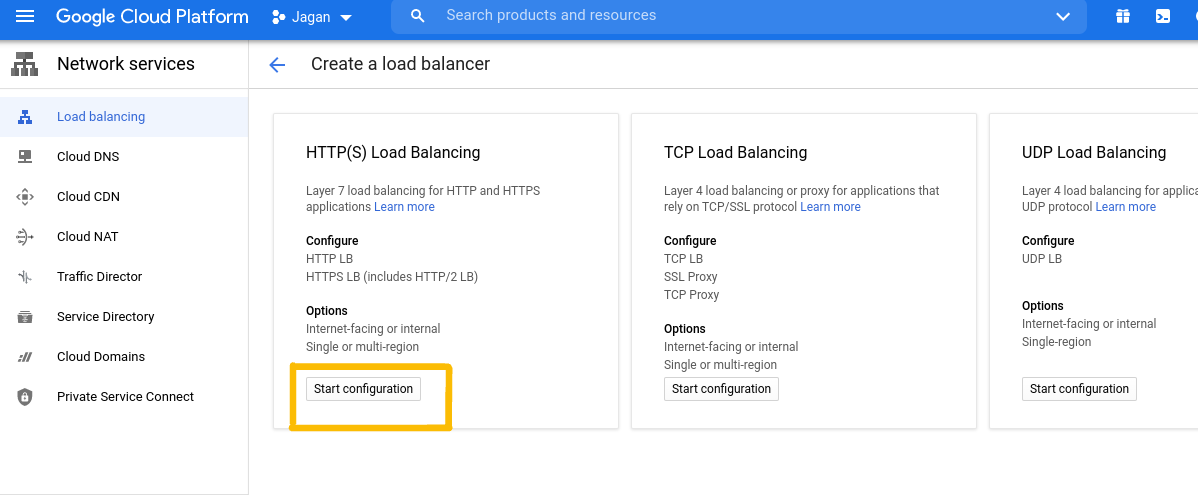
Selecting HTTP(s) Load Balancing
Then by clicking on the Create load balancer tab you will get the screen below. Here, you have to select the HTTP(s) Load balancing and click on start configuration.
What is HTTP(s) Load balancing
According to Google “Google Cloud HTTP(s) Load balancing enables you to run and scale your services worldwide behind a single external IP address. It distributes HTTP and HTTP(s) traffic to backend hosted on Google Compute Engine and Kubernetes Engine.”
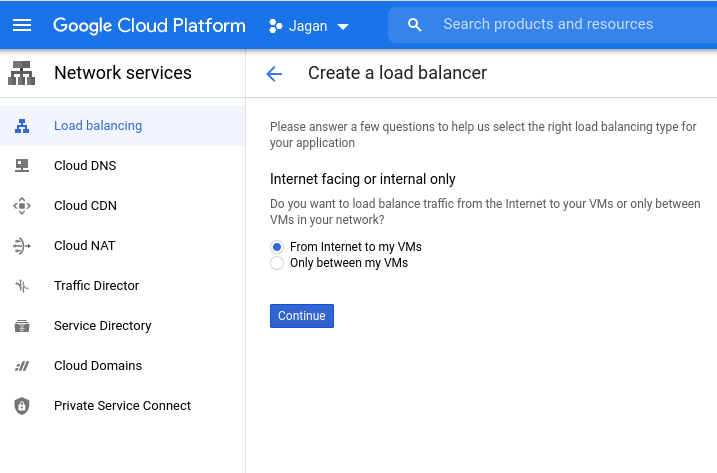
Here you have to select the traffic from the internet to your VM because you are going to access this instance through the internet and not between the VMs. After selecting the internet to VM click on the continue button.
Configuring the Backend service in Load balancer
Now you have to give the name for your Load balancer and click on the next button. Then you will get the screen below to configure the Backend service for the load balancer.
If you already have any backend services you can select or you need to click on the create a backend service tab.
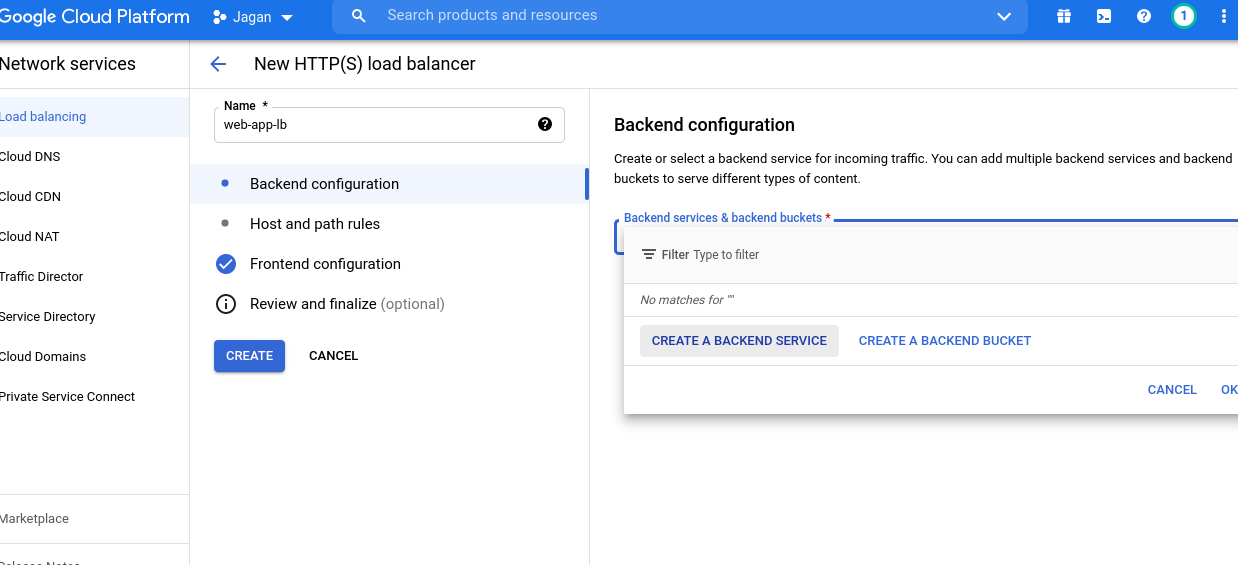
Creating the Backend service
After clicking on the create a backend service you will get the below screen. Here you need to give the name for the backend service and select the backend type as instance group.
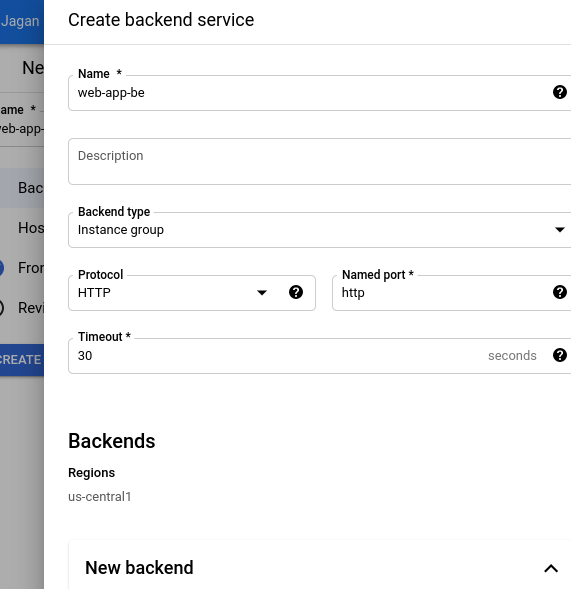
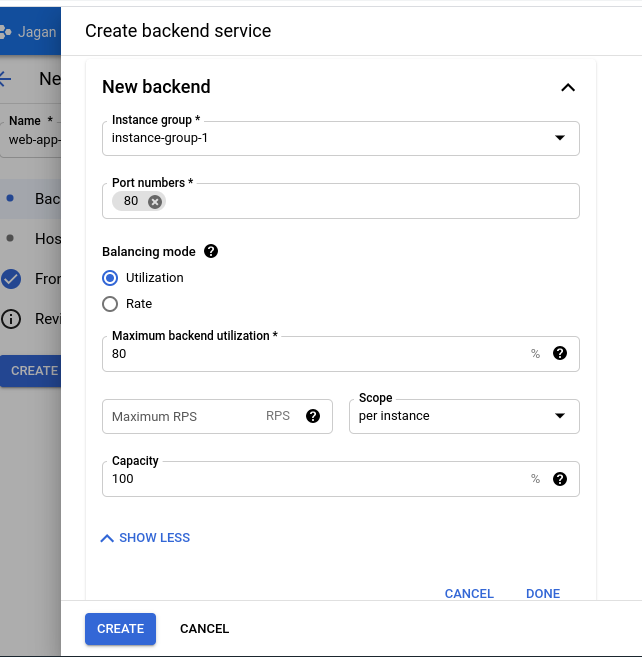
Then, In the New backend tab click on the instance group and select the instance group which you have created already in Compute Engine.
Then enter the port number as 80 for HTTP traffic.
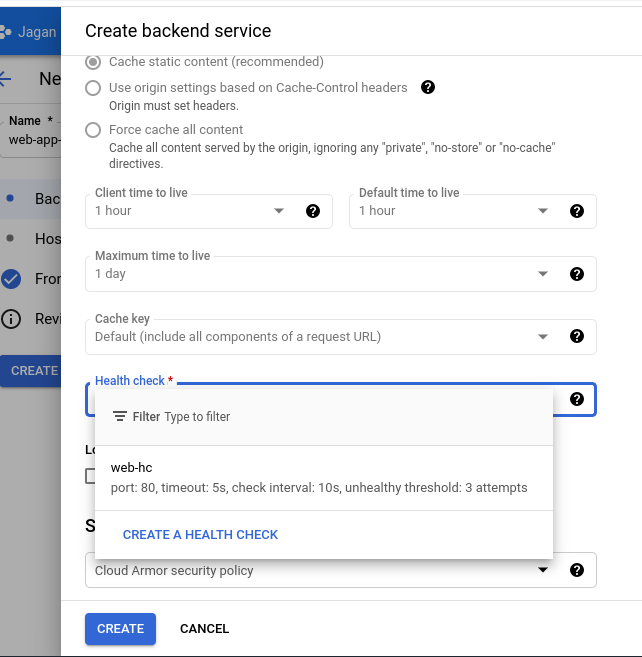
Then finally, In the below screen click on the Health check tab and select the health check which you have already created for the instance group or you can create a new health check.
After entering all the details and the configuring process you need to click on the create button at the last to create a backend service.
Configuring Host and Path rules
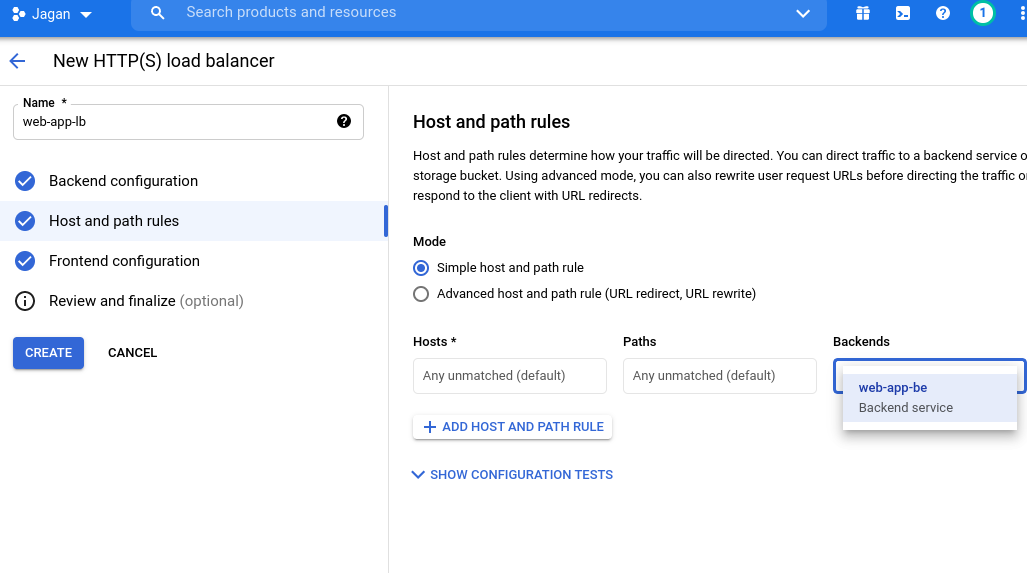
Therefore after creating the backend service you need to click on the next button. Then it will take you to the Host and path rule.
Here you need to select the mode as Simple host and path rule and choose the backend which you have recently created.
Configuring the Frontend service
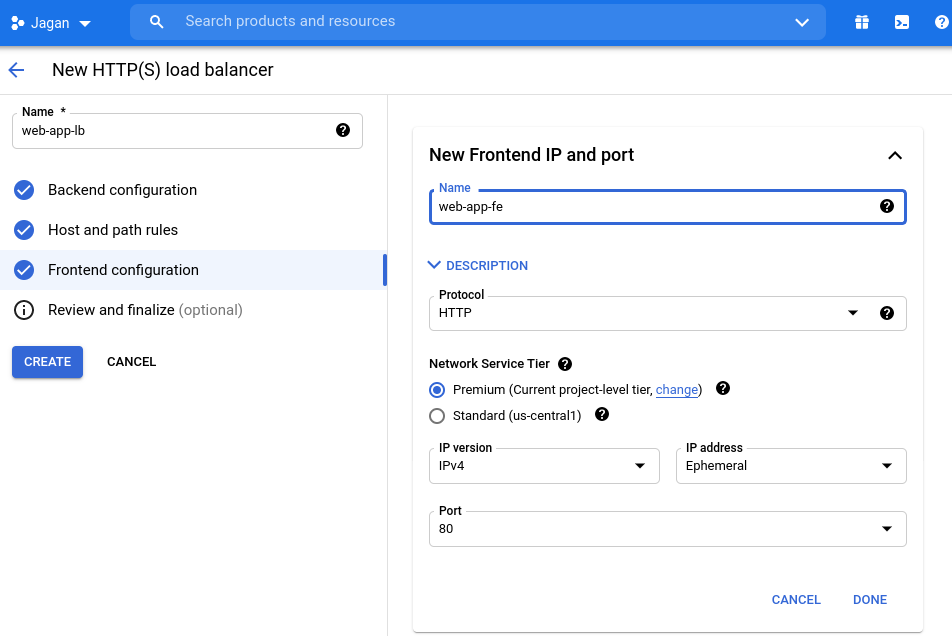
After configuring the host and path rule you need to click on the next button and it will take you to the frontend configuration part.
Here you need to give a name for the frontend service and select the HTTP protocol. Then, if you want the IP address to be static you can change that to Ephemeral to static in the IP address tab and click on done.
Reviewing and finalizing
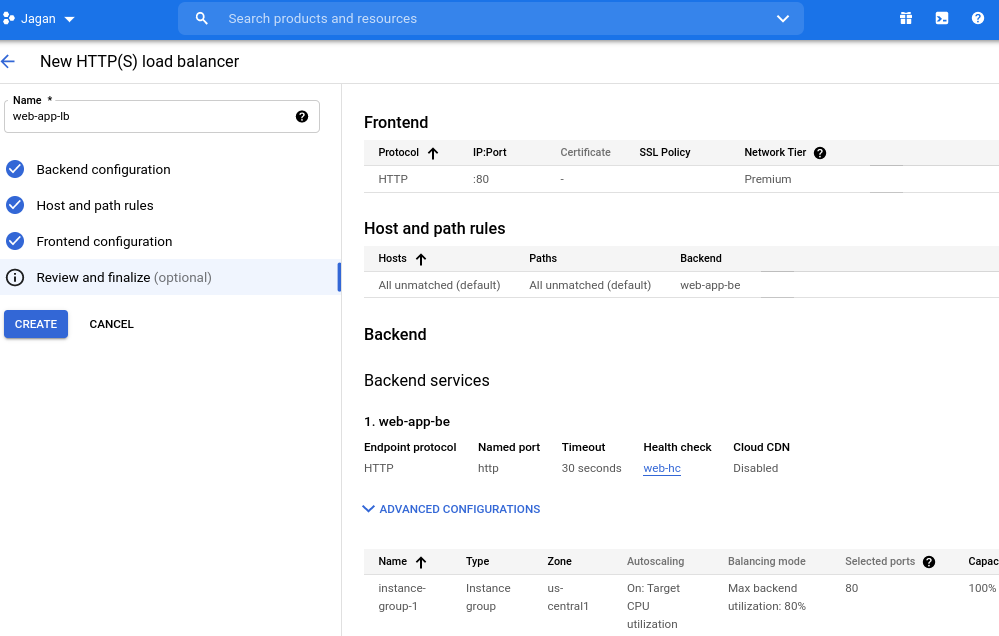
Then, finally you can review all the process and the details from backend to frontend service. After reviewing you can click on the create button at the left.
Created a Load Balancer
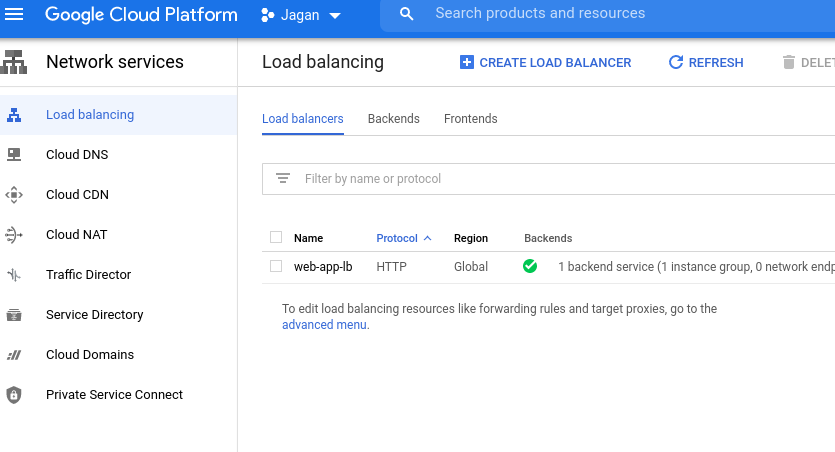
Therefore, In the below screen you can see that the Load balancer has been created successfully with one backend service.
To see the load balancer IP address and access the IP you need to click on the Load balancer name. It will take you to the new tab where you can see all the configurations of this Load balancer.
Selecting the Load Balancer IP
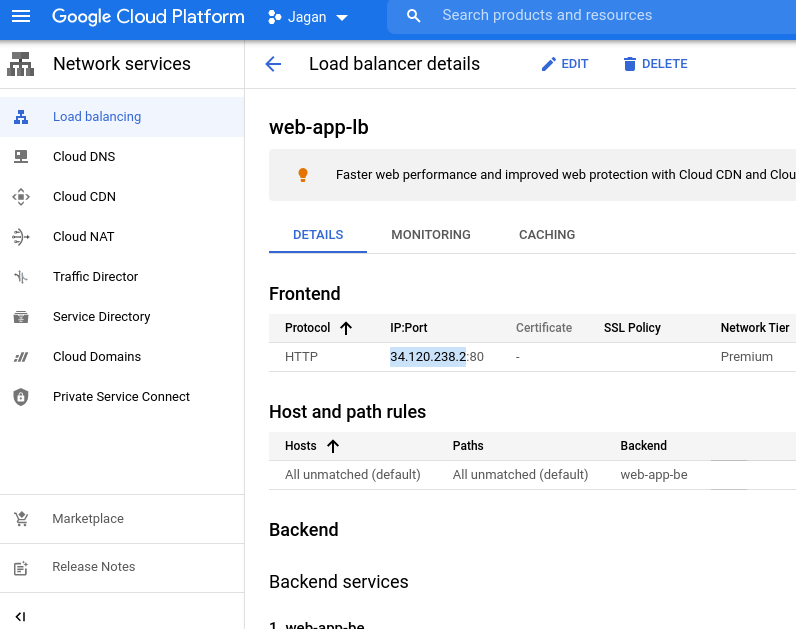
Now, In the below screen you can see the configuration and IP address of this Load balancer. To access the Load balancer IP address in the browser you need to copy the frontend IP address.
Accessing the Load Balancer IP
In the below screen you can see that the Load balancer IP address is working fine in the browser. Here, the data will be fetched from the instance group at the backend.
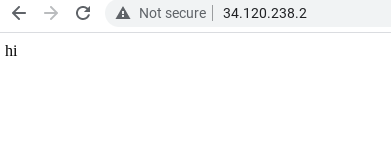
Accessing the IP from an Instance separately
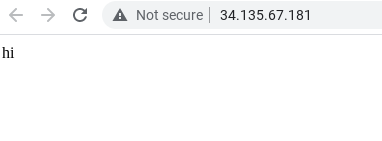
To check the instance separately in the Compute Engine after configuring the Load balancer, you have to select any one of the instances from an instance group and paste the External IP address in the browser.
Then you can configure the Load balancer IP address to your domain.

In the below screen you verify that both the Load balancer and instances in Compute Engine are working fine by accessing the IP address separately.
Conclusion
In this article we have seen the easiest way and step by step procedure to create a Load balancer in Google Cloud Platform. I hope this article will help you in Getting started with Load balancer in Google Cloud Platform.
In the next blog we are going to publish a lot more articles on Google Cloud. Till that stay tuned with us!!!
Happy Learning!!!


