In this article, we will learn about how to create an instance group in Google Compute Engine. Instance group allows your applications to gracefully handle increases in traffic as well as it reduces the cost when the need for the resource is lower.
Before starting to learn this article I would recommend you to have a look at our previous blog on “What is Instance Groups in Google Cloud Platform?” to have a better understanding of Instance groups.
Let’s get into this article and learn about Creation of Instance groups in Google Compute Engine. Stay tuned here, we will keep publishing a lot more articles on Google Cloud.
What is Instance Group?
Instance group is nothing but a group of virtual machine instances managed as a single entity. You can manage groups of similar VMs having a similar life cycle as one unit and you can create two types of Instance group in Compute Engine.
They are
- Managed instance group
- Unmanaged Instance group
Instance group is the basis for Autoscaling group, Load balancers and Autohealing.
Overview
If you want your instances running at all the time and if any one of those instances goes down, then the instance group will automatically create another virtual machine based on the predefined instance template.
Therefore, if you want to create an instance group then the first step is to create an instance template. Instance template is nothing but a specification from which you can create multiple virtual machines.
Instance group will create machines based on an instance template.
Creating a instance template
The first step for instance groups is to create an instance template by specifying the machine types, Boot disk, configuring the network and enabling the firewall.
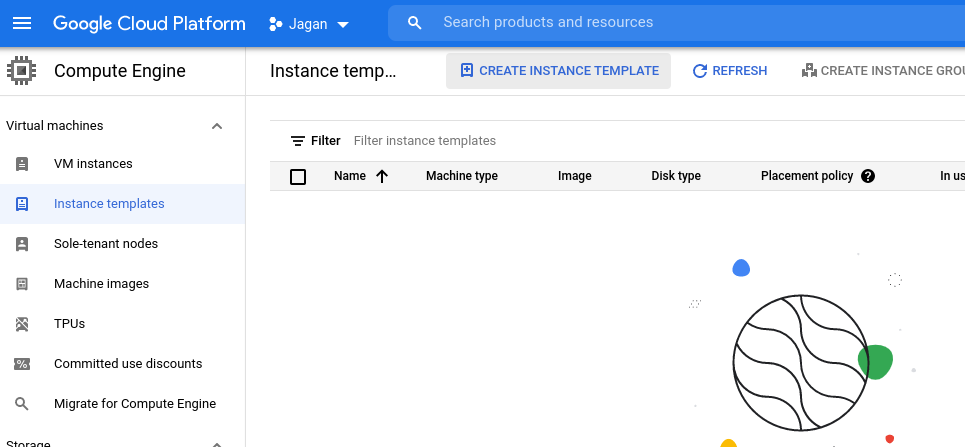
For creating an instance template you need to select the instance templates from the navigation menu and then click on the create instance template option at the center of the console.
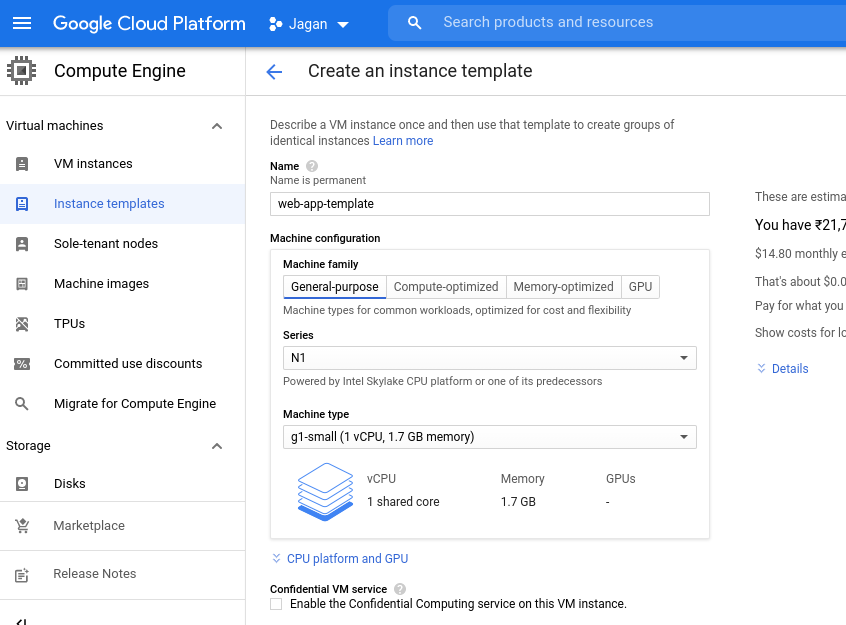
After clicking on the create button you will get the screen below for entering the specifications for an instance. Here you need to specify the instance template name and select the machine configuration.
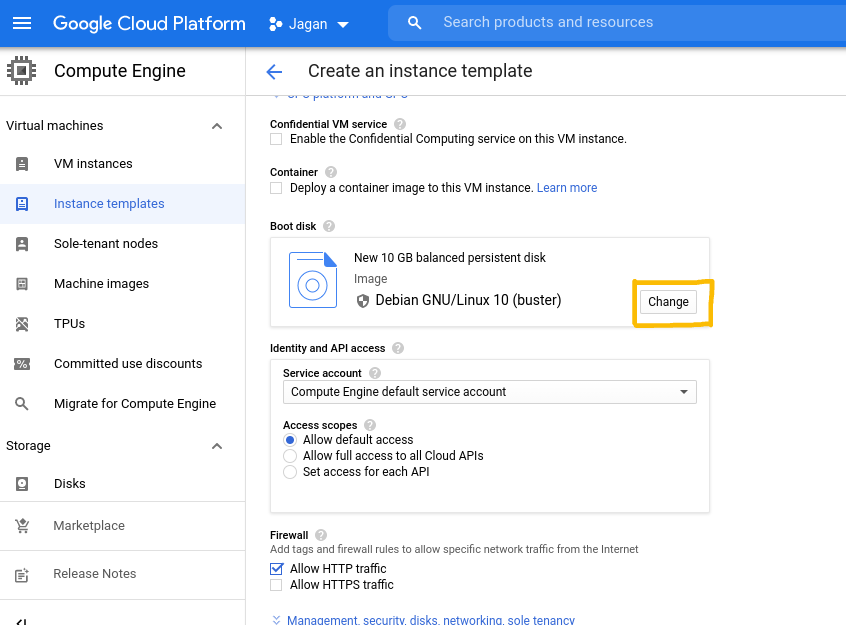
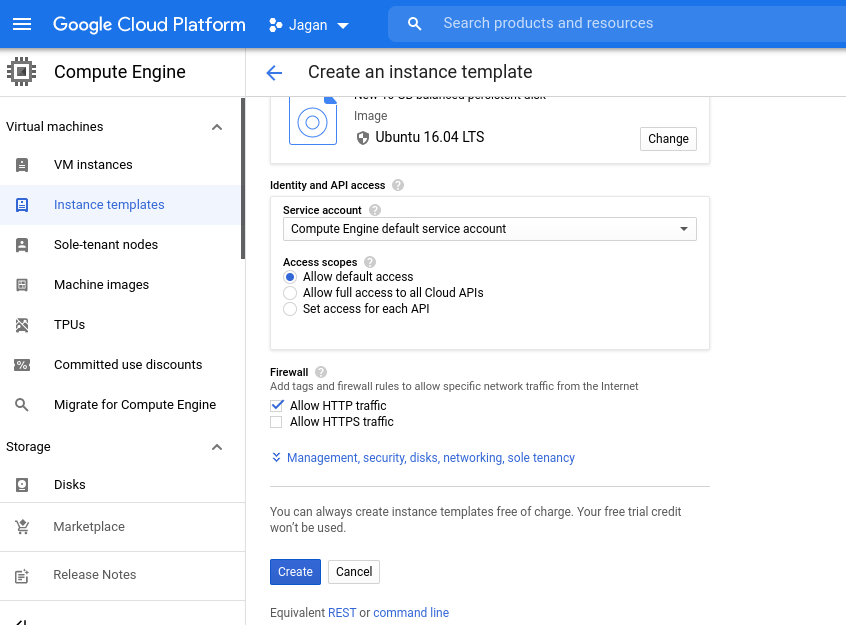
In the below screen you need to click on the change button to select an image or snapshot to create a new boot disk or you can attach an existing disk to the instance.
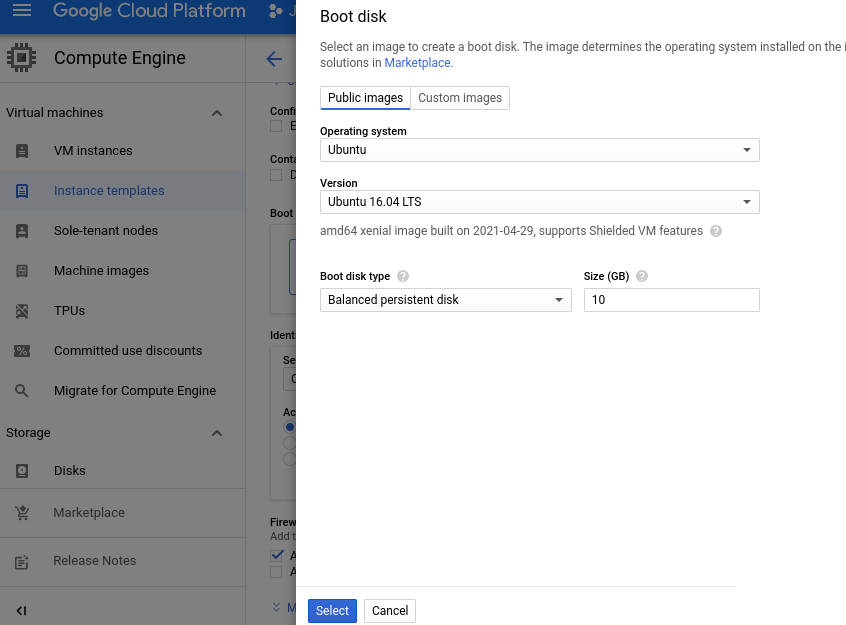
Here, In the below screen you can select an image to create a boot disk and also you can select the version as well as the size of the disk type.
After selecting the boot disk you can enable the firewall based upon your convenience and click on the create button at the last to create an instance template.
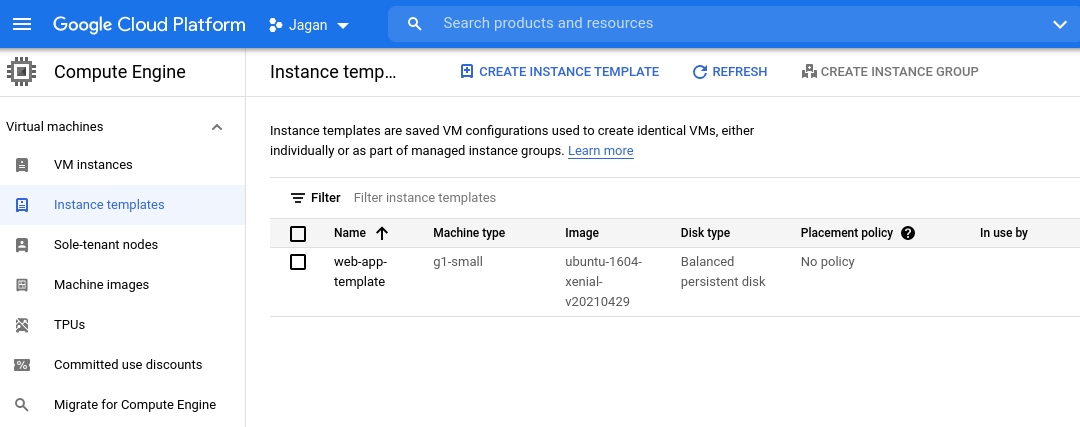
Created a Instance template
Now, In the below screen you can see that the instance template has been created successfully with all the given configurations.
Creation of Instance group
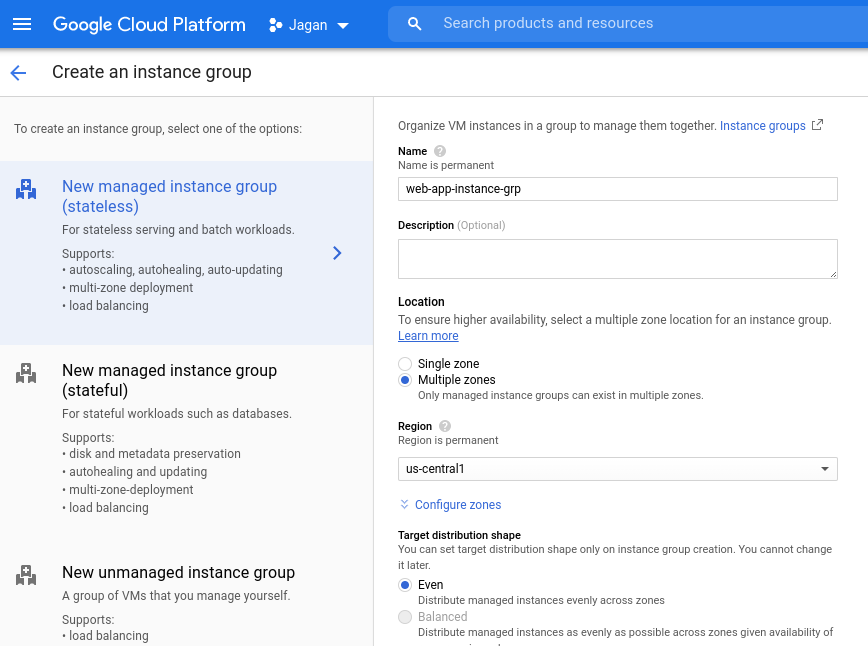
After creating the instance template you need to click on the instance group from the navigation menu and select the create instance group button at the center of the console.
Then enter the name of the instance group and to ensure the high availability you can select a multiple zone location for an instance group. The multiple zone can only exist in managed instance groups.
Adding Instance template in an instance group
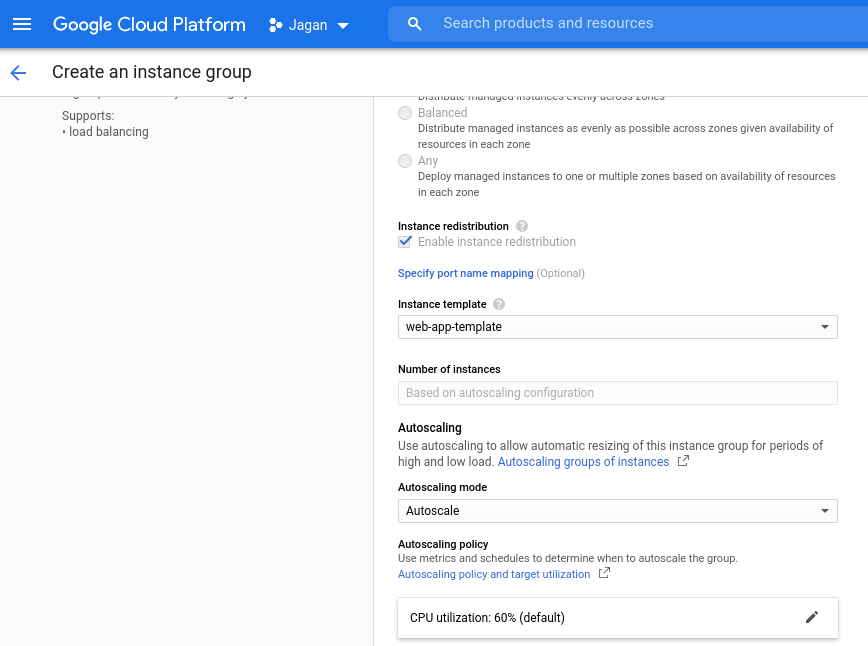
After selecting all the above details you need to select the instance template which you have created recently. Then select the Auto scaling mode to allow automatic resizing of this instance group for periods of high and low load.
You can also specify the CPU utilization for your instance group to Autoscale this instance group.
Specifying a number of instances
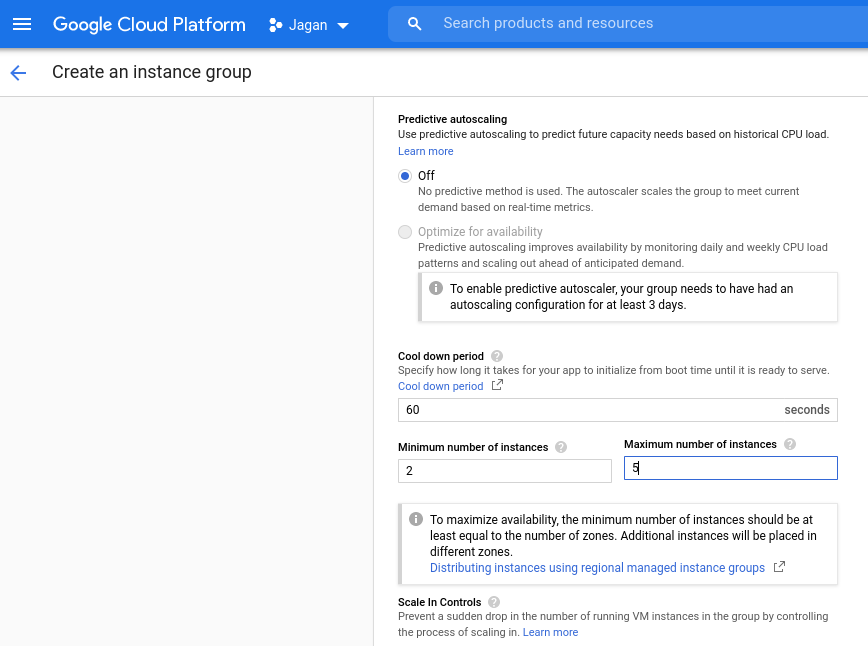
Now you have to mention the minimum number of instances to be present while creation of instance group and also you need to mention the maximum number of instances to be created while Autoscaling.
The instance group will have the minimum number of instances running at the time of creation. It will autoscale when the CPU utilization exists above 60% and it will autoscale based on the maximum number of instances specified.
Autohealing process
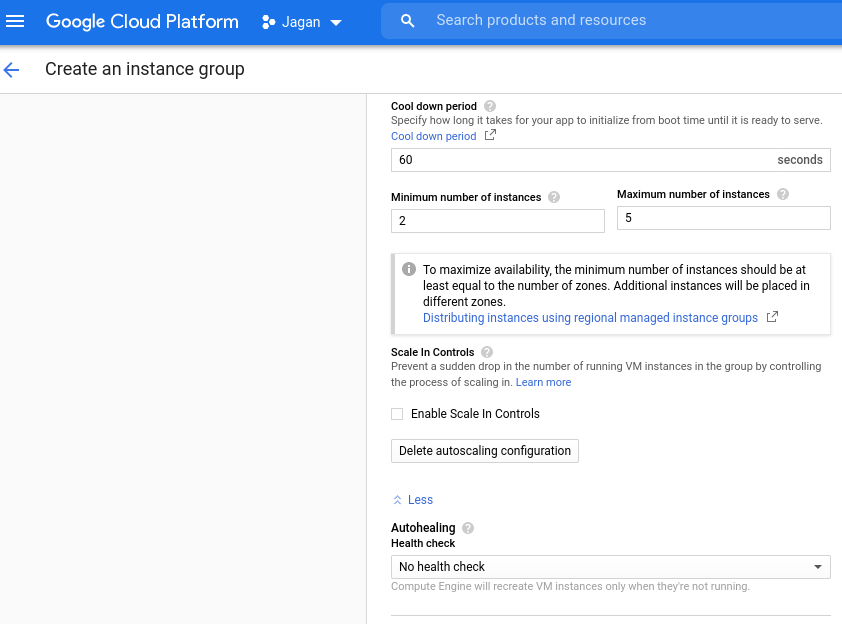
An instance group also needs the health check, if a machine becomes unhealthy and doesn’t pass the health check then it will automatically get recreated by the instance group.
In the below screen you need to click on the no health check tab and click on the create a health check.
Creating a health check
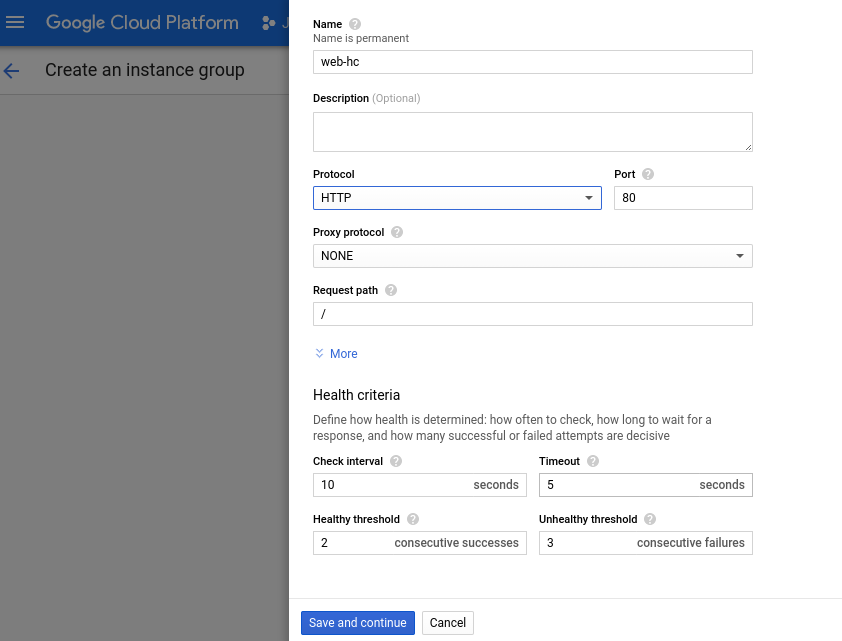
After clicking on the create a health check tab you will get the below screen. Here you need to specify the health check name and select the protocol as HTTP.
If you want to change the health criteria you can configure it and finally click on save and continue button at the last to create a health check.
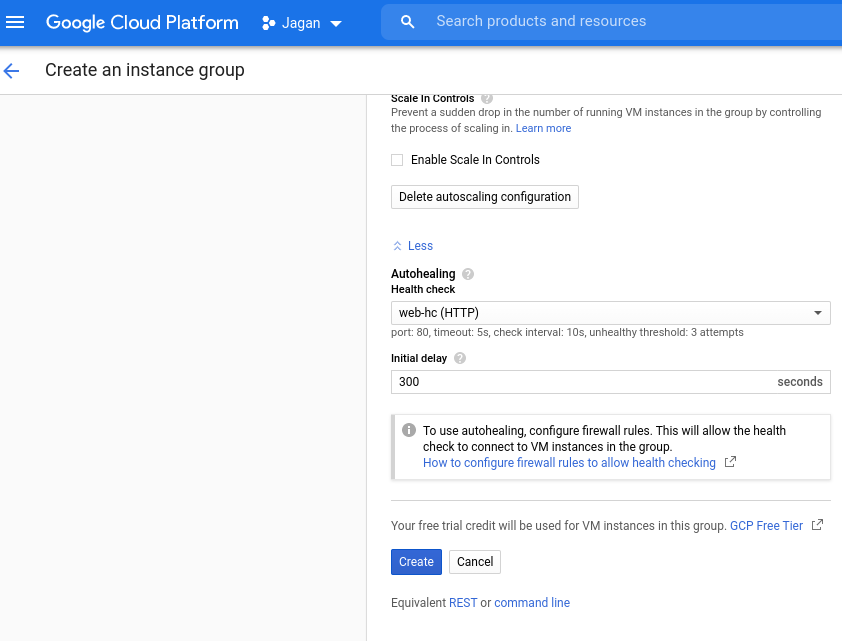
After creating the health check you have to click on the create button at the last in the screen below.
Created an Instance group
Finally, In the below screen you can see that the instance group has been created successfully with the minimum of two instances running in the VM instances.

Ensuring the instance in VM instances
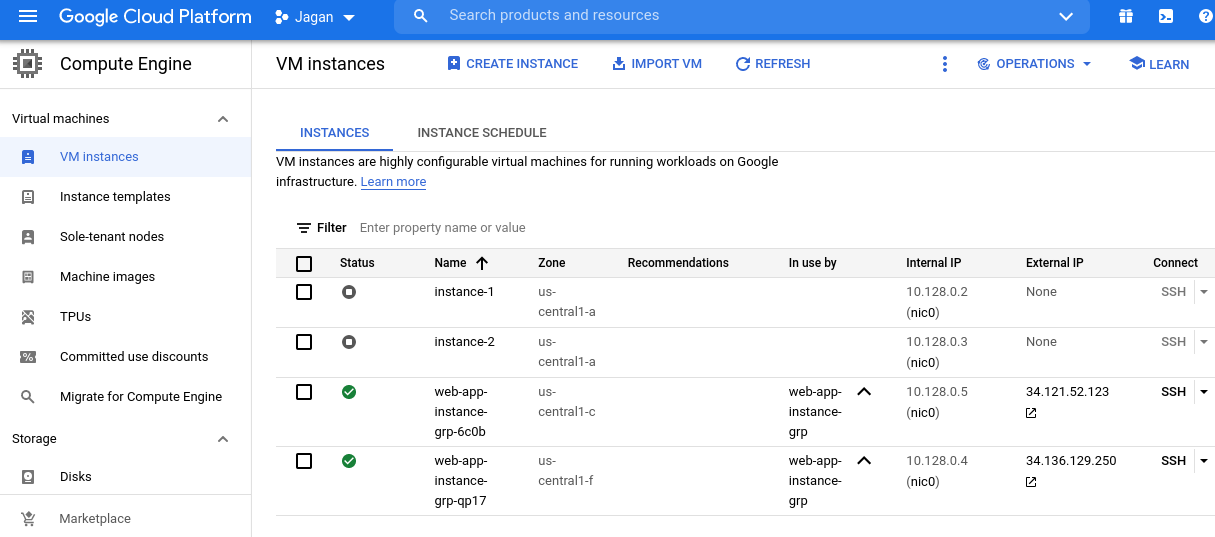
To ensure the minimum number of instances running in the VM instances you need to select the VM instances from the navigation menu.
Now, In the below screen you can see that the two instances are running named as web-app instance grp and also you can see that the two instances are located in the multiple zones in the us-central.
Accessing the instance created by the instance group
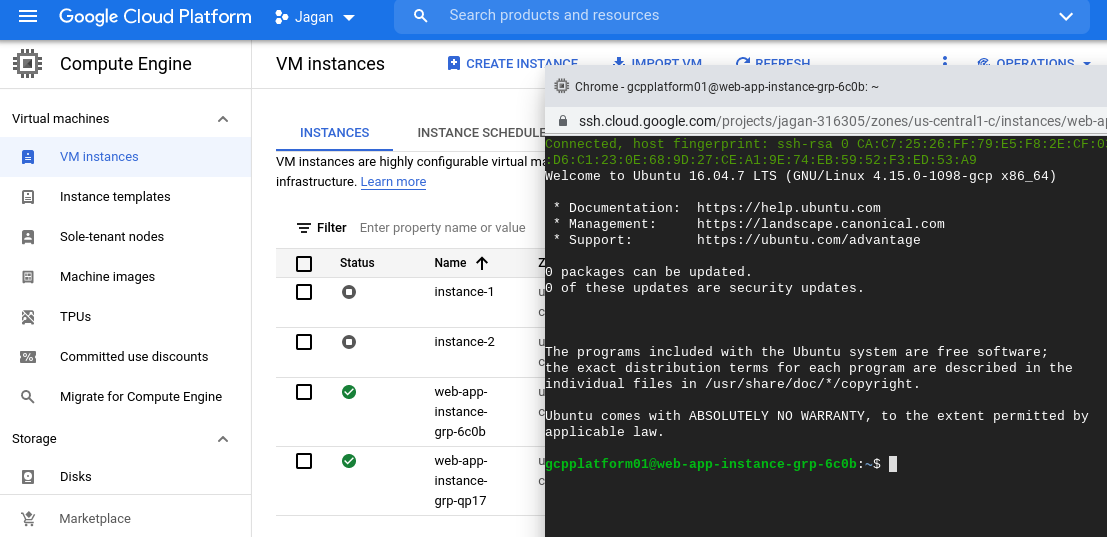
Now you can access the instance from the instance group by clicking on the ssh button under the connect option.
And by ssh into that instance you can see that the Ubuntu operating system has been successfully launched on your instance.
Conclusion
Therefore, In this article you have learned about how to create the instance group by having the instance template in Google Cloud Platform. At the same time if you delete the instance group it will also delete the instances in the VM instances.
I hope this article will help you in Getting started with the instance group in Google Compute Engine. In the next blog, we will publish a lot more articles on Google Cloud. Till that stay tuned with us!!!
Happy Learning!!!


