In this article we are going to learn about how to create a snapshot and also we will learn how to create an instance from this snapshot in Google Compute Engine. It will be a step by step process for creating a snapshot from the disks and for creating the instance using that snapshot.
Let’s get into this article and learn about snapshots in Google Compute Engine. Stay tuned here, we will keep publishing a lot more articles on Google Cloud.
What is Snapshot?
According to Google Cloud “Snapshots incrementally back up data from your persistent disks. After you create a snapshot to capture the current state of the disk, you can use it to restore that data to a new disk. Compute Engine stores multiple copies of each snapshot across multiple locations with automatic checksums to ensure the integrity of your data”.
Snapshot is for backup purposes, When I say snapshotting a virtual machine we are not backing up the virtual machine itself we are just backing up the underlying disk.
So, it’s just the disk that holds the data and this disk can be attached to any machine.
Overview
- Before taking a snapshot from Compute Engine. you should have at least one VM running on your project. By using this existing VM you have take the snapshot for your backup purpose.
If you want to know about how to create an instance. Please have a look on our previous blog on “how to create an instance in Google Compute Engine” to have a better understanding.
- After taking a snapshot of that particular instance we will create another instance by adding this snapshot in the boot disk.
Steps for launching a VM from snapshots
Ensuring an Existing Instance
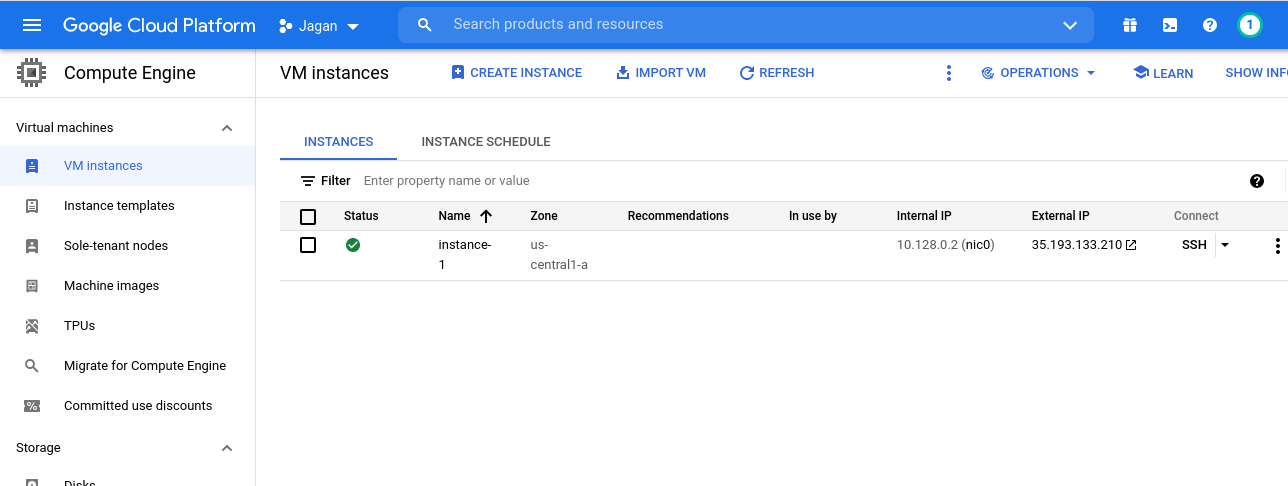
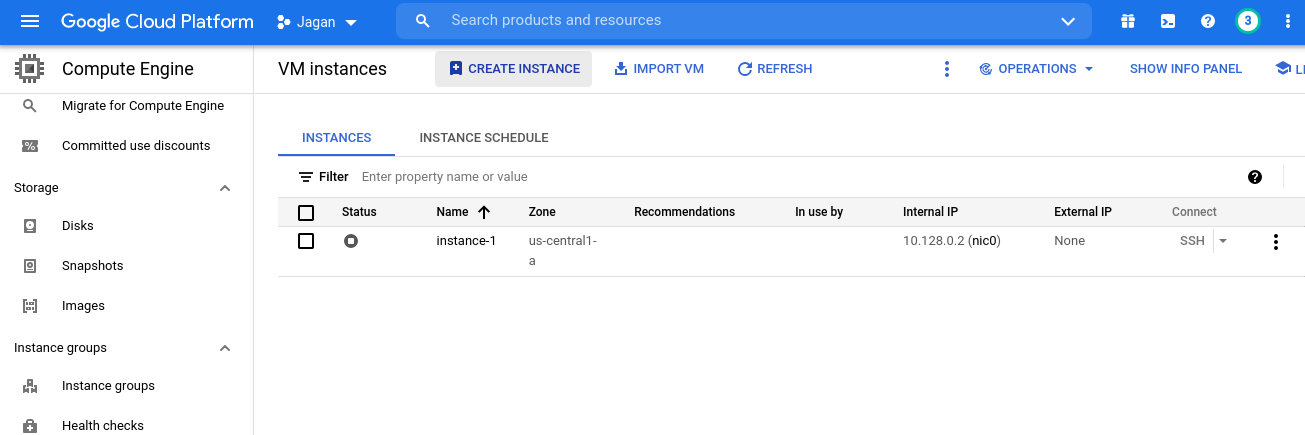
If you are creating a snapshot from the virtual machine, you have to ensure that the existing VM is present in your project. In the below screen you can see one VM is already running in the project.
The below instance contains an Apache2 web server installed already.
Uploading a File in Instances
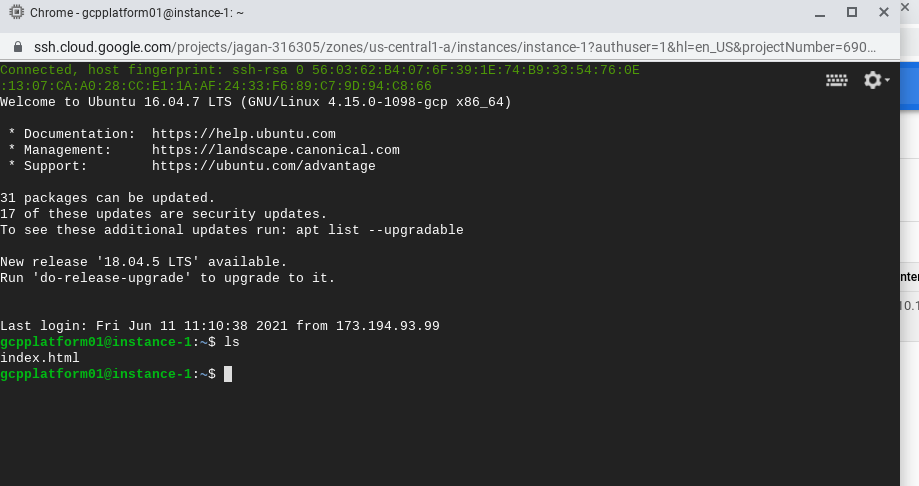
By connecting SSH into the above instance you will get the screen below. This instance contains an index.html webpage.
Creating a Snapshot
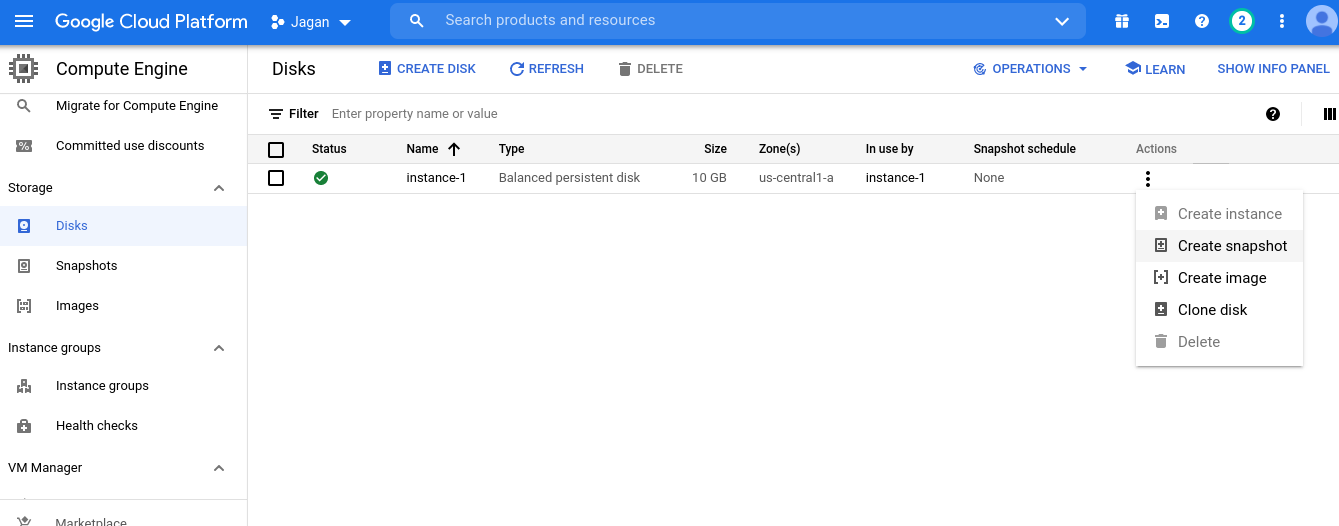
To create a snapshot you need to click on the disks in the navigation menu. Then select the instance which you need to create a snapshot and click on the create snapshot under the Action menu.
This snapshot can be used to create further instances. In the below screen you can see how to create a snapshot from an existing disk.
It’s always a best practice to stop the instances before creating a snapshot.
Selecting a Disk
After clicking on the create a snapshot from the disk, you will get the screen below to enter the details of the snapshot.
Here, you need to select the specific instance under the source disk to create a snapshot. And you have to select the Location to store the snapshot.
In the below screen you can see that there will be some network transfer fees if you choose to store this snapshot in a location different from the source disk.
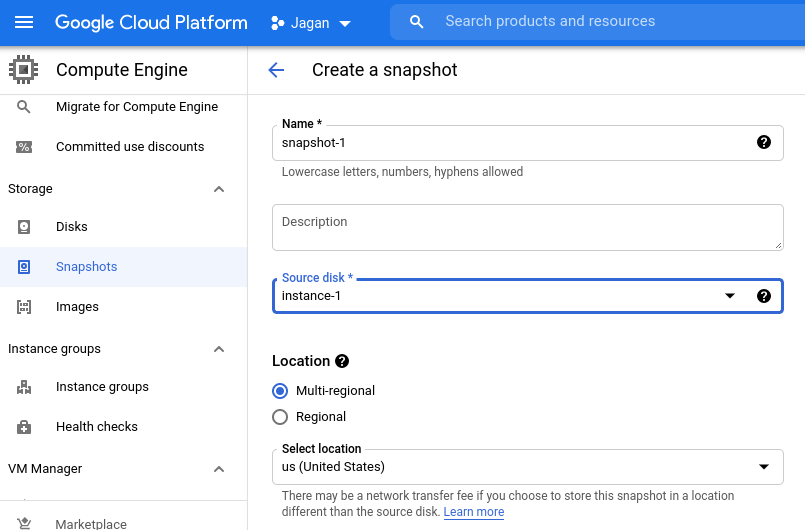
After selecting all the details for this snapshot you have to select the create button. And if you want to add labels to this snapshot you can add the label.
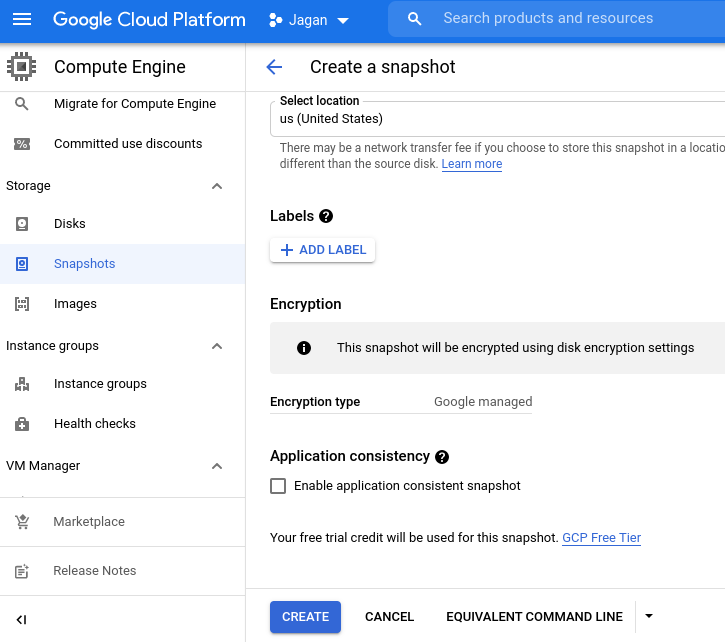
Created a Snapshot
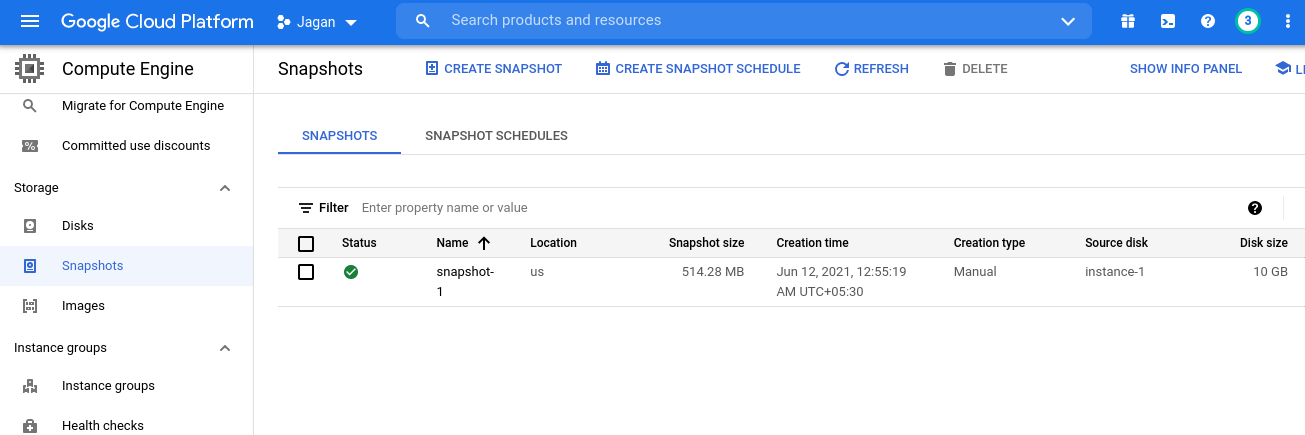
After selecting the create button, In the below screen you can see the snapshot has been created successfully.
Creating a Instance from snapshot
After creating a snapshot, you have to click on the VM instances in the navigation menu. Then you have to select the create instance icon to create a VM.
Filling up the instance details
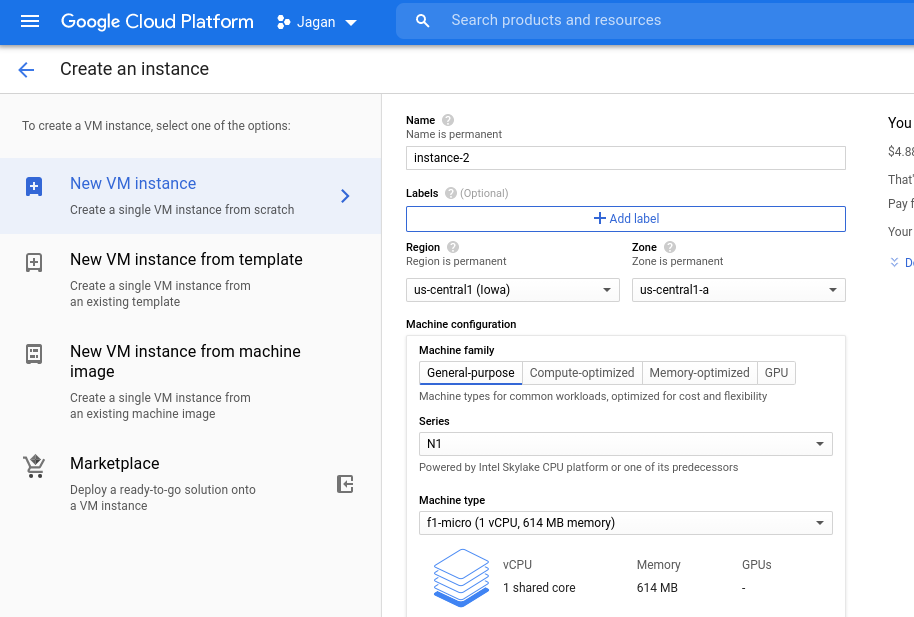
After clicking on the Create instance icon you have to enter the instance name, location, Machine configuration and select the machine type of that particular instance.
Selecting a Boot Disk
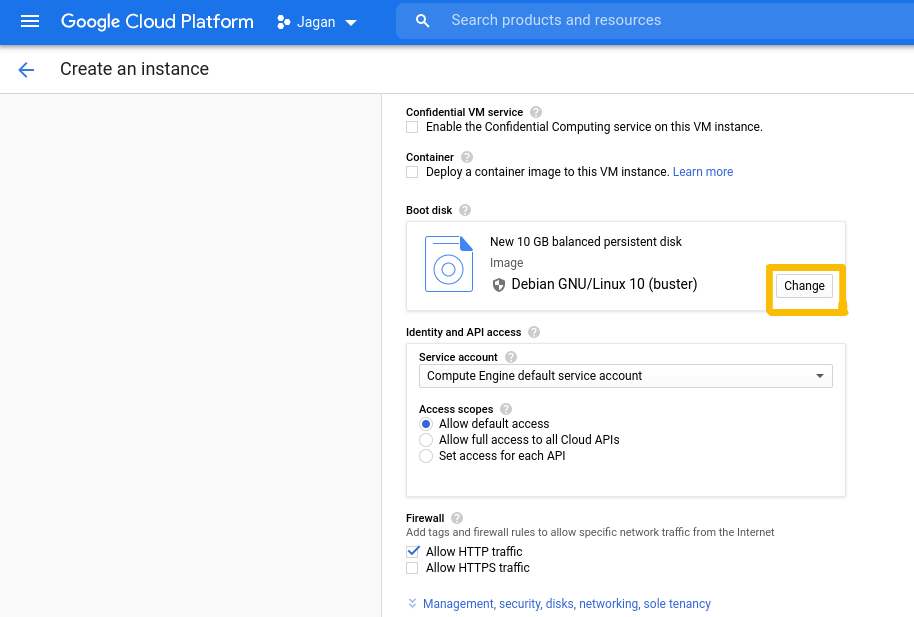
Then for selecting the Boot Disk you need to click on the Change icon in the below screen.
Selecting a Particular Snapshot
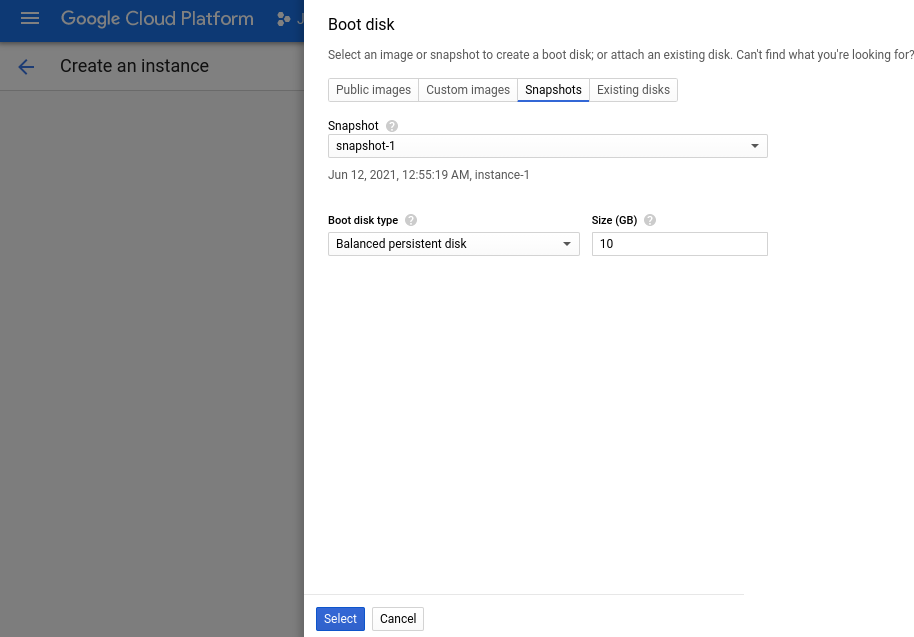
After selecting the boot disk you have to click on the snapshot tab and select the snapshot which you have created previously. Then you need to click on the select button to select the boot disk.
Instance Created from a snapshot
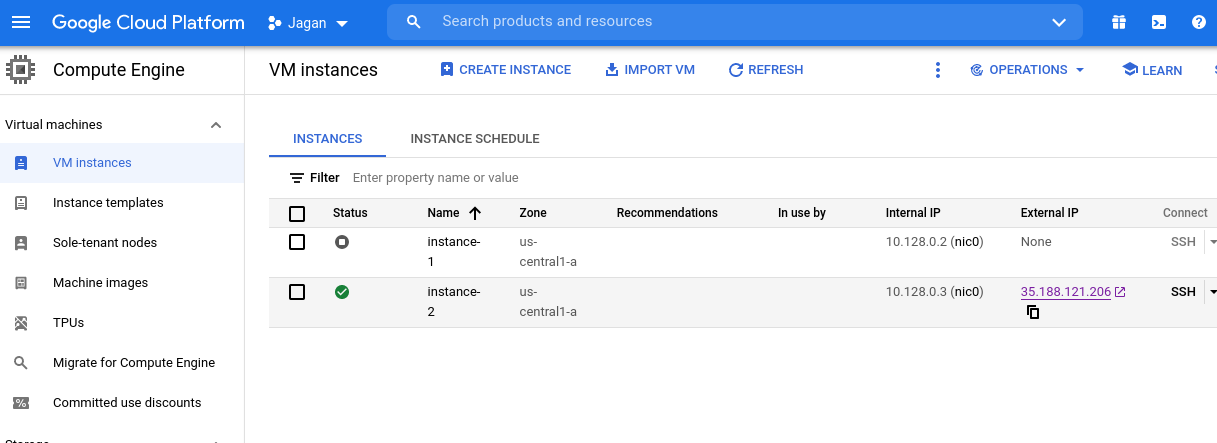
Then, By enabling the firewall of the instance you need to select the Create button at the last to create an instance.
In the below screen you can see the instance has been created successfully. Once the VM has been created you have to log into the instance by connecting via SSH.
Ensuring the same file in the instances
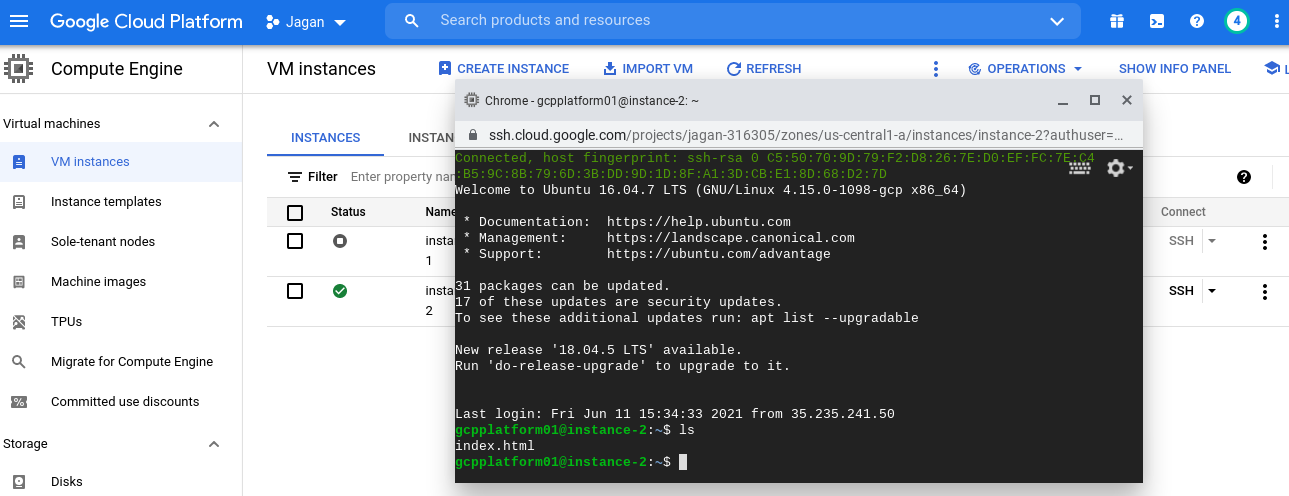
By logging into the instance you have to check whether the file which you have uploaded in instance 1 is present or not.
For ensuring the same file you have to type the command as ls. In the below screen you can see the html file which you uploaded in instance 1 is present.
So, this is how you need to confirm that it comes from the same disk image.
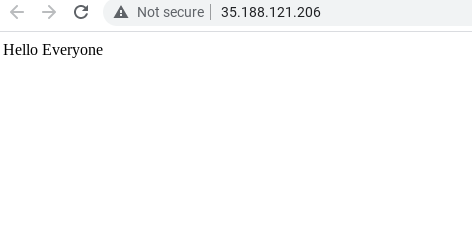
And also you can check the web server of this particular instance by copying the external IP addresses in the browser.
Here, you can see that the web site is working fine for this particular instance.
Conclusion
Therefore, this is how you need to create a snapshot or new instance from a snapshot that’s based on a disk image of another instance.
I hope this article will help you in creating a snapshot in Google Compute Engine on Google Cloud Platform. In the next blog we will publish a lot more articles on Google Cloud. Till that stay tuned with us!!
Happy Learning!!!


