Introduction
- AWS Amplify is a group of tools and features which helps developers build their applications easier. It provides a complete CI/CD process like code pipeline for automation process.
- We can simply connect Amplify with the GitHub repository to get our application code and automatically host it to the website.
- In this article we are going to host a simple Reactjs application on AWS Amplify.
- Amplify creates a group of resources that helps to host an application with simple steps. It makes the CI/CD process much easier.
Push source code to your GitHub repository
- Go to my GitHub repository using the link below that contains the simple Reactjs application code.
- Now, go to your GitHub account and create a repository.
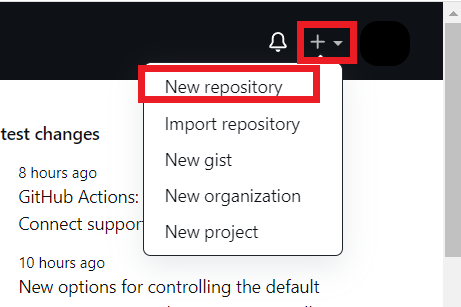
- Click the + icon and create a New repository.
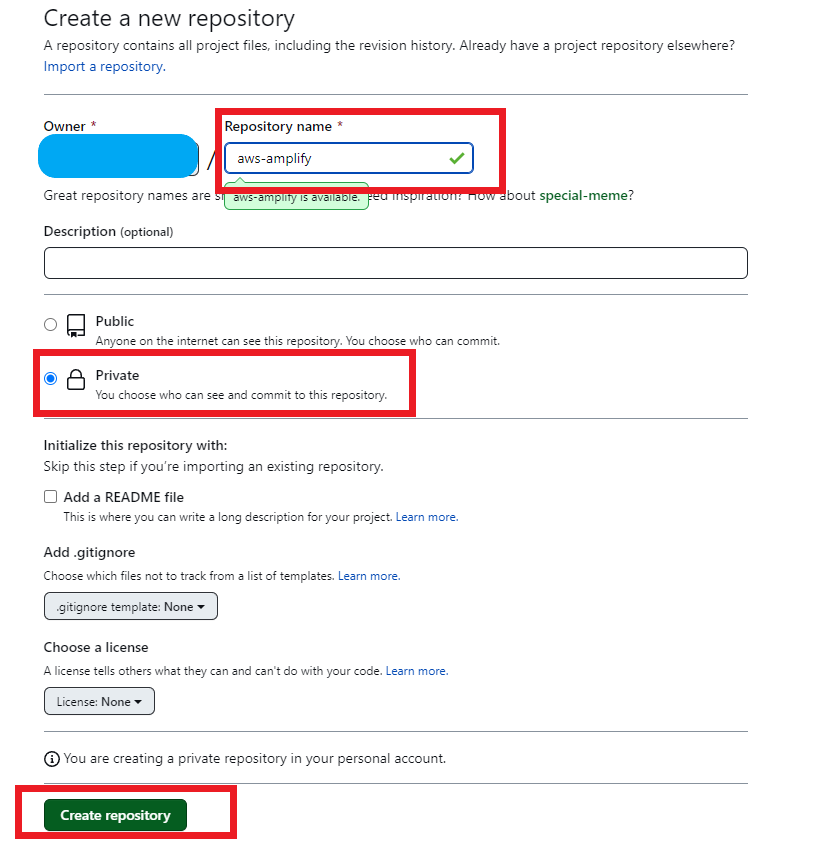
Enter the repository name and choose Private for your repository and then click Create repository.
- Once you created a new repository, copy the URL of the repository. Please make sure that the “HTTPS” button has been chosen.
- Then push the code to your git repository which you have cloned from my git repository.
- Use the “git push -u origin main” command to push the code to your repository.
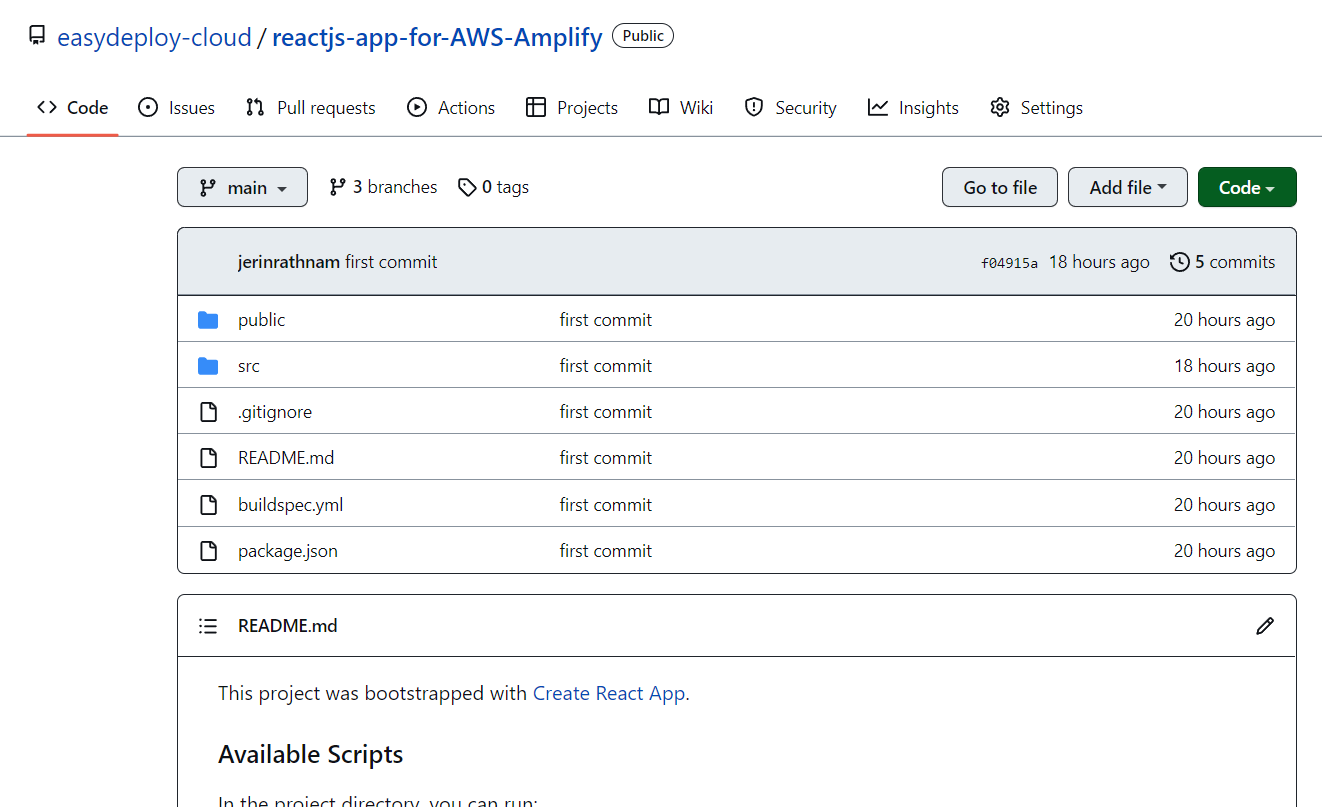
- Now your code is pushed to your remote repository in the “main” branch. Then reload your GitHub repository page, and if you can see your source code on GitHub, push command is successful.
Connect GitHub Repository to AWS Amplify
Now go to your AWS console and navigate to AWS Amplify page. And then click the Get started button.
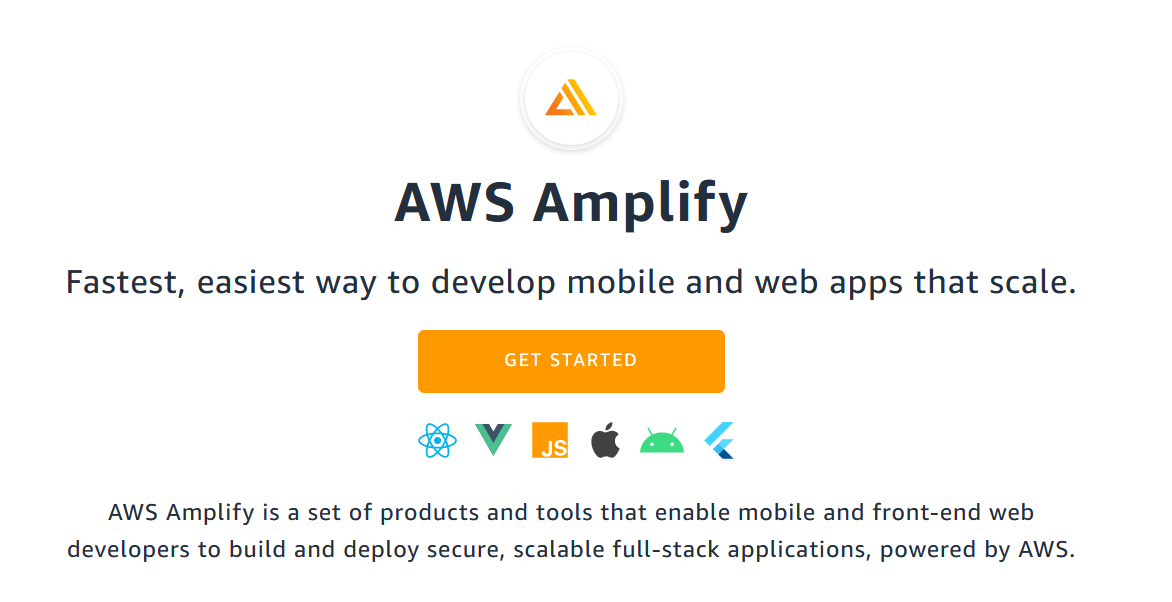
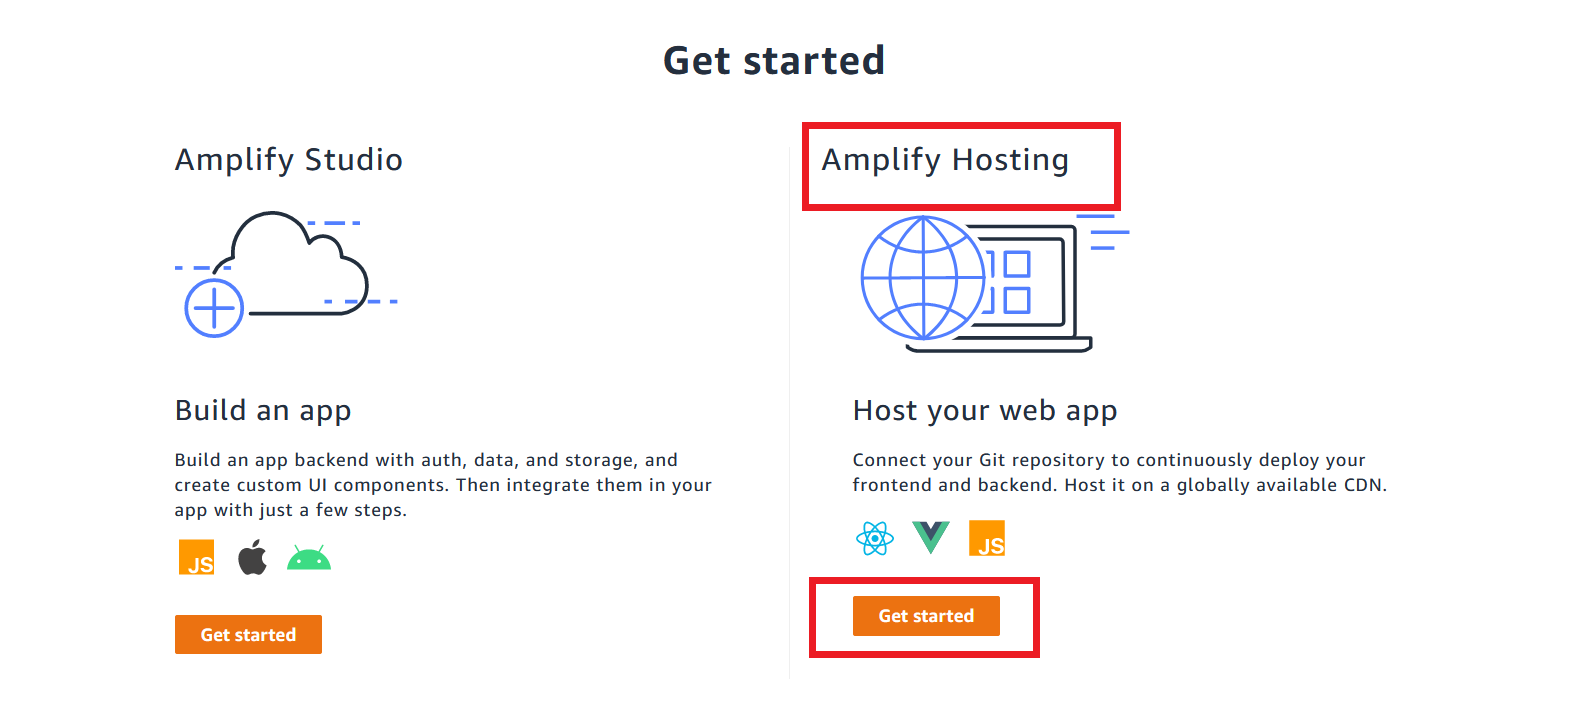
- It will redirect you to a page like in the below screenshot.
- We are going to host our application. So you have to select the type Amplify Hosting. Then click the Get Started button that is present in the Amplify Hosting section.
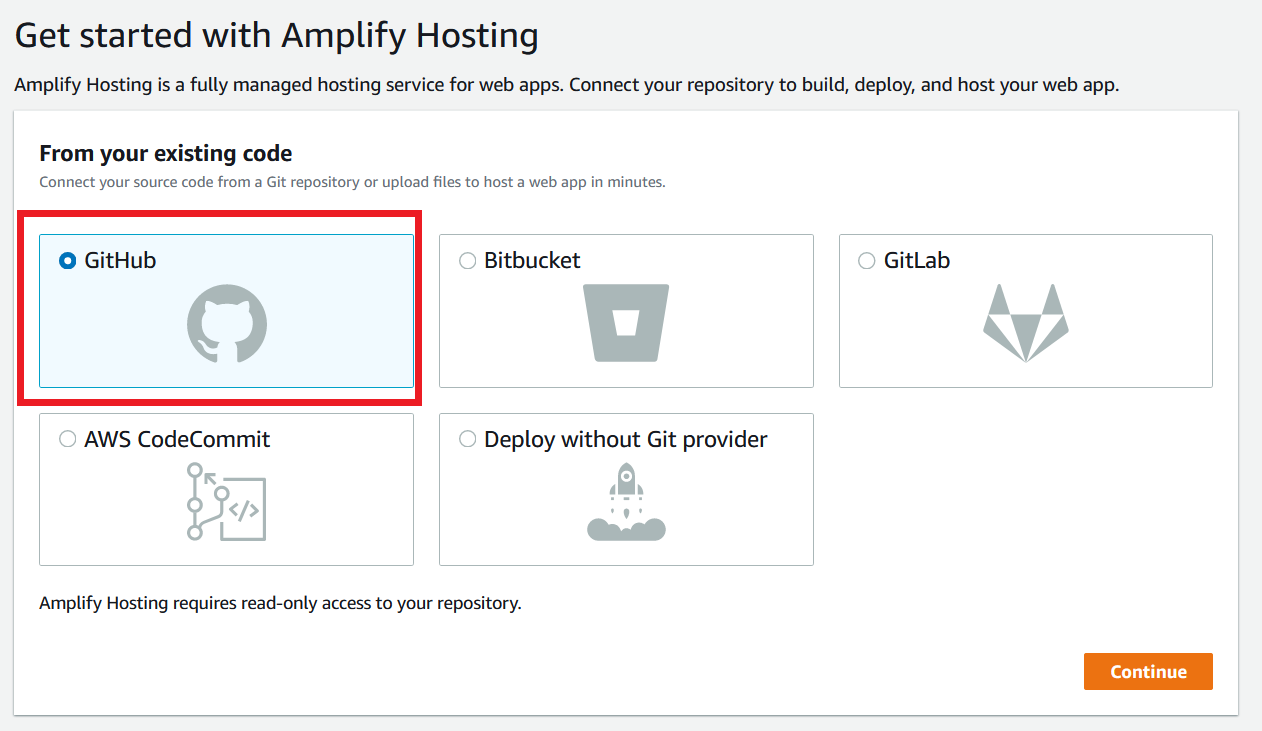
Now it asks you to choose a remote repository that you want to connect with Amplify. Choose GitHub to connect your GitHub repository and continue.
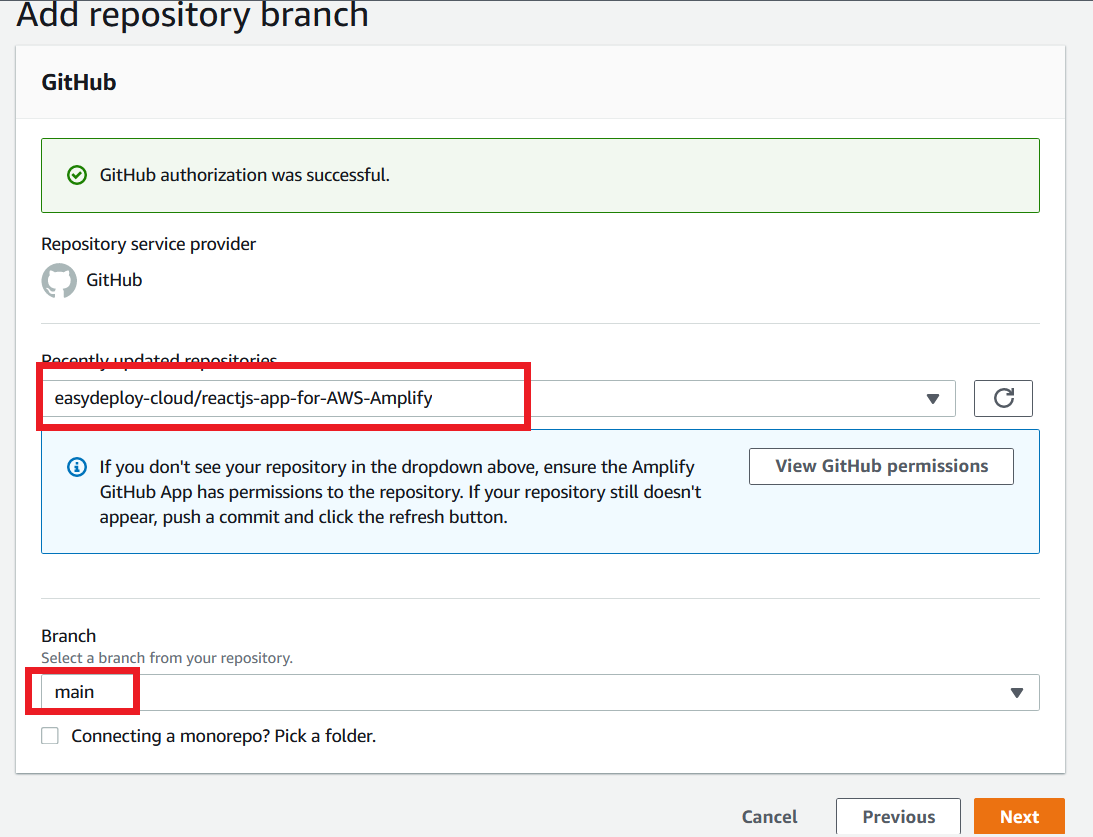
In the next screen, you can choose the repository and branch you want to connect to. Please choose the repository you created just before and the main branch.
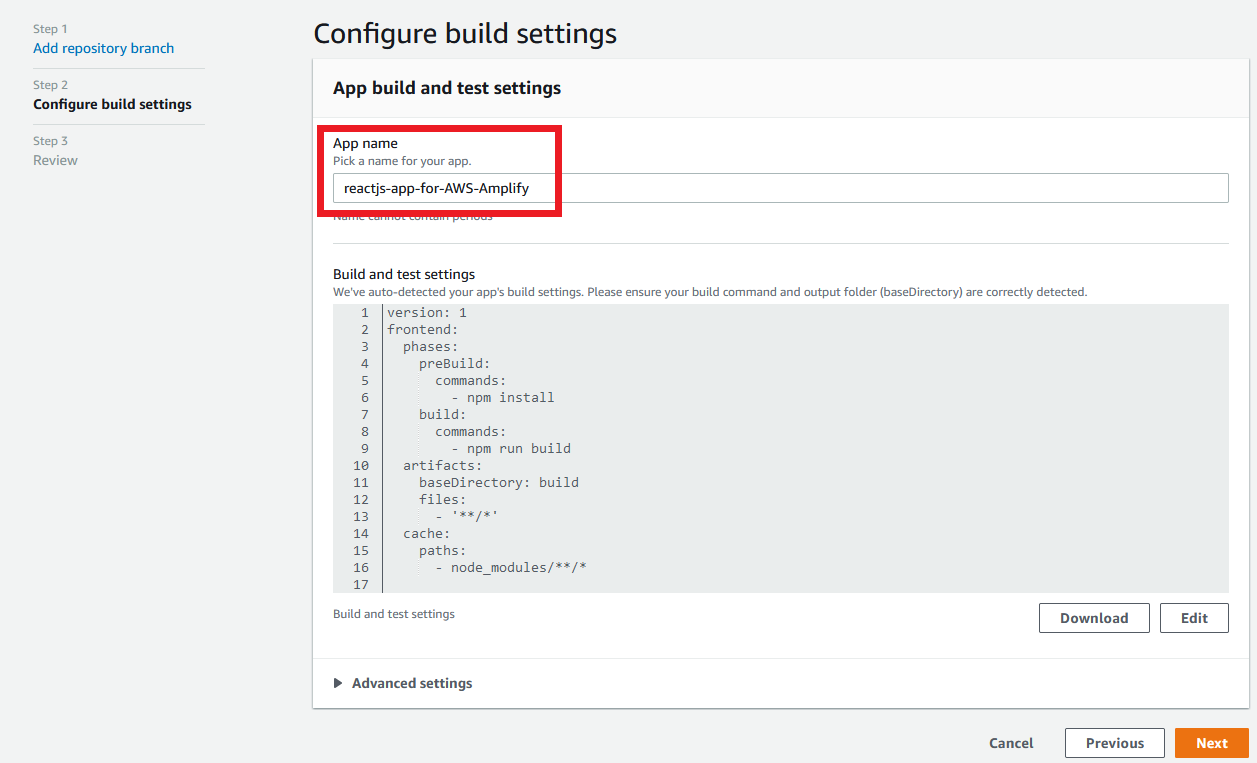
On the next page, You have to enter a name for your application. And you can see a yaml script for the build stage. This is a simple yaml script that builds your application.
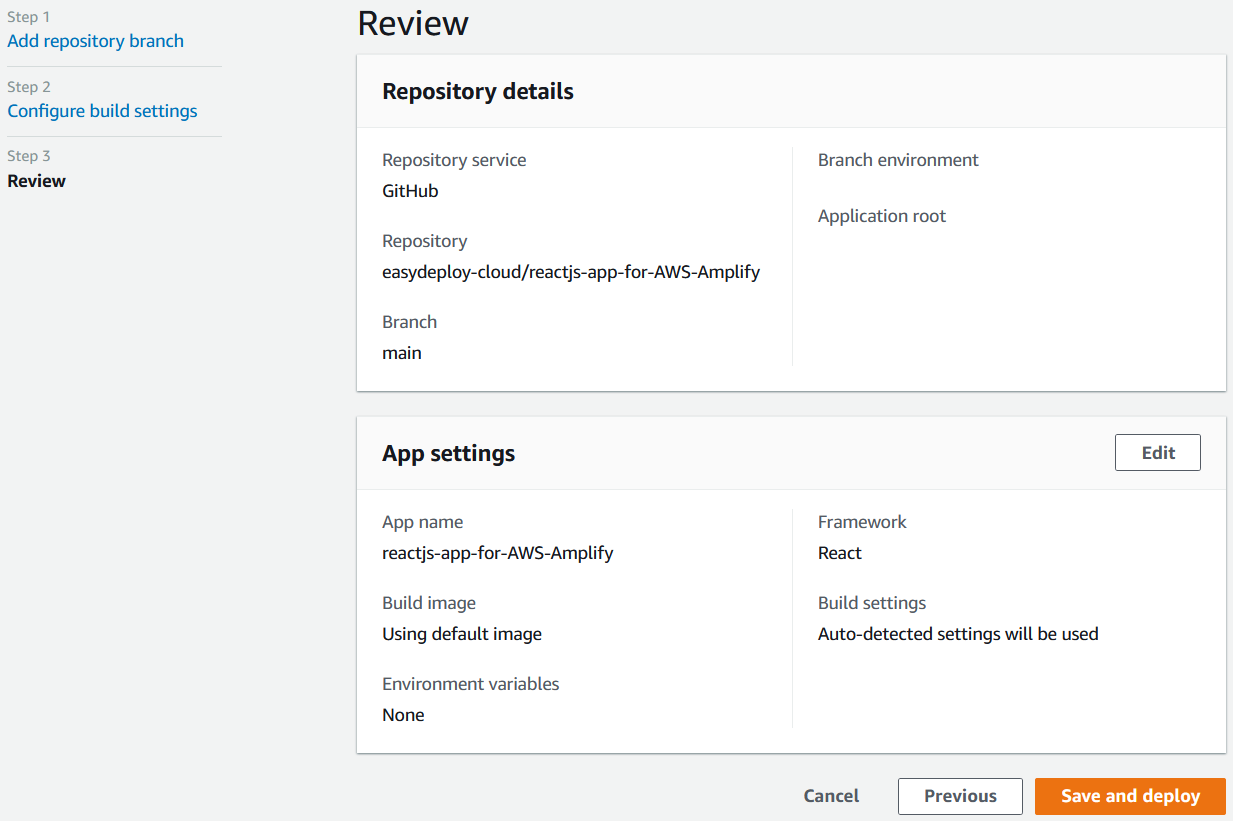
Finally you can review your setup for your Amplify application. Click the Save and Deploy button to deploy your application.
- Now your application started provisioning from your GitHub repository.
- It has four stages. So it automatically pulls your code from your GitHub repository in the branch that you refers in your application. Then it builds your application and Deploy it and finally it verifies the deployment.
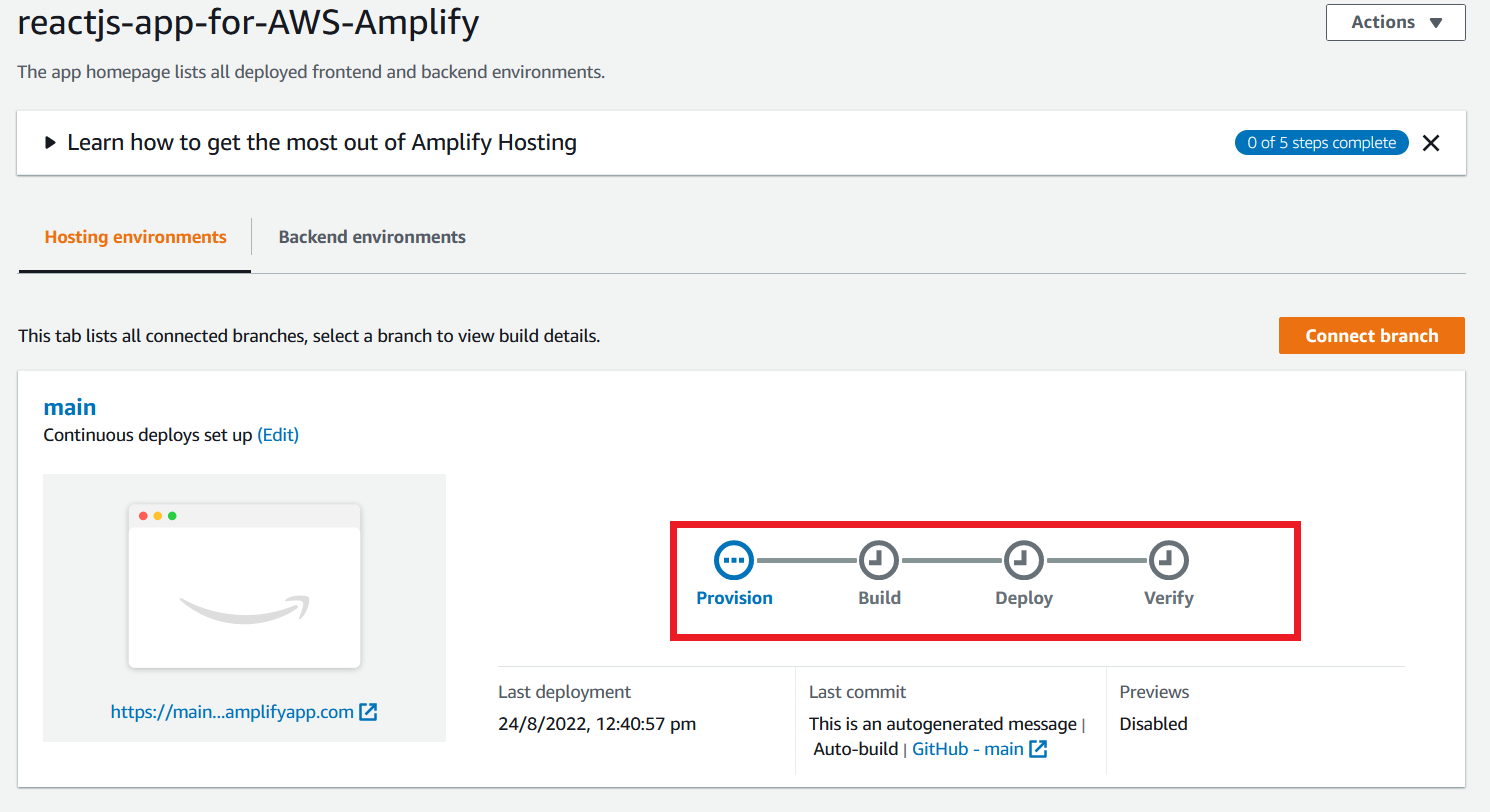
Wait for your application to complete all the stages.
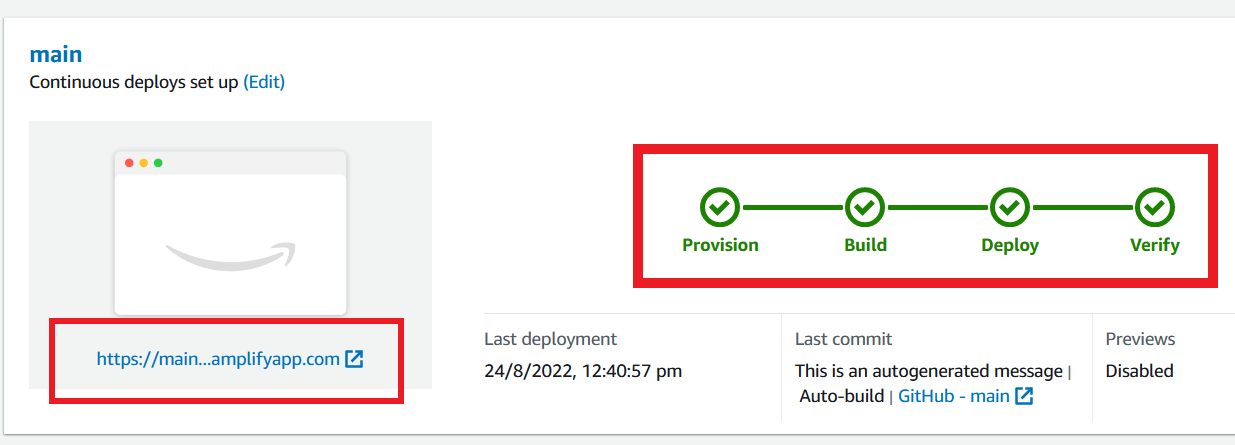
- As you can see in the above image, all the stages are successfully completed.
- Click the link that I marked in the above image, It opens a new page and it shows like the below screenshot.
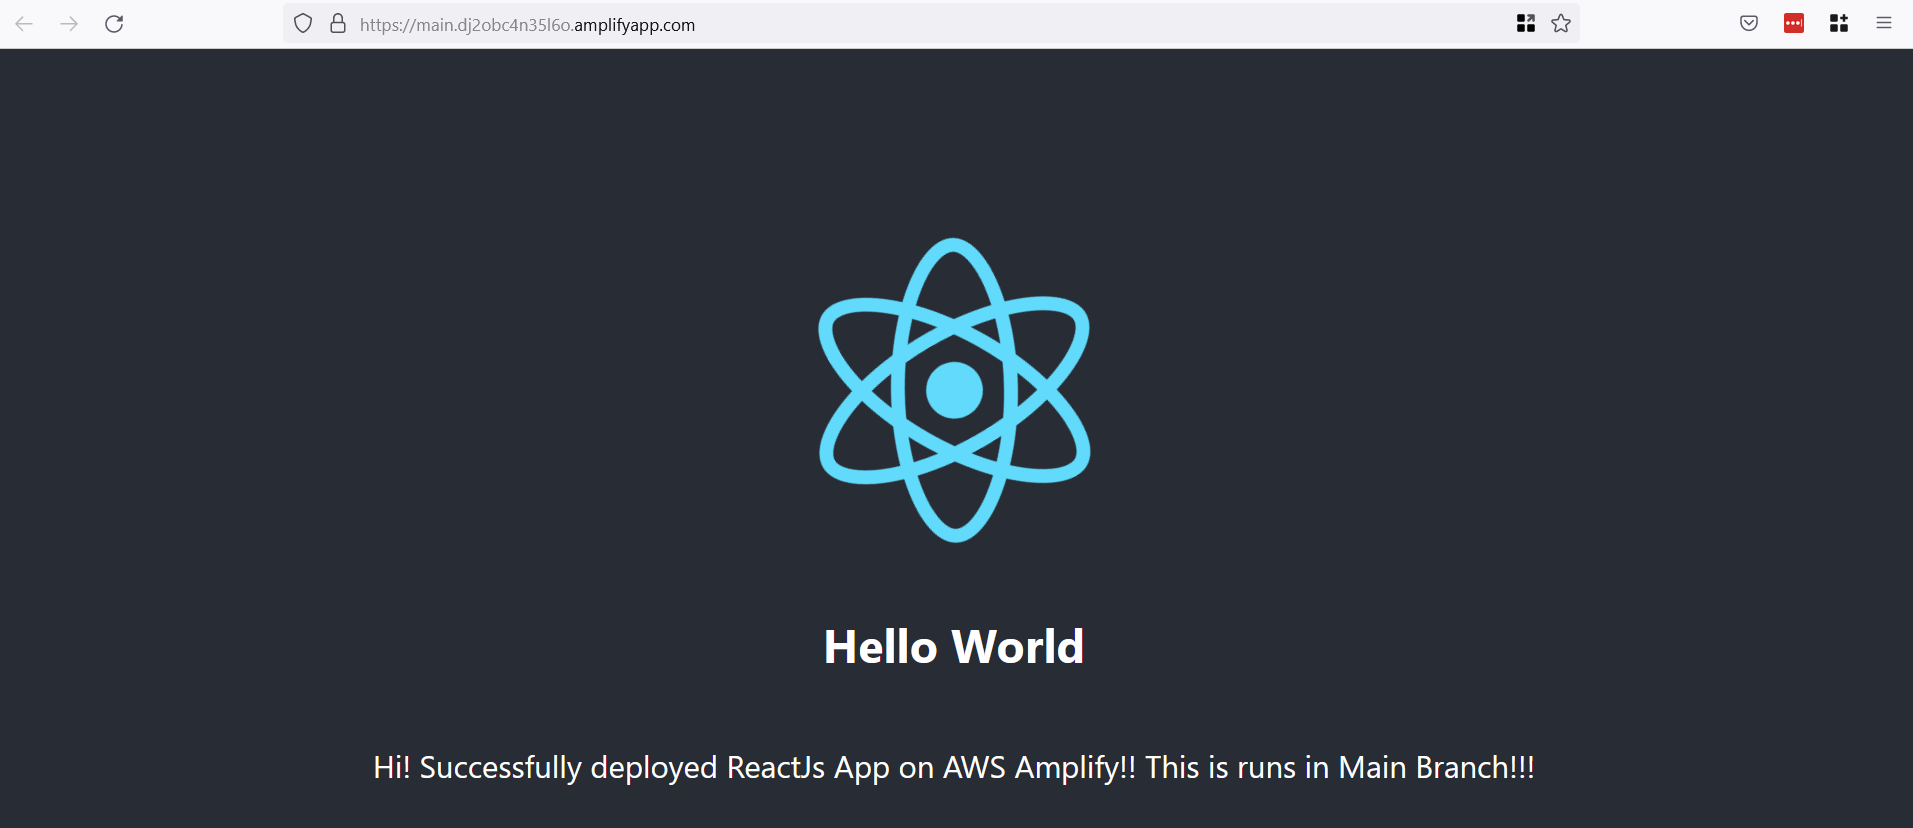
Congratulations, you have successfully deployed a Reactjs application on AWS Amplify.
Modify Code and Push again to GitHub
- You can check our application to pull the code automatically from the remote repository, whenever a change occurs on the code of our application.
- For check this, go to your VS code editor and open your application code.
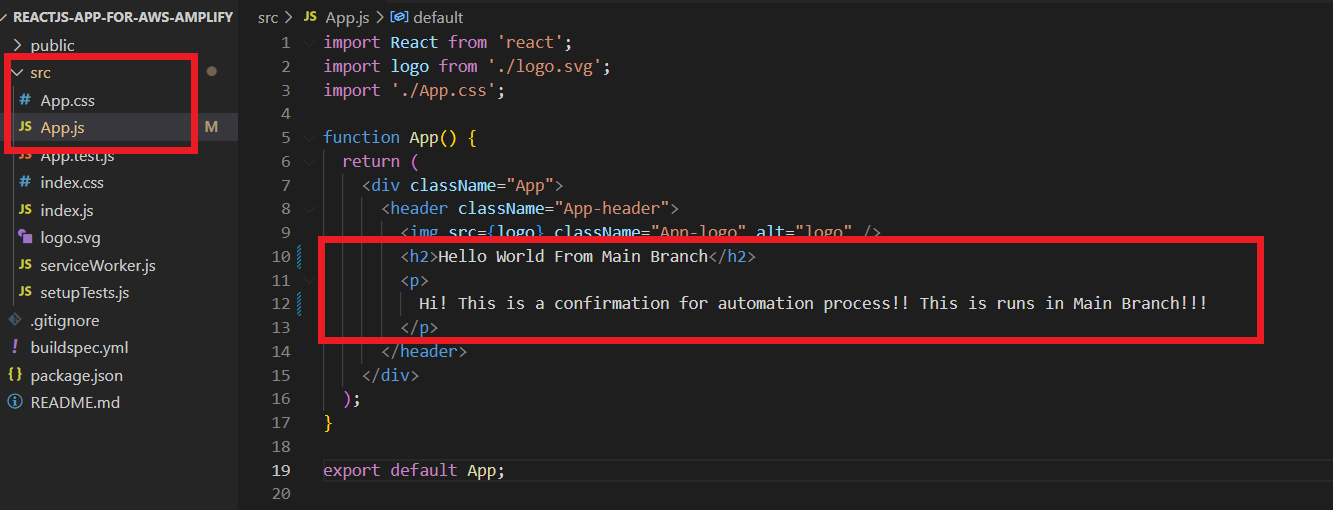
- Open App.js file that is present in the src folder. And modify the line that I showed in the above image. Then push your code to your GitHub repository.
- Then come back to Amplify console you can see the provision stage is started again, because of the changes occurring on the remote repository.

Wait until it completes all the stages and once completed refresh the page that you are hosting your application and see the difference that you have made on your code.
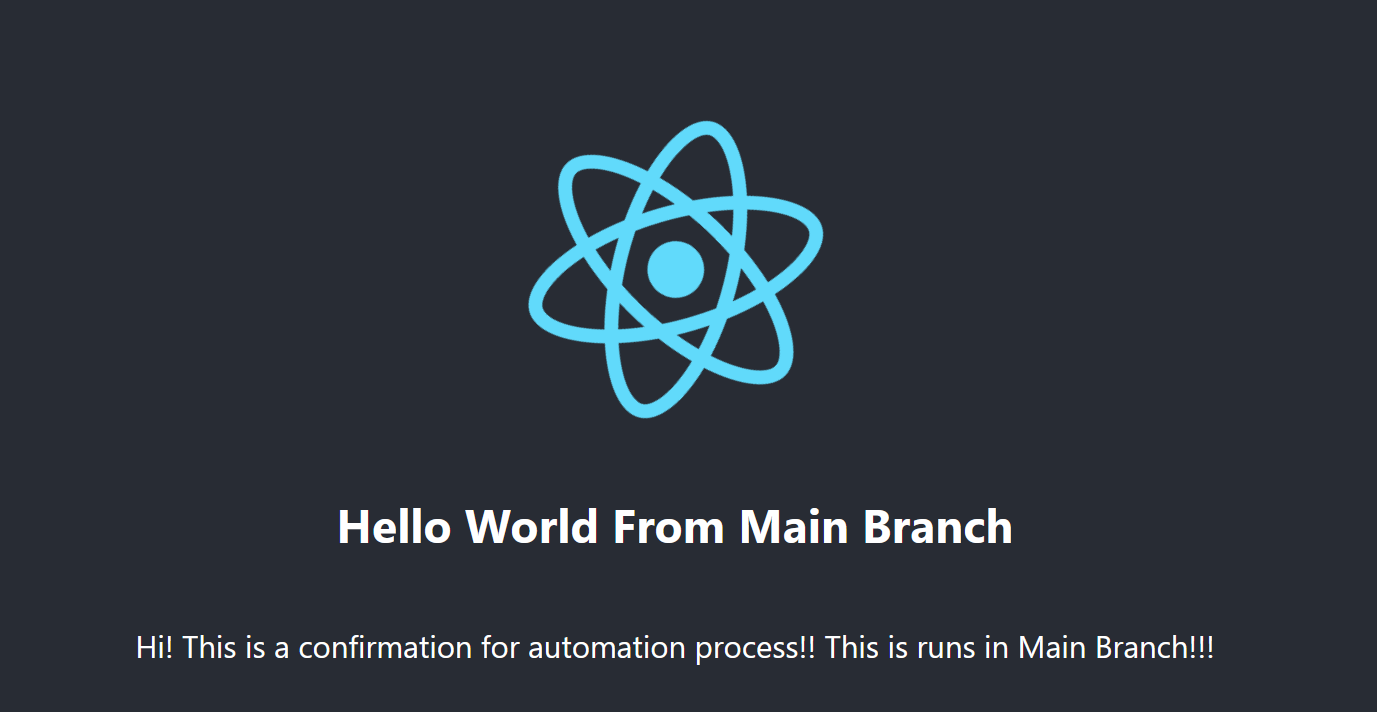
This is a fully automated way like AWS CodePipeline. It always checks the source repository, for the changes on the code, and once it detects any changes on the code, it brings the code to Amplify and it deploys it in our application.
Adding a Custom Domain for Application
Additionally, you can redirect the endpoint of your Amplify application with your own custom domain. On the left side of the page click the Domain Management button.

You will redirect to the Domain management page and click the Add domain button.

Add your own custom domain name under the Domain section. For this article I just add a domain called example.com and then click the button Configure domain.
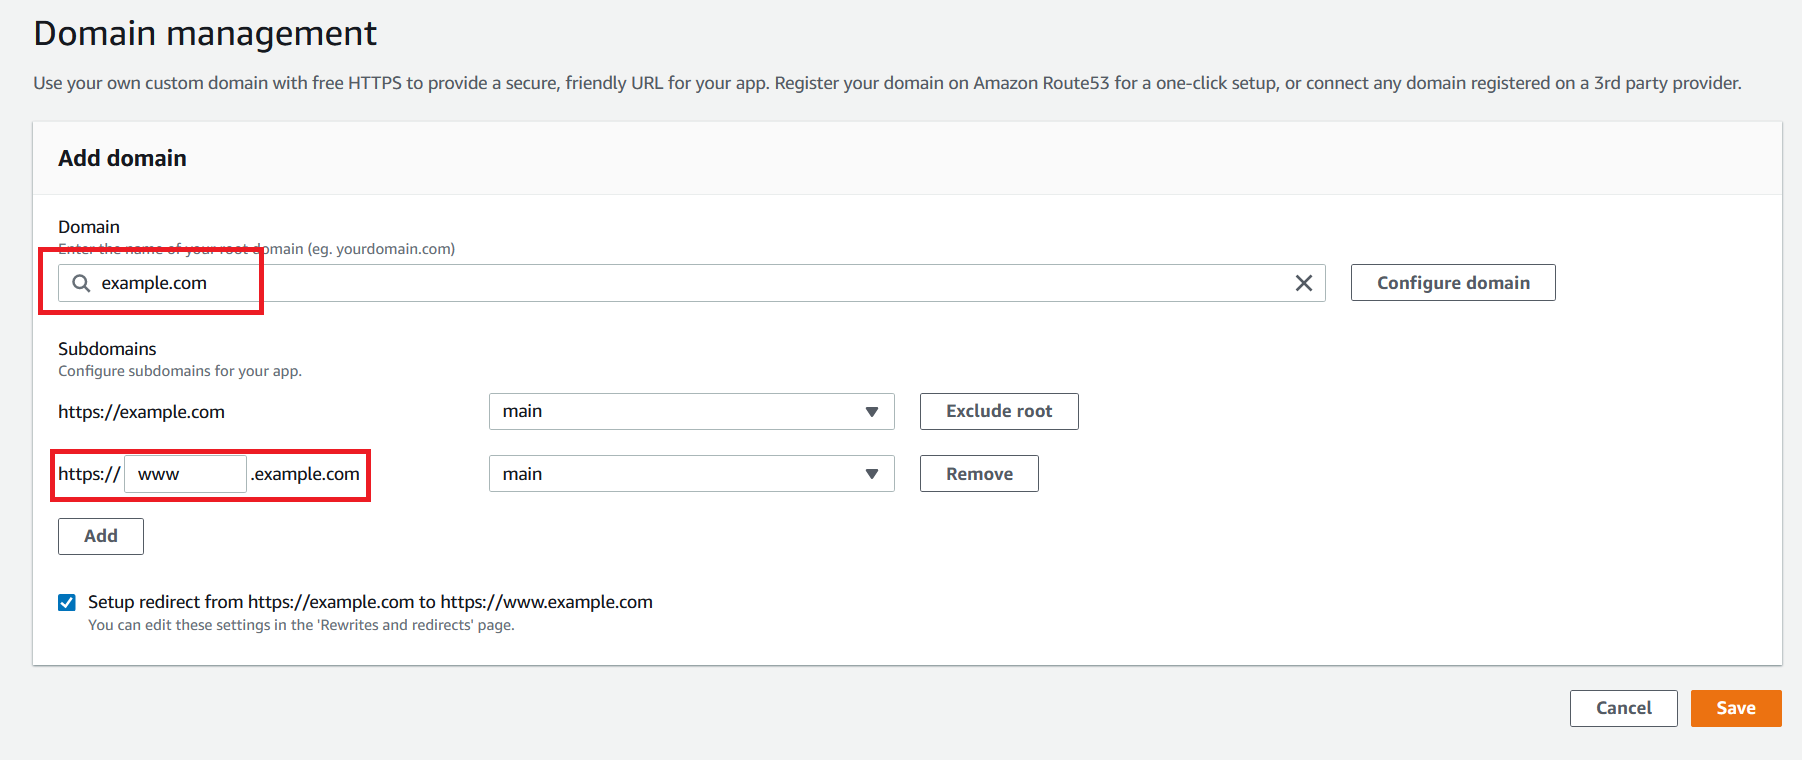
- Then you have to add a subdomain for your domain. This means you can set up any redirects for your domain.
- For example, here I add a redirect from https://example.com to https://www.example.com.
- Then click Save to complete your domain set up for your application. After this AWS will provide you a validation certificate for your domain. You can check your certificate in your aws account AWS Certificate Manager (ACM) console.
Hope you will learn something new about Amplify in this article. Enjoy your Reading!

