Before Terraform version 1.5, if you want to import existing resources into a Terraform configuration, you must write a configuration for the resources you want to import. If you haven’t created any resource block for the resources, you cannot import the resources under Terraform cloud. you can also use Terraform Import but the configuration Is safer.
Firstly you have to write a Terraform configuration for the particular resource that you want to import and execute the import command with the resource id. Then you have to run terraform plan command to compare the configuration changes of the resource from the cloud provider to your terraform configuration file. This is like writing a Terraform configuration script from the beginning and If you want to import an infrastructure that has a lot of combined resources, it took more time and confusion to manually import and write Terraform configurations for them.
But recently Hashicorp released Terraform version 1.5 and it has a major update for the import concept. They have introduced a new resource block called import.
This how-to is also published on our youtube channel. Please find the video here
Using this import block we need to provide the resource id and a resource block name for the resource. Then running the import command will create a new configuration for that resource automatically and we can manage the resource from terraform cloud. Maybe it won’t be very clear to you when I say all the things here. So let’s dive into a simple demo.
That will give you an understanding of the process and so i will explain every step for a deep understanding.
Prerequisites for Terraform Configuration
1. Before you take this demo your Windows or Linux machine must have the following tools installed
2. AWS IAM user with the following permissions
3. Configure the AWS CLI with the above IAM user’s Access and secret keys
Procedure:
Create EC2 Instance and Security Group in AWS console
Open your AWS console and search for EC2 and click it. You will be redirected to the EC2 dashboard.

Expand the Launch instance icon and click the Launch instance link like the below-mentioned picture.

Enter a name for your EC2 instance and scroll down to select an AMI for the server. Then select the Amazon Linux image which is eligible for the free tier for this test purpose.

For the Instance type also leaves it as default as t2.micro and for the Key pair choose to Proceed without a key pair option. Because we don’t need to log in to the server now. And click Edit for the Network setting section.

Do not change the VPC, Subnet, and Auto-assign Public IP options. Just leaves them as default values.
For the Firewall, select the Create security group option, enter a name for your security group, and change the description of the security group also.

Click the Launch instance button.

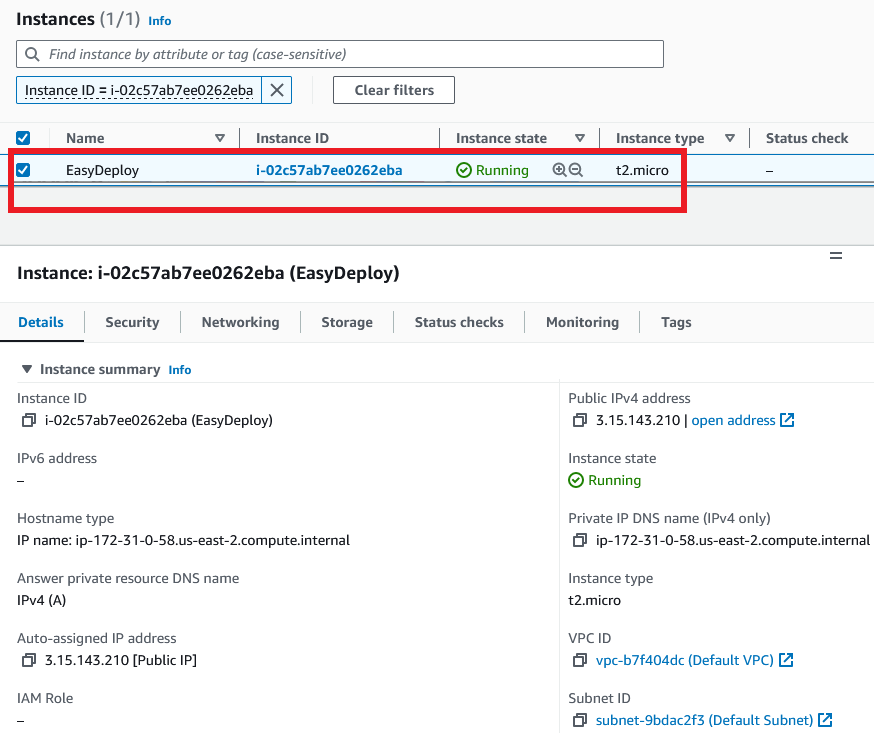
Your instance is getting created. click on the instance id to view your instance details.

Initialize Terraform configuration and Define the Import Block
Open your Visual Studio code editor in the folder in that you run your Terraform script.
Create a new file as provider.tf and paste the below code into the file.
provider "aws" {}
terraform init command to initialize the terraform configurations related to AWS Provider.
import {
  id = "instance-id"
  to = aws_instance.this
}

import {
  id = "security-group-id"
  to = aws_security_group.this
}


Generating the configuration for the resources
Now we are going to generate a configuration file for our existing resources. For this, we have to use terraform plan the command with the -generate-config-out flag to generate a configuration file for the resources needed to import.
terraform plan -generate-config-out=main.tf

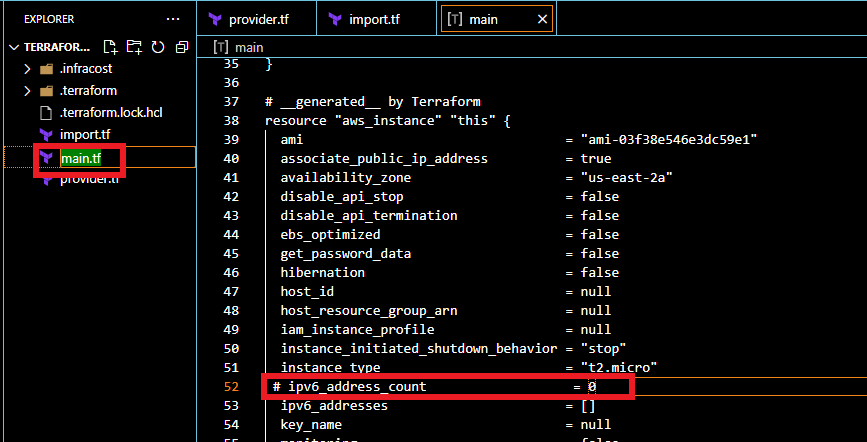

terraform plan to verify that your configuration matches the current settings for the instance and security group. It shows there will be some resources that need to be imported into the state file.

Update the Resource and Test
Now we are done with the process of importing resources into terraform configuration. So it’s time to check whether the resources are really managed by Terraform or not.
Open the main.tf file in the VS code editor and change the following line with the following value exactly like the below screenshot.
instance_type = "t2.nano"

When running the terraform apply command it will ask for a confirmation with the detail “1 Resource will be updated in place”.

Verify the plan and enter yes to apply the changes.

Once the apply completed, navigate to the AWS console and to the AWS EC2 page. Then select the instance that you have created and check the instance type. It will be changed to ‘t2.nano‘.

Conclusion
In this blog post, we explored the power of Terraform as an infrastructure as a code (IaC) tool for provisioning and managing cloud resources. At this place, you have an idea about the new import feature of Terraform with the configuration-generating process for existing resources. With Terraform you can manage a whole infrastructure that has a bunch of Cloud services within a single configuration file.
With this new Terraform Import Feature, you can import existing or manually created resources into Terraform configuration file without writing any Terraform configuration scripts manually, and also you can able to import multiple resources with a single command and mention them in a single configuration file.
Terraform Blogs
We hope this blog post has provided you with a solid foundation in Terraform and inspired you to explore the capabilities of this powerful tool further. With Terraform, you have the ability to create and manage infrastructure efficiently and reliably, unlocking new possibilities for your projects and driving innovation.
Remember to continue learning and experimenting with Terraform, staying updated with the latest features and best practices. The possibilities are endless, and we are excited to see what you create with Terraform as you build and manage your cloud infrastructure.

