In this article, we are guiding you through step-by-step on how to install WordPress in your DigitalOcean server. DigitalOcean server is very user friendly where you can install your WordPress blog with Single click. We are suggesting our customers to use DigitalOcean for hosting their blogs. It is very easy to manage instead of using VPS or any other servers.
DigitalOcean also provides single click installations for many other services like PHP, Discuss forums, etc.
Here is the step-by-step guide. If you have any questions, please write it in the comments section.
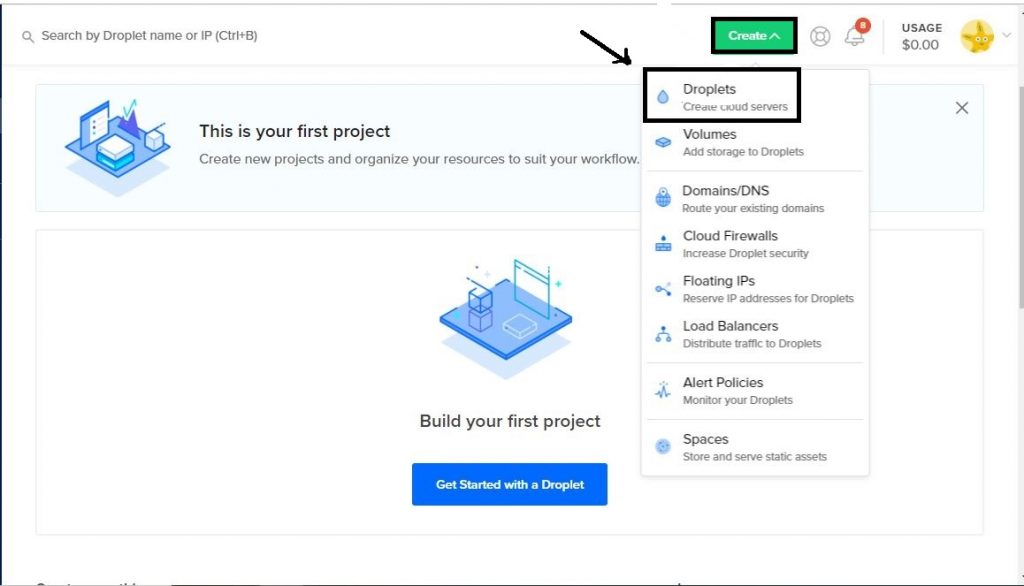
Step 1: Choose DigitalOcean Droplets
Login to the DigitalOcean console and click on the create button and then click droplets as shown in the screenshot below.
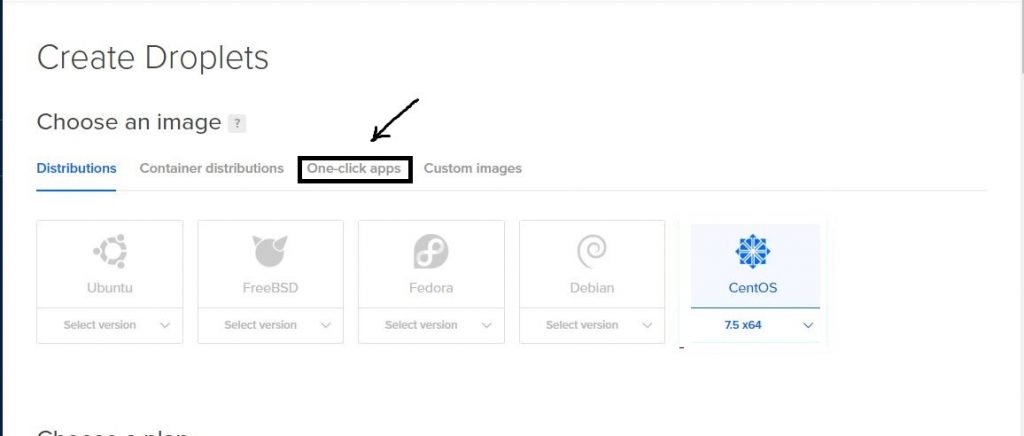
Step 2: Click on One-click-Apps
As shown below, please click on the one click apps option.
Step 3: Choose Wordpress Option from the menu
Once you have clicked on the one-click-apps, you will be taken to the new screen with list of apps to be selected for the installation. From the list, chose the WordPress on 18.04 as shown below. Note that the version number would be different if you are going to install on different droplets version. But you have to ensure that there is WordPress in it.
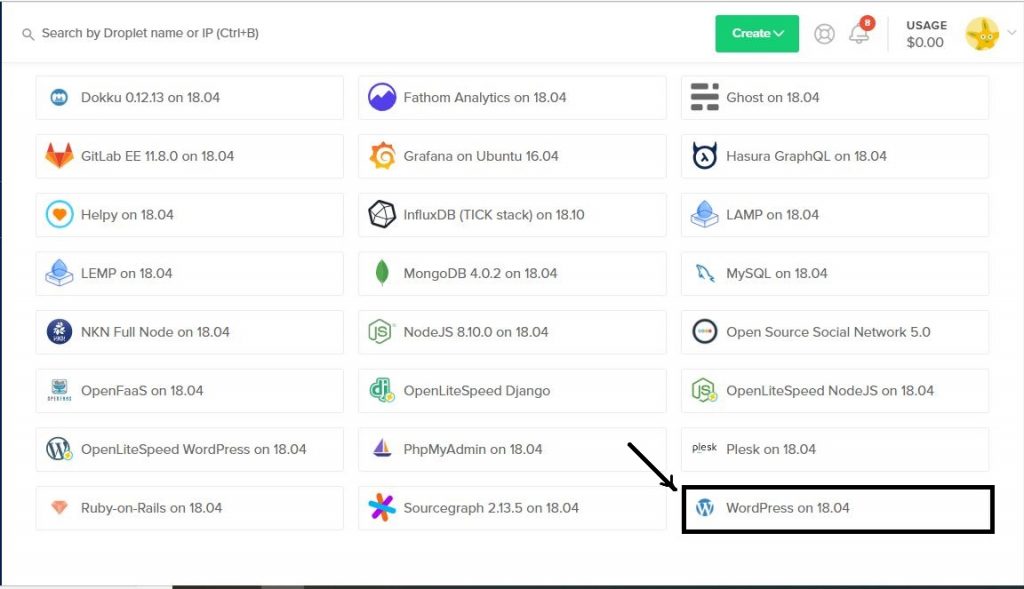
Note: Here we are installing WordPress on ubuntu 18.04 server as base OS
Step 4: Choose a Plan
By default you can chose standard for hosting small sites. In case you are going to host medium size site you can chose General purpose. If your needs high performance you can go for CPU optimised. The cost may vary according to the plan you chose.
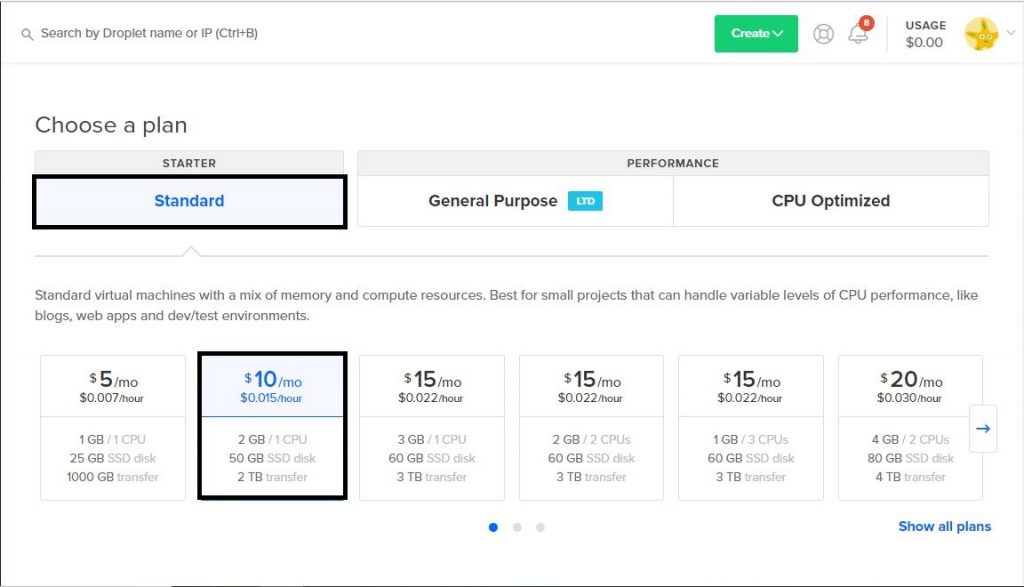
In above case we are choosing standard type with $10 per month. You can choose $5 month if the site is very small and has less amount of traffic.
Step 5: Add backups and other options
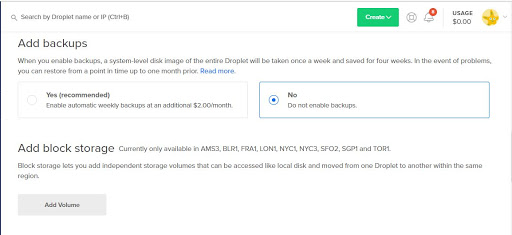
You can add automatic back of your droplet while creating but it includes extra charges. You can also add extra volumes by click add volumes as per the below screenshot.
Step 6: Choose region
Now chose the region where you are going to host your site. Currently Digital ocean having eight regions. You can select your region depending upon your users location to ensure speed.
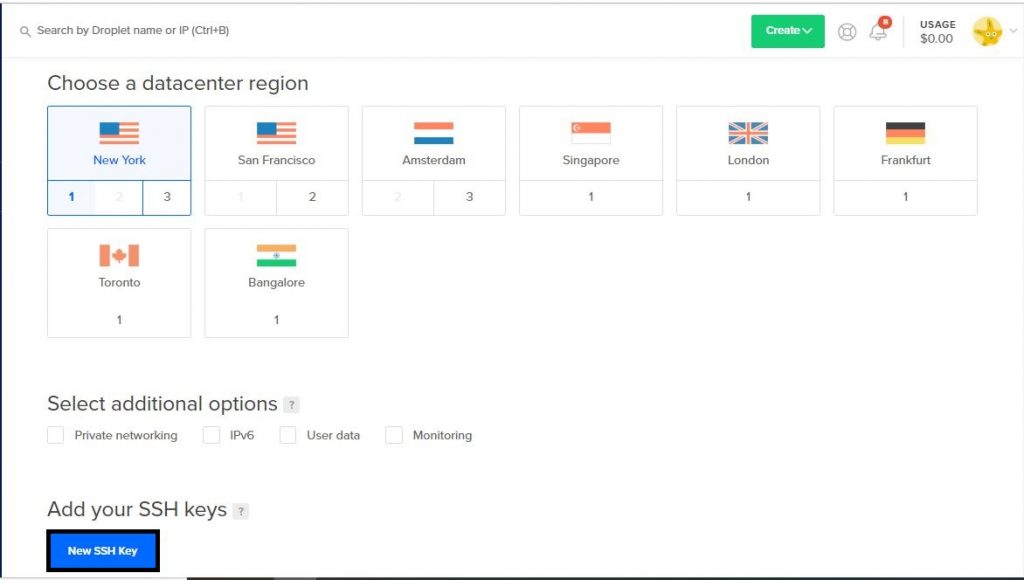
You can add the SSH while launching the server. Just click on New SSH key and then add your public key so that you can login to the server with ease using your corresponding private key.
Step 7: Enter Server Name
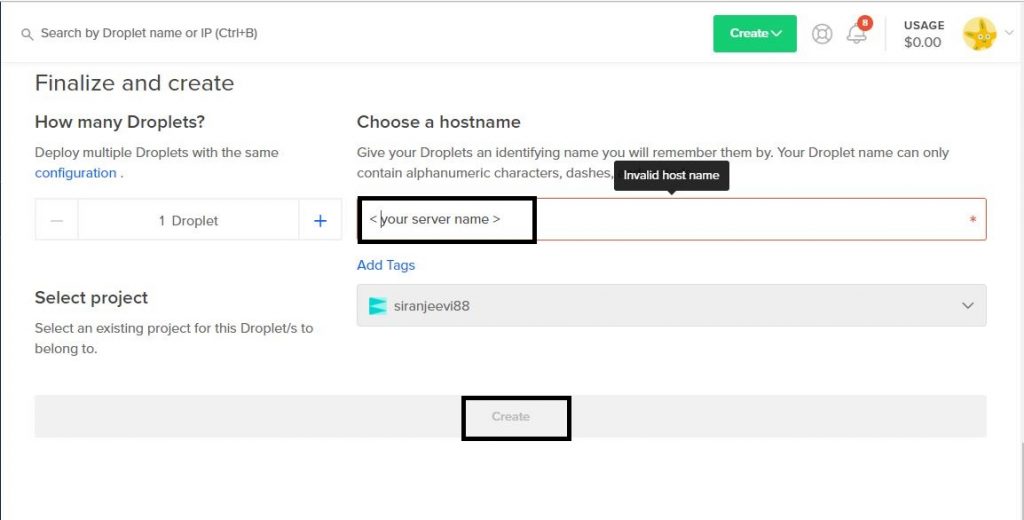
You are in the final step, enter your desired server name. Ex.server.example.com and then click on the create button. Now your server will be launched in the region where you select and you can login to the server and test everything works fine.
To access your WordPress site just enter your droplet public address in the browser. This is all you have to do for hosting your WordPress site with DigitalOcean servers. Advantage os using DigitalOcean is that you will save lot of cost which is not easy while you are managing your own servers.
I hope this article has helped you to learn how to install WordPress in your DigitalOcean server. If you have any further questions, please write us in the comments section.
How much does DigitalOcean cost?
The plan starts with $5 per month. It is the most basic one and it ranges from $5 to $25 per month depends on the plans. If you share your current traffic of your website, we can suggest you what is the ideal plan for you.
What is a DigitalOcean Droplet?
Each Droplet created in DigitalOcean is a Linux based Virtual Machine (VM) created on the virtual hardware. It is your dedicated server for hosting your websites. It takes only few seconds for you to create a droplet and install your applications.
Reference:

