Monitoring the performance of your EC2 instances in AWS is crucial for ensuring that your applications run smoothly. One important aspect of monitoring is keeping an eye on the memory (RAM) and disk space usage of your instances. In this blog post, we will show you how to set up memory and disk space monitoring for your EC2 instances using AWS CloudWatch.
By following these steps, you will be able to track the usage of these resources in real-time and receive alerts when usage exceeds a certain threshold. This will help you identify potential issues and take action before they become critical, ensuring that your applications continue to perform at their best.
Monitoring RAM and diskspace will prevent from server down & server crash so that now we are going to learn how to monitor RAM and Diskspace for our EC2 instance in a very simple way.
Supported systems
This monitoring scripts will be supported on the below Linux flavours
-
Amazon Linux 2
-
Amazon Linux AMI 2014.09.2 and later
-
Red Hat Enterprise Linux 6.9 and 7.4
-
SUSE Linux Enterprise Server 12
-
Ubuntu Server 14.04 and 16.04
Create an IAM role for the EC2 instance
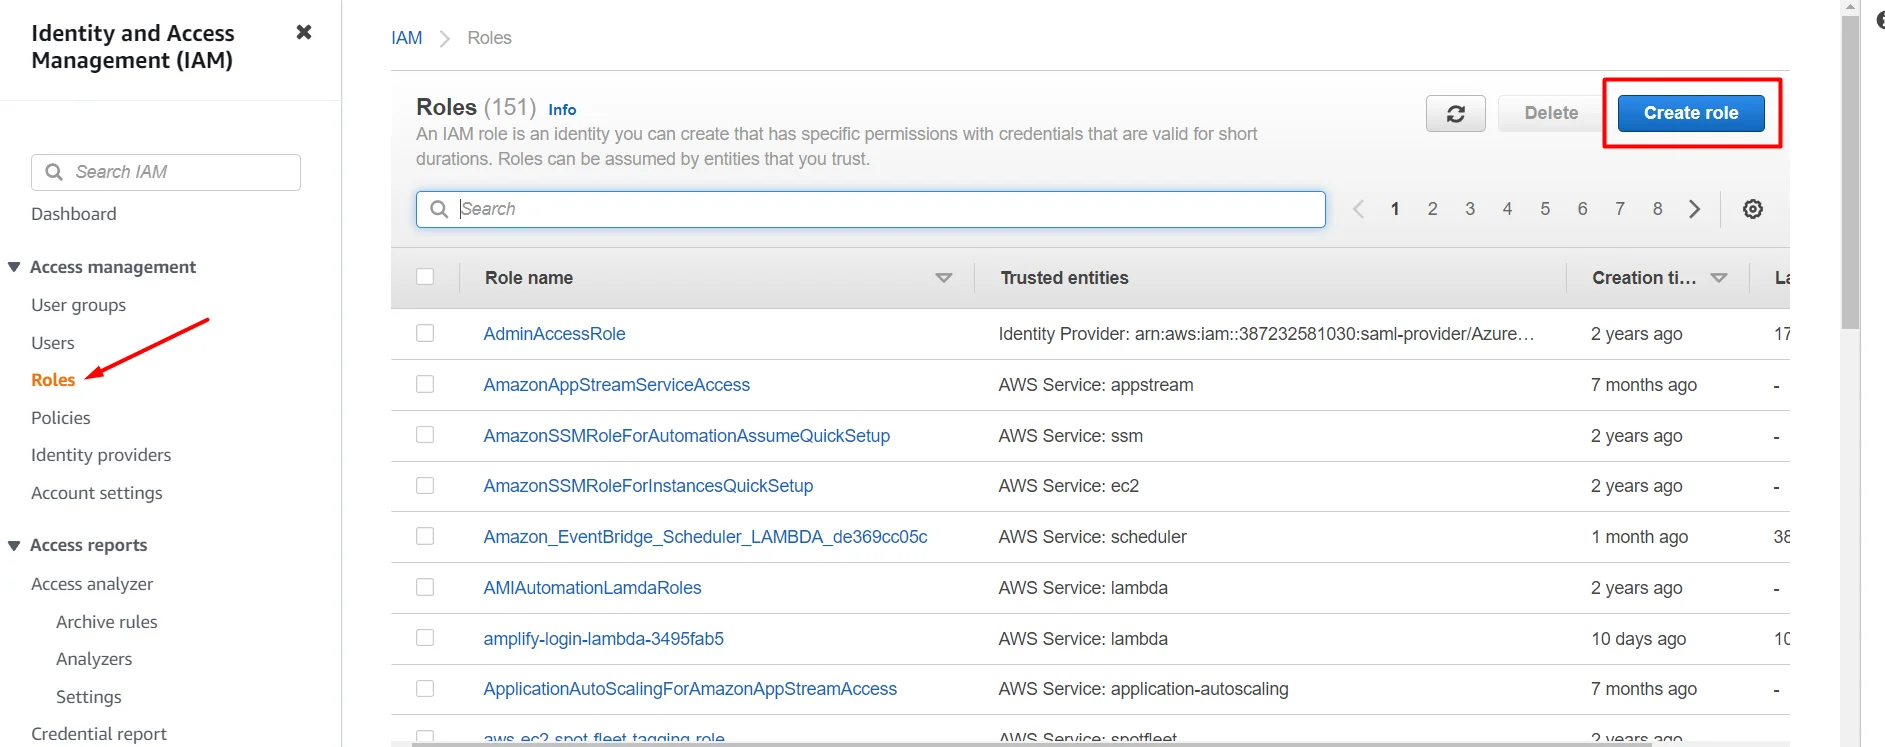
Go to AWS console, open IAM service → under roles → click create role

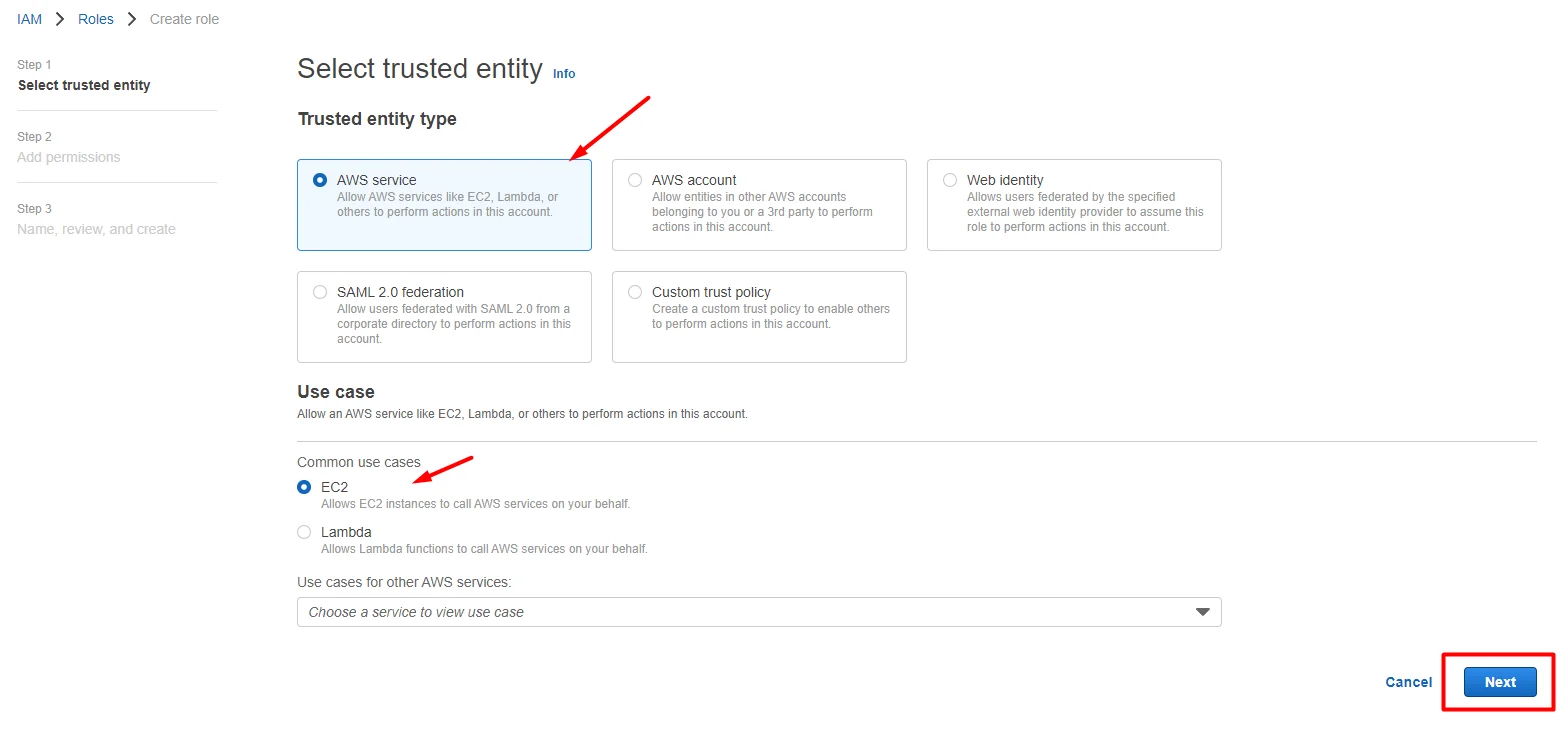
In the trusted entity type, make sure you are in AWS service then select EC2 under use case and click next
aws service → EC2 → next
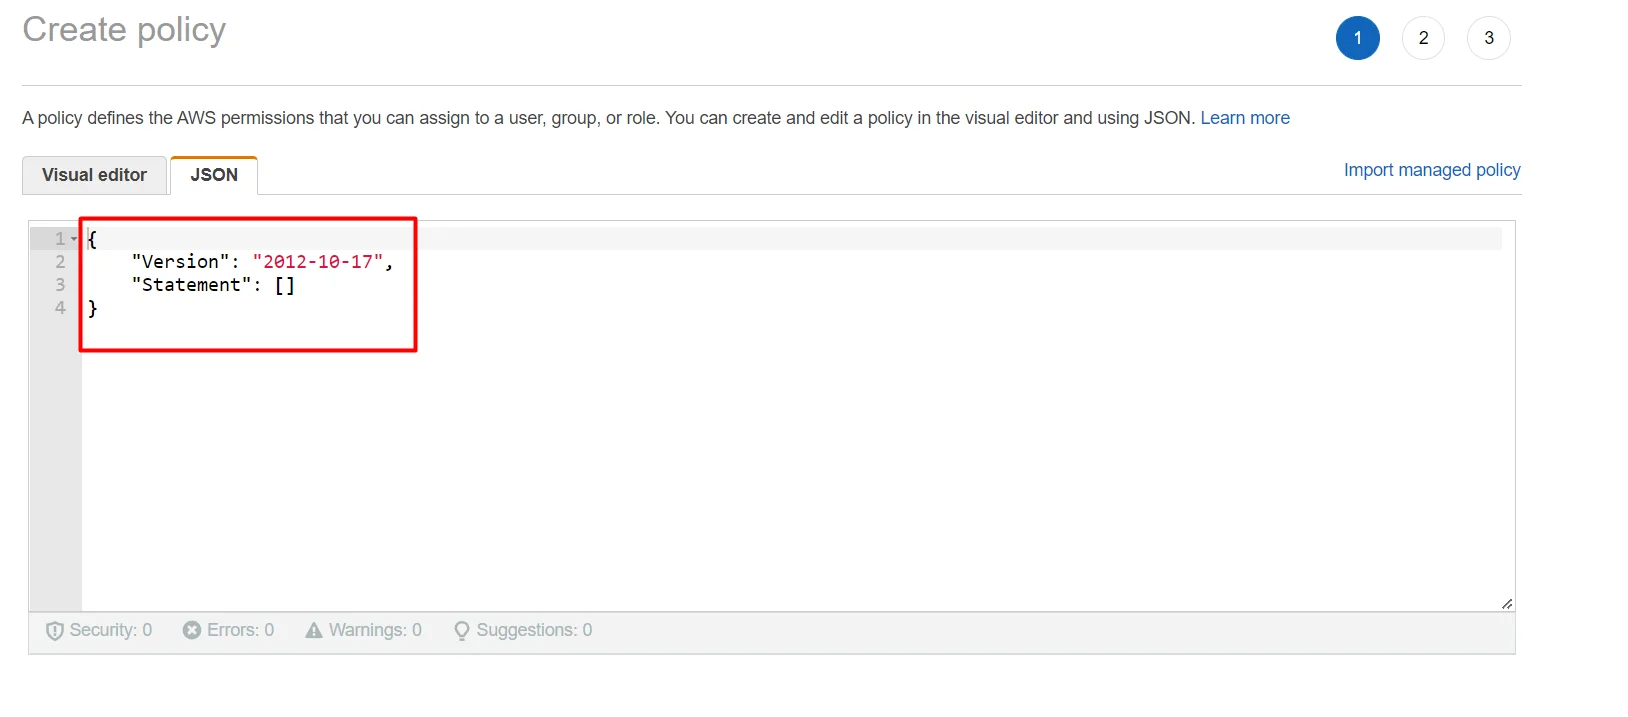
Now click create a policy to write our custom policy with cloud watch permissions

click JSON to write code

Just remove the existing lines under the JSON section
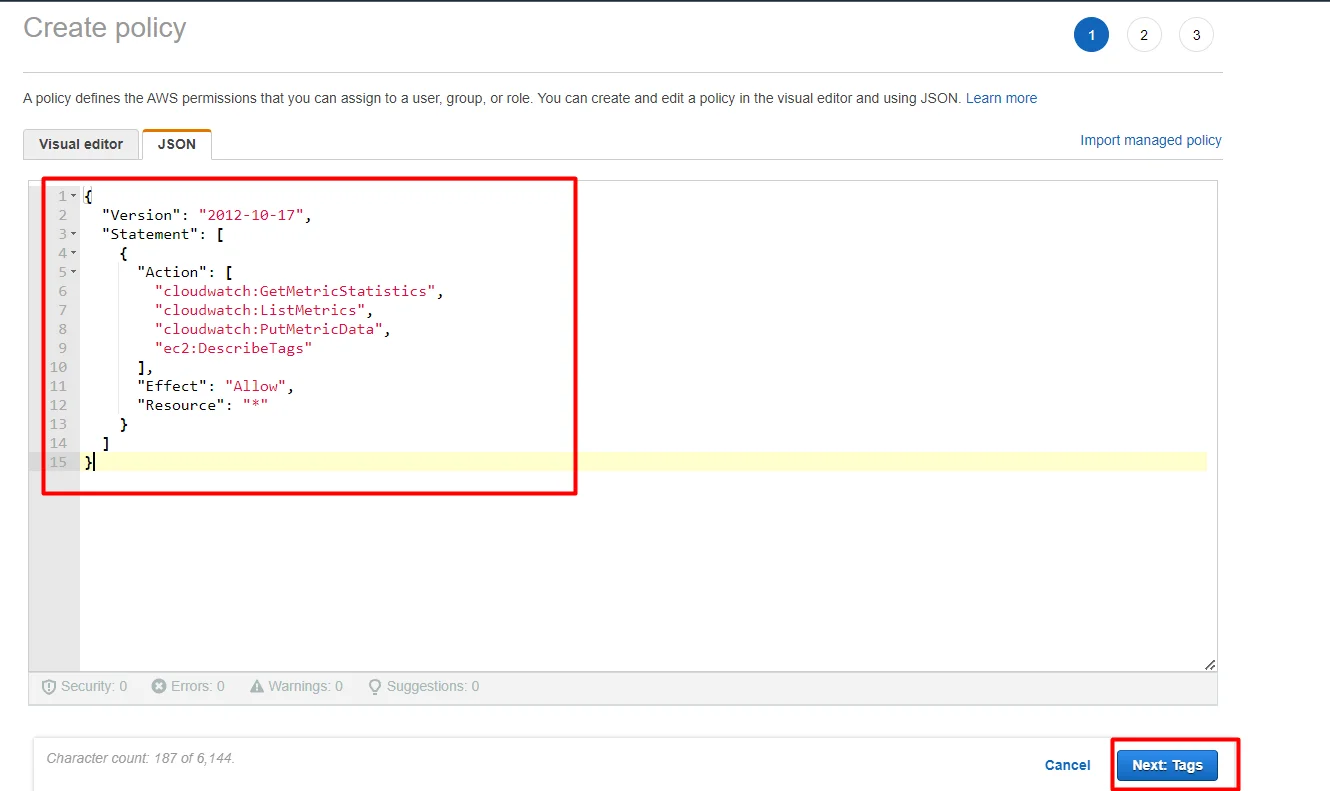
And paste the following JSON code under the JSON section and click next → next
{
"Version": "2012-10-17",
"Statement": [
{
"Action": [
"cloudwatch:GetMetricStatistics",
"cloudwatch:ListMetrics",
"cloudwatch:PutMetricData",
"ec2:DescribeTags"
],
"Effect": "Allow",
"Resource": "*"
}
]
}
Now give the name for our new policy and then click create policy
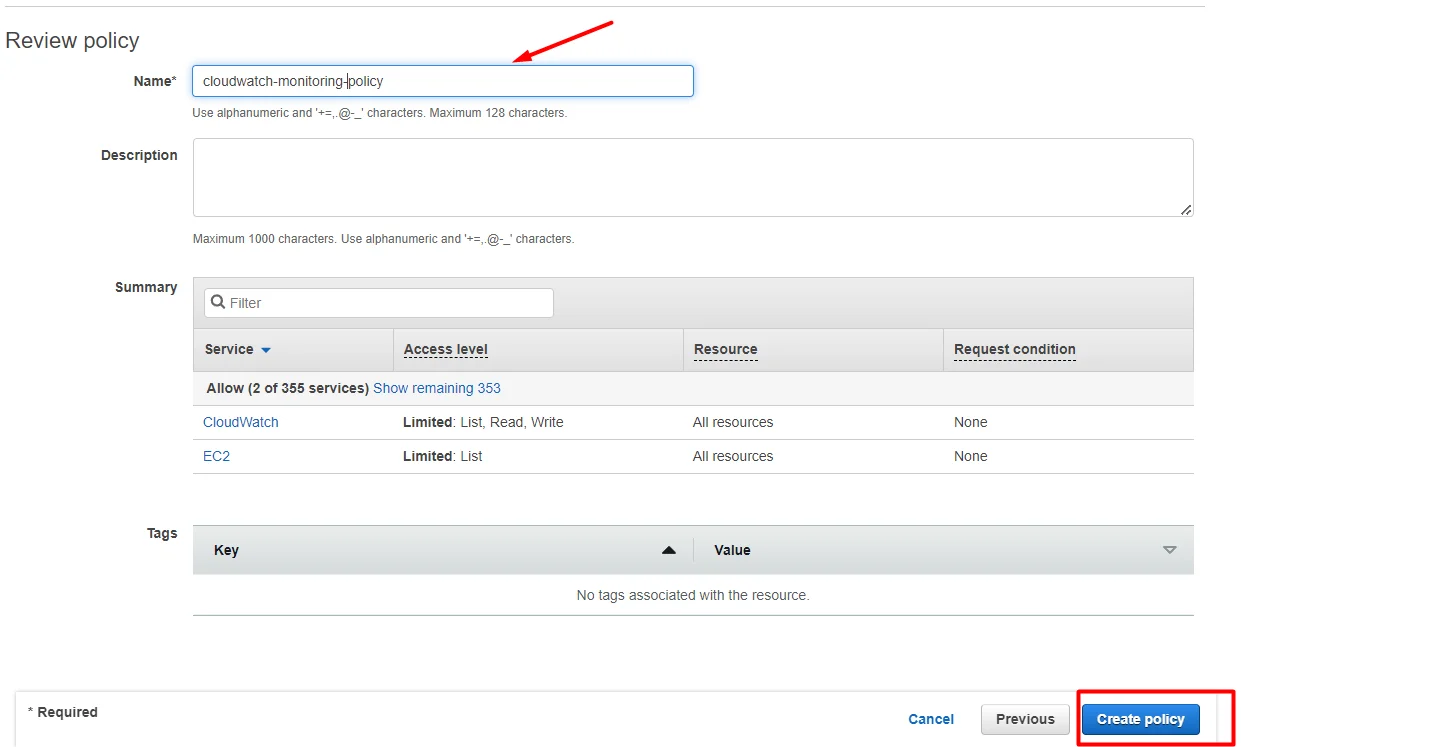
Go back to our previous tab, just refresh the page and search for your newly created policy by entering the name, which was you given in the previous step

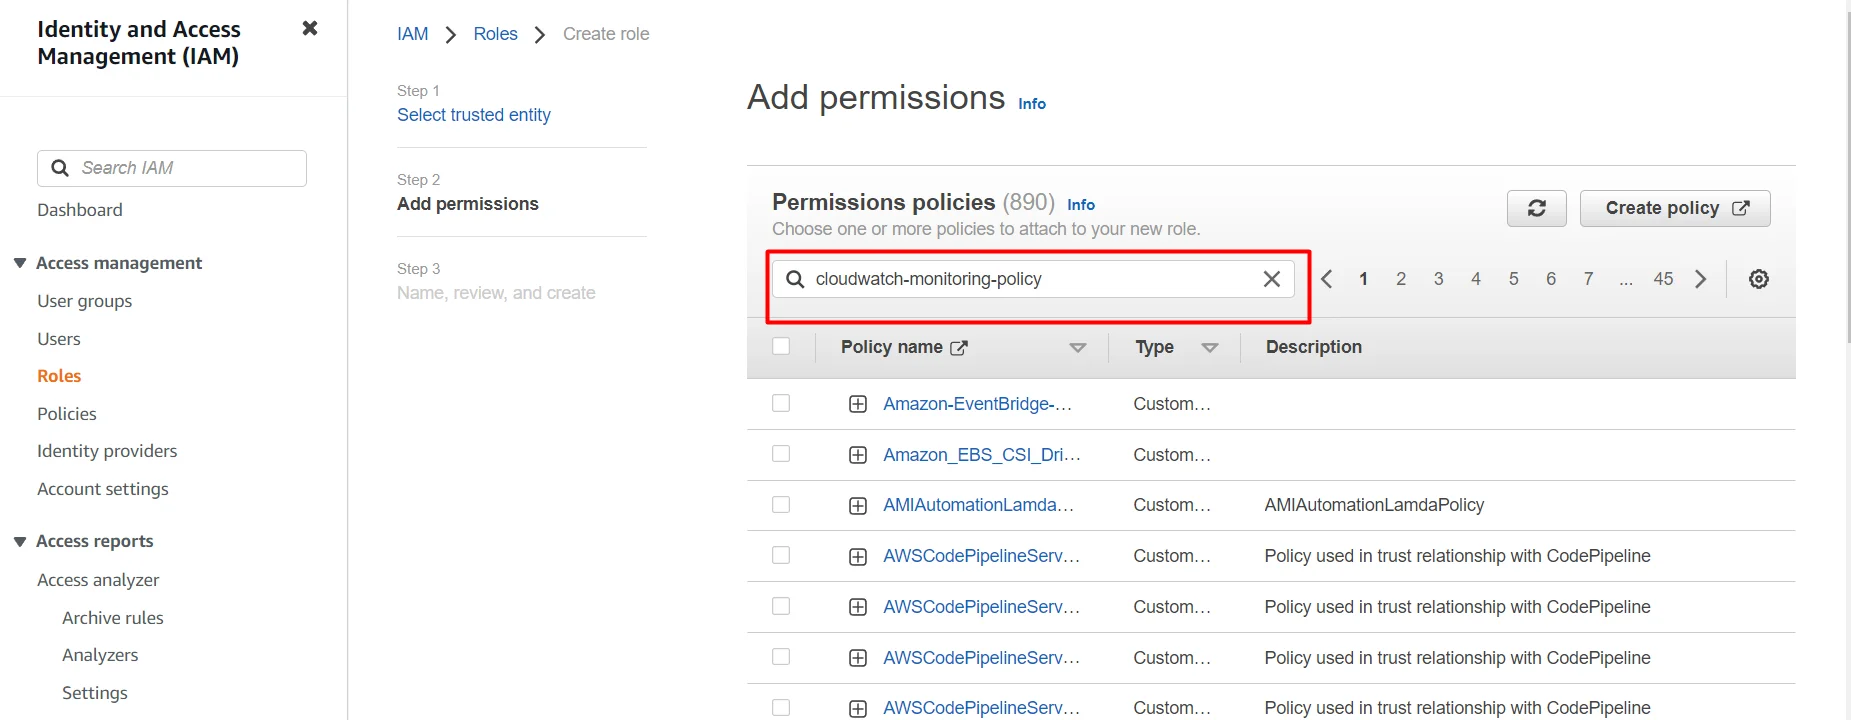
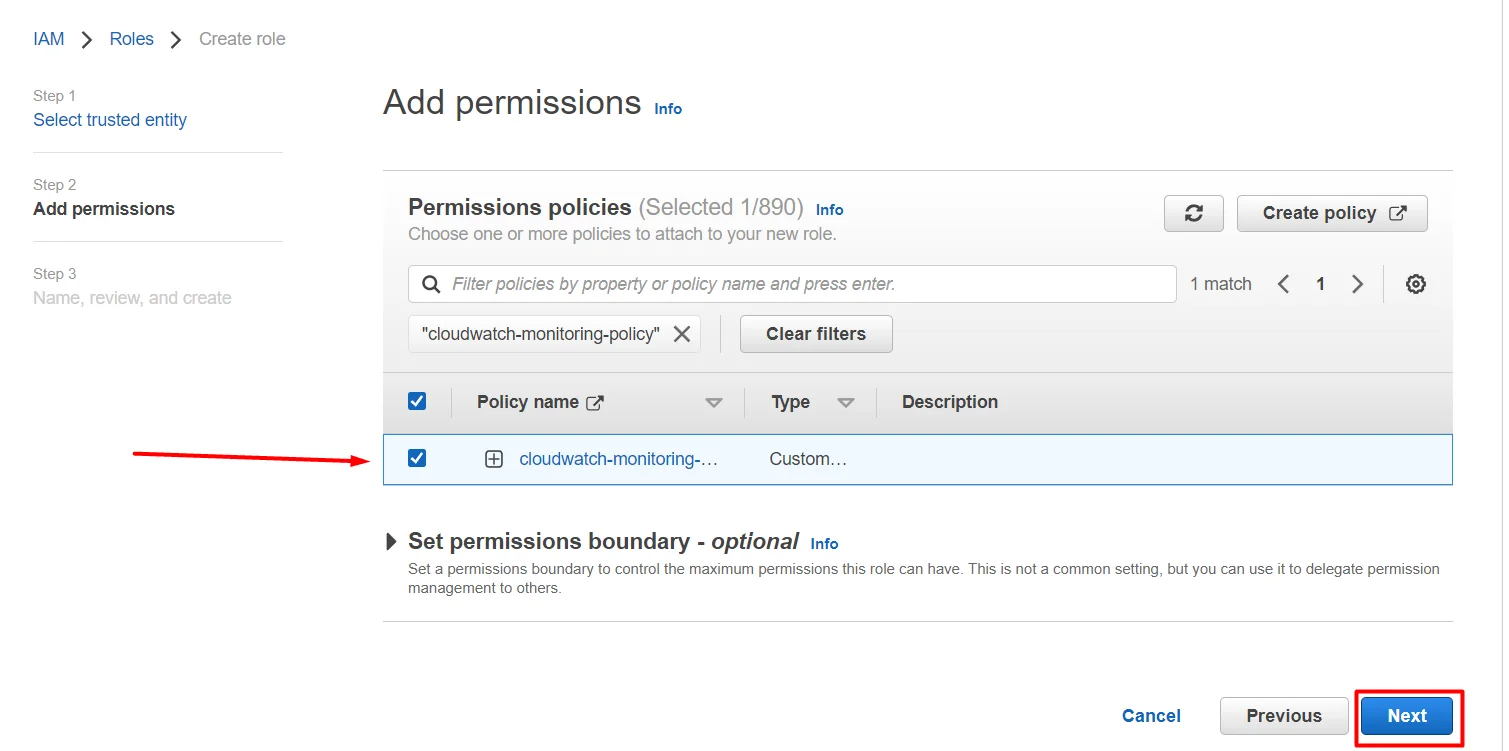
Click Enter, select our policy, and click next
Just give the name for our role and click create role
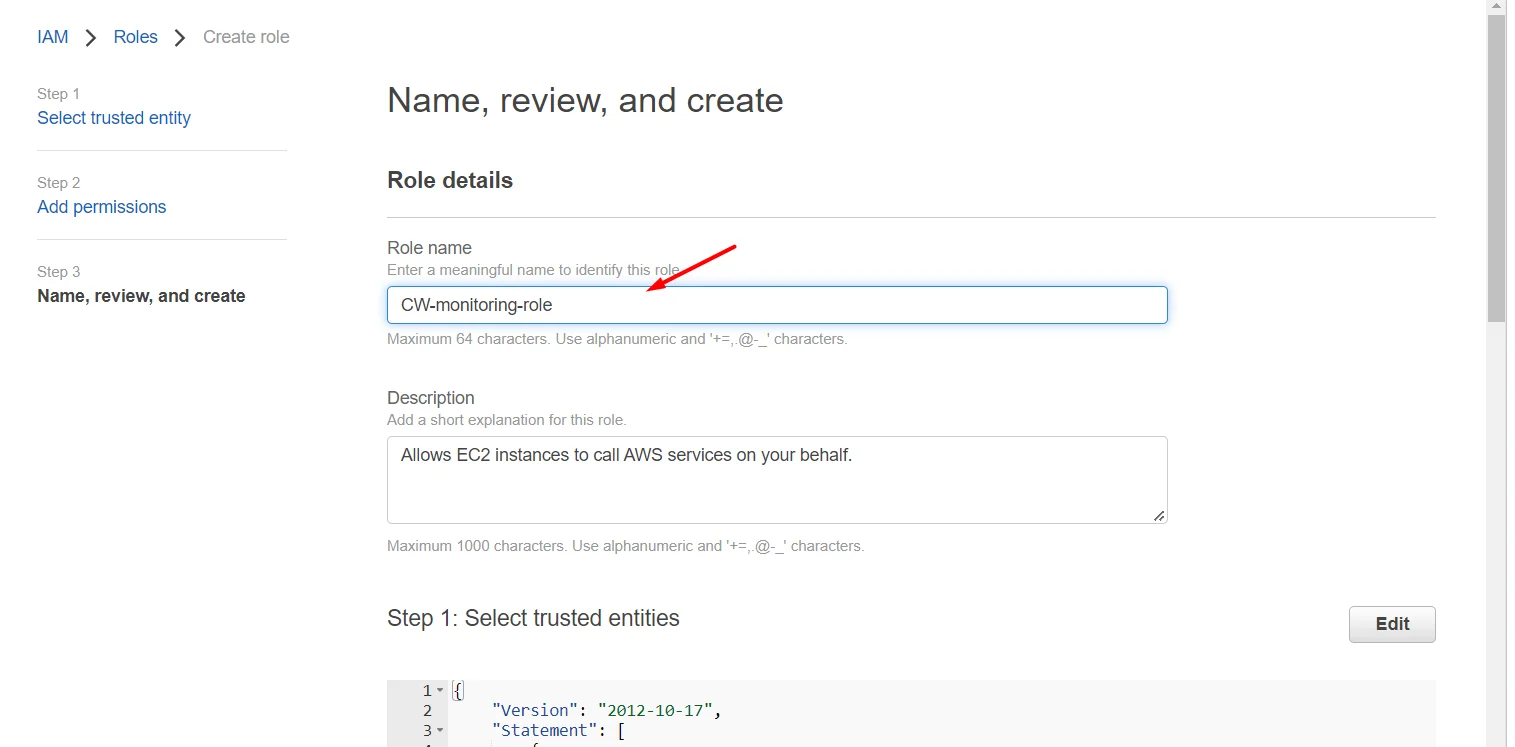
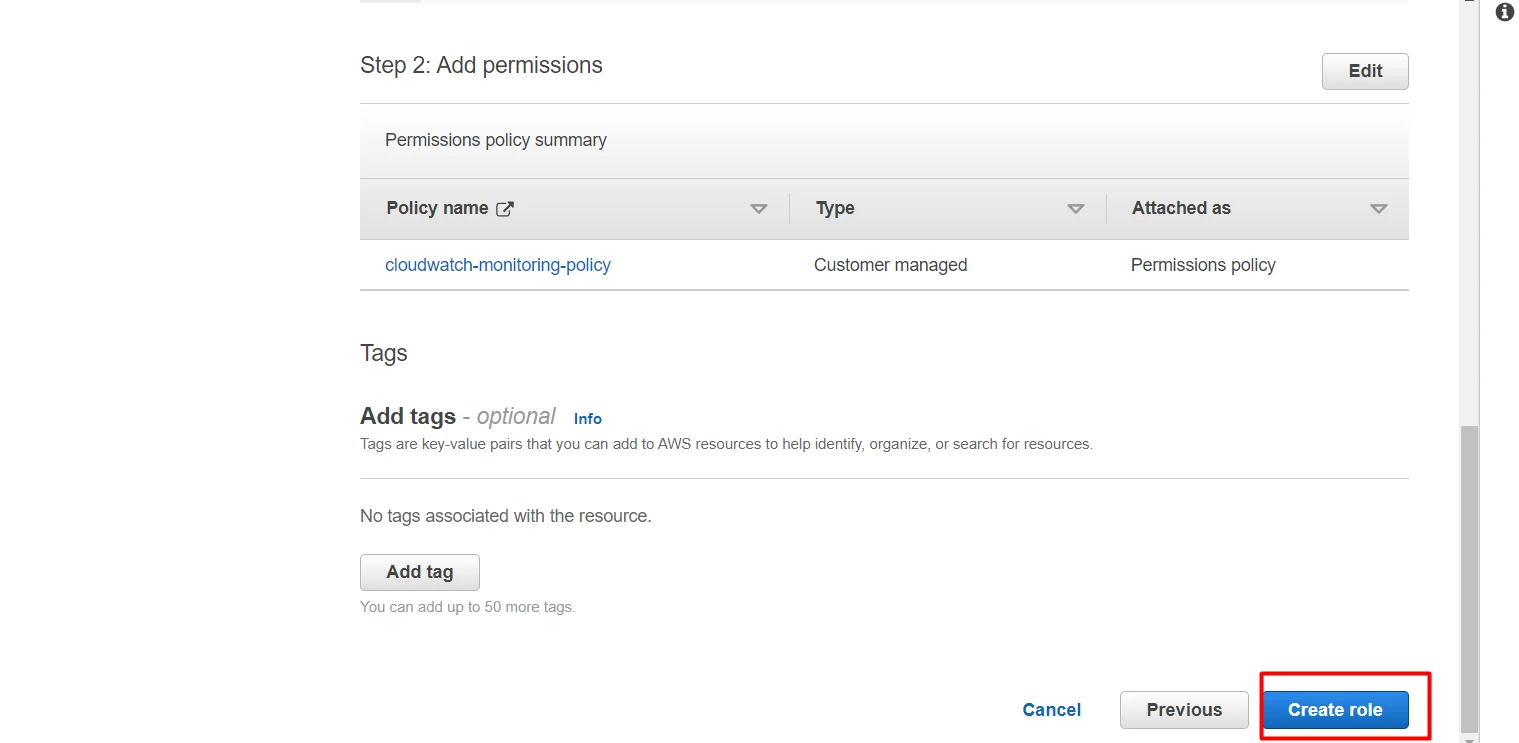
Now we have successfully created a new role for our EC2 instance with cloud watch permission
Attach the role to our EC2 instance
Open the EC2 service, select your instance → click Actions
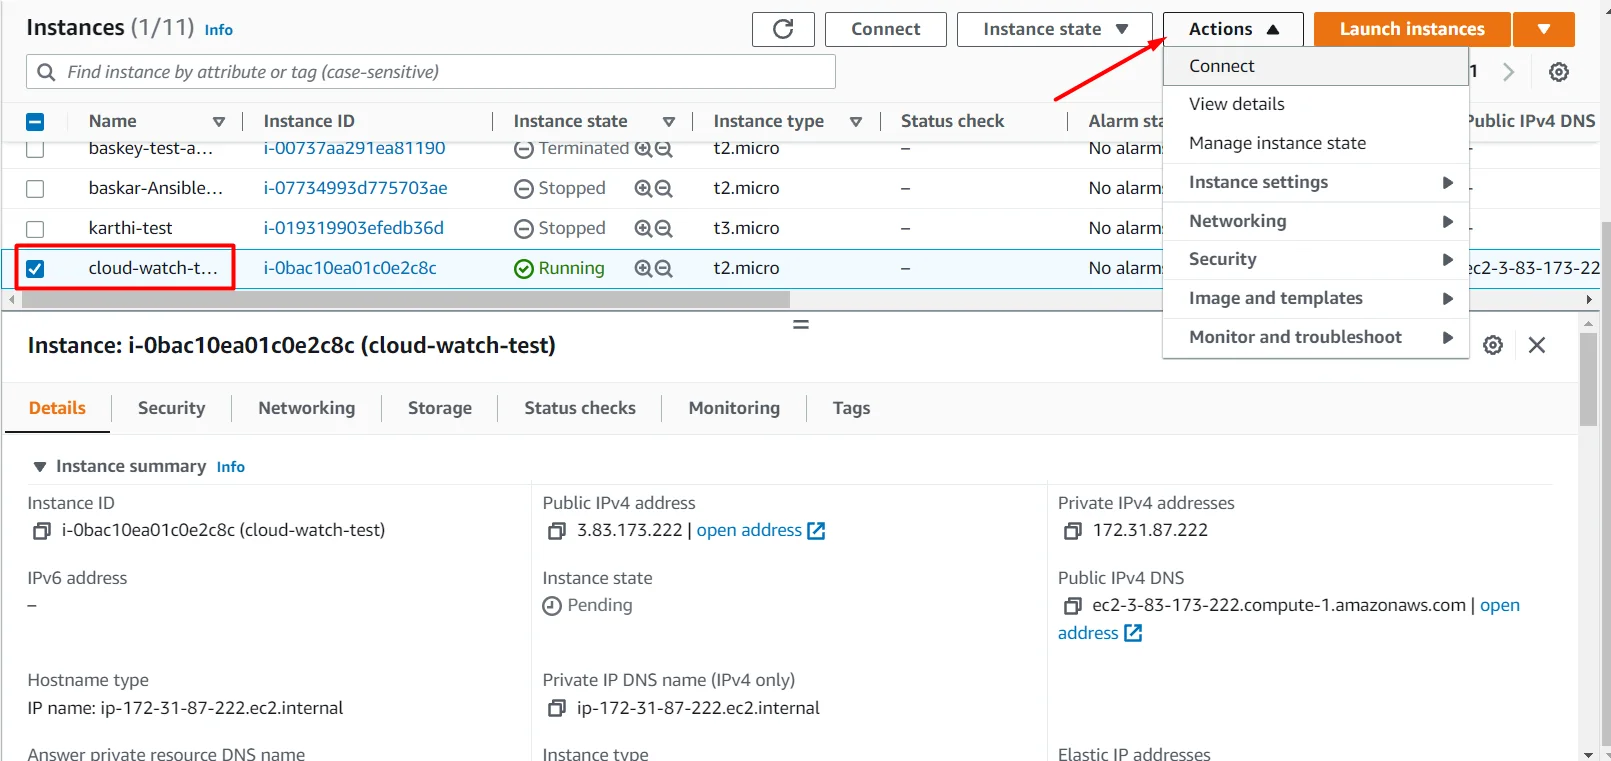
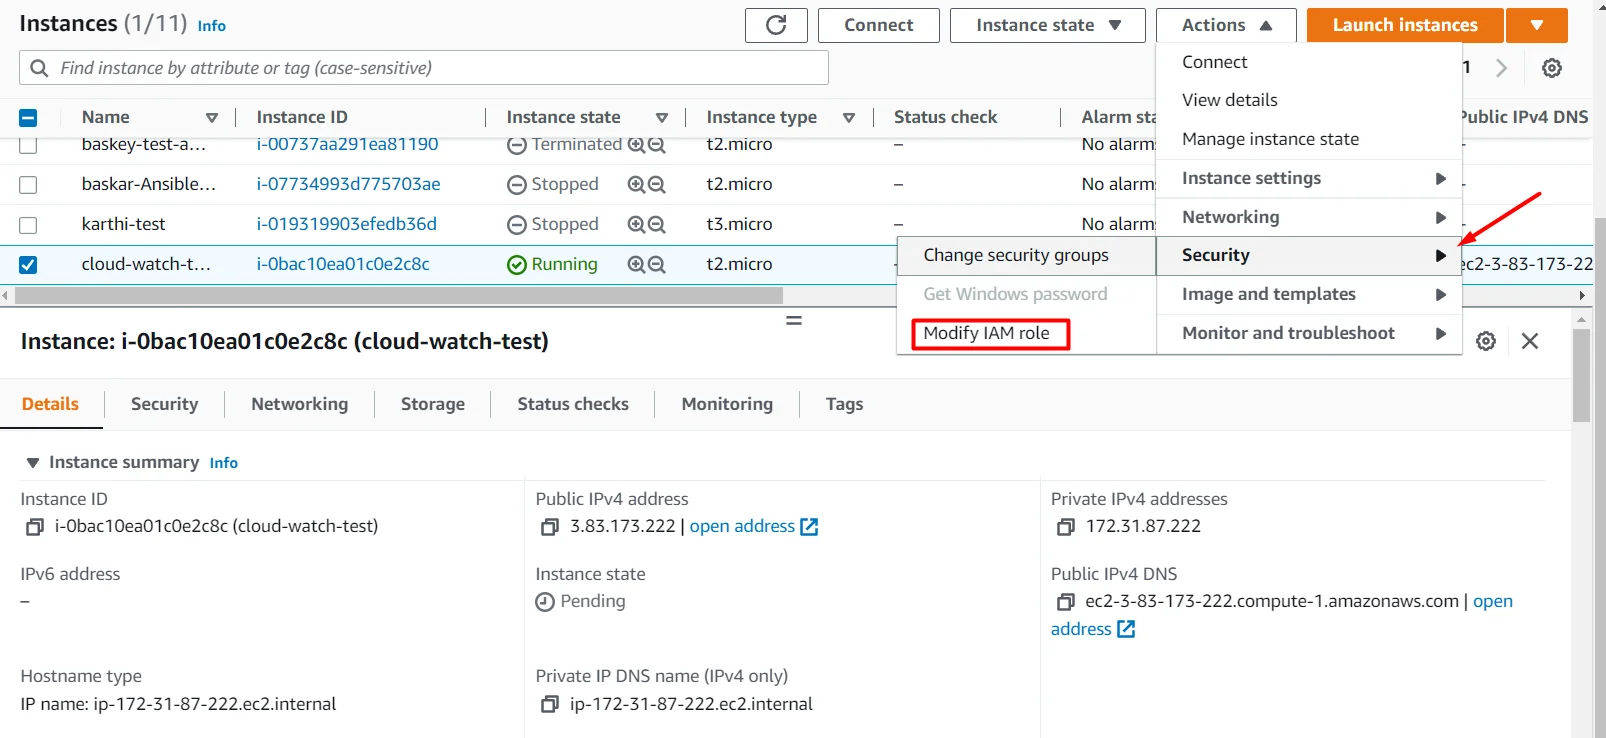
Click security → modify IAM role

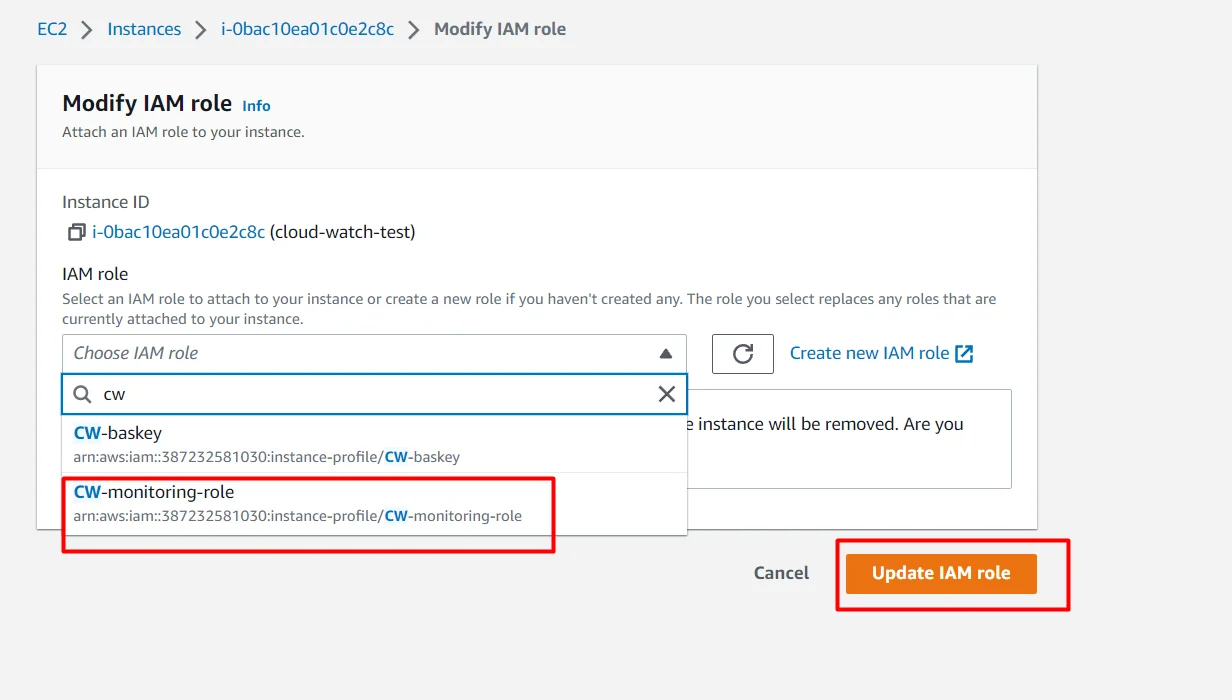
Now just select our role and click update IAM role
Install the required packages on the EC2 instance
for Amazon Linux 2 :
sudo yum install -y perl-Switch perl-DateTime perl-Sys-Syslog perl-LWP-Protocol-https perl-Digest-SHA.x86_64
for Ubuntu :
sudo apt-get update

sudo apt-get install unzip

sudo apt-get install libwww-perl libdatetime-perl
for Red Hat Enterprise Linux 7 :
sudo yum install perl-Switch perl-DateTime perl-Sys-Syslog perl-LWP-Protocol-https perl-Digest-SHA --enablerepo="rhui-REGION-rhel-server-optional" -y

sudo yum install zip unzip
for SUSE :
In SUSE Linux Enterprise Server 12, you need to download the perl-Switch package
wget http://download.opensuse.org/repositories/devel:/languages:/perl/SLE_12_SP3/noarch/perl-Switch-2.17-32.1.noarch.rpm

sudo rpm -i perl-Switch-2.17-32.1.noarch.rpm
Now install packages :
sudo zypper install perl-Switch perl-DateTime

sudo zypper install –y "perl(LWP::Protocol::https)"
Install monitoring scripts on EC2
To install the monitoring script, use the below command
curl https://aws-cloudwatch.s3.amazonaws.com/downloads/CloudWatchMonitoringScripts-1.2.2.zip -O

unzip and remove the monitoring script zip file
unzip CloudWatchMonitoringScripts-1.2.2.zip && rm CloudWatchMonitoringScripts-1.2.2.zip

Change the directory to aws-scripts-mon you can see the below script files
cd aws-scripts-mon
ls

When we run the “ mon-put-instance-data.pl “ script file, it will send memory and disk space reports to the cloud watch
Schedule cron for monitoring script
if we schedule cron it will automatically run our monitoring script each time as we mentioned in the crontab, and our script will send report to cloud watch.
open crontab using below command
crontab -e
Now crontab file will be opened, just replace your script path with the below command and then copy & paste the command in our crontab file,
and then save & exit.
*/1 * * * * <path-to-script>/aws-scripts-mon/mon-put-instance-data.pl --mem-util --mem-used --mem-avail --disk-space-util --disk-space-used --disk-space-avail --disk-path=/

*/1 * * * * /home/ec2-user/aws-scripts-mon/mon-put-instance-data.pl --mem-util --mem-used --mem-avail --disk-space-util --disk-space-used --disk-space-avail --disk-path=/
If we give cron like this “ */1 * * * * ” it will run our script at every single minute

Crontab Issue
If you are facing “Command not found” issue when using crontab , then follow the below steps to rectify this error.

Install cron
yum install cronie cronie-anacron
Now check using “crontab -e” command , it will works
Setup Cloud Watch metrics
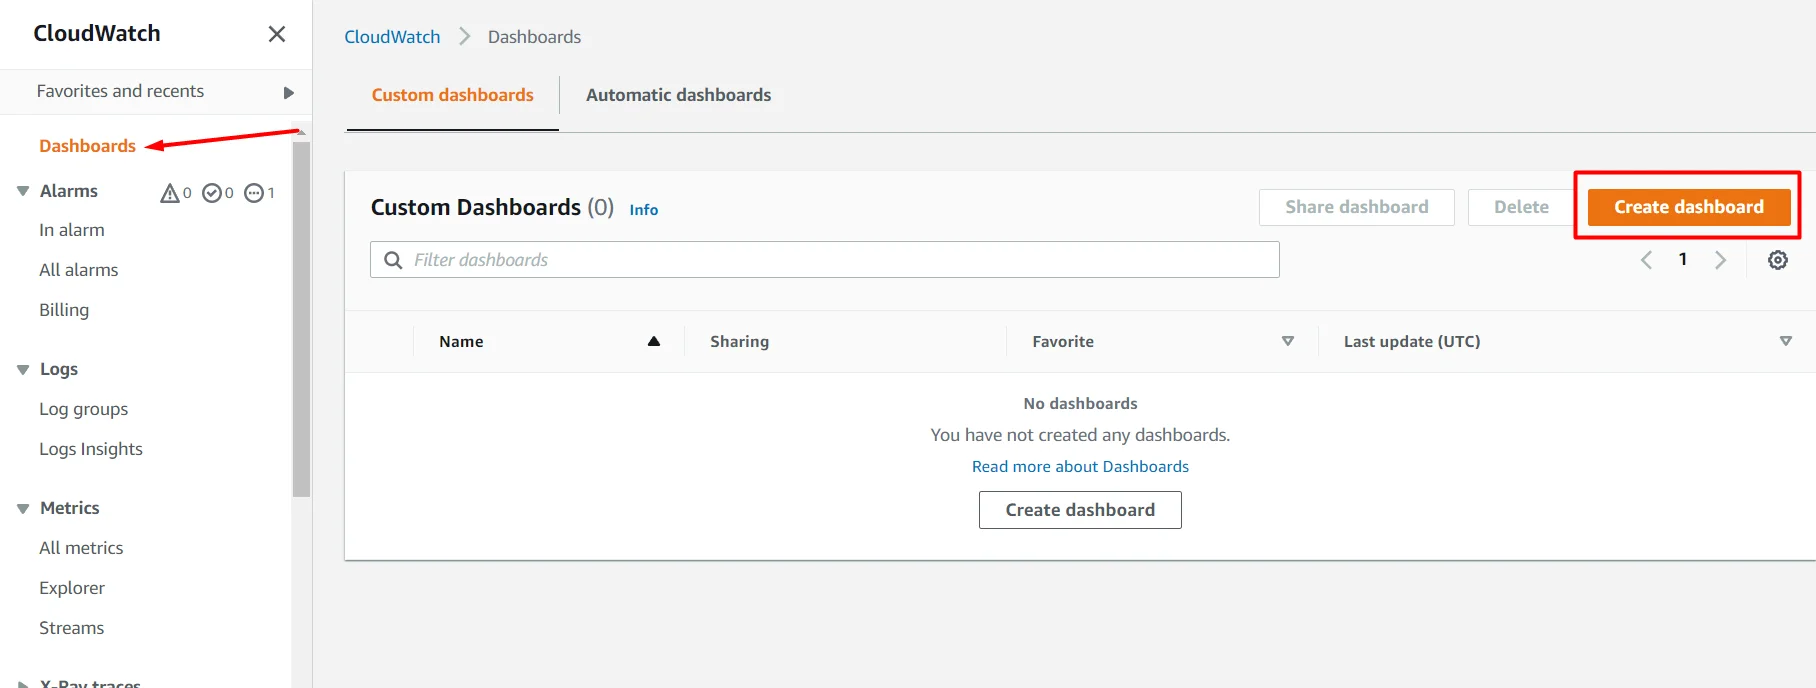
Go to cloud watch service → Dashboards → create dashboard

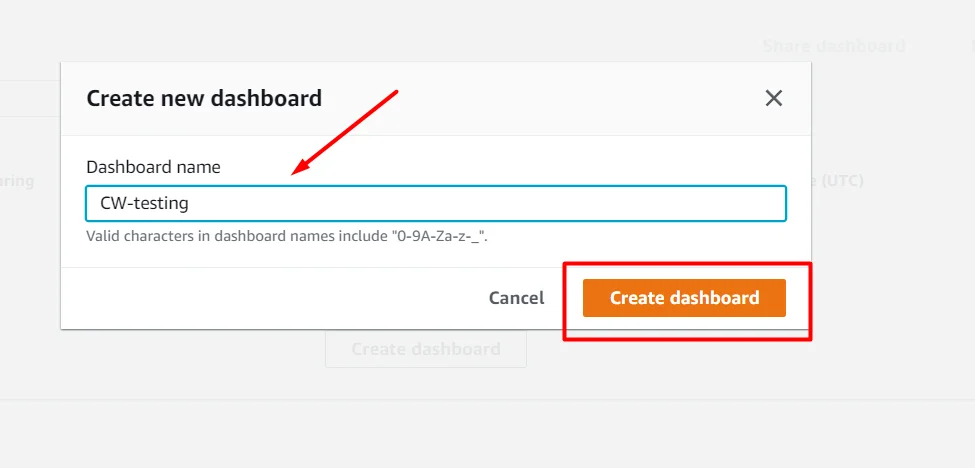
Enter the name for our dashboard and then click create dashboard
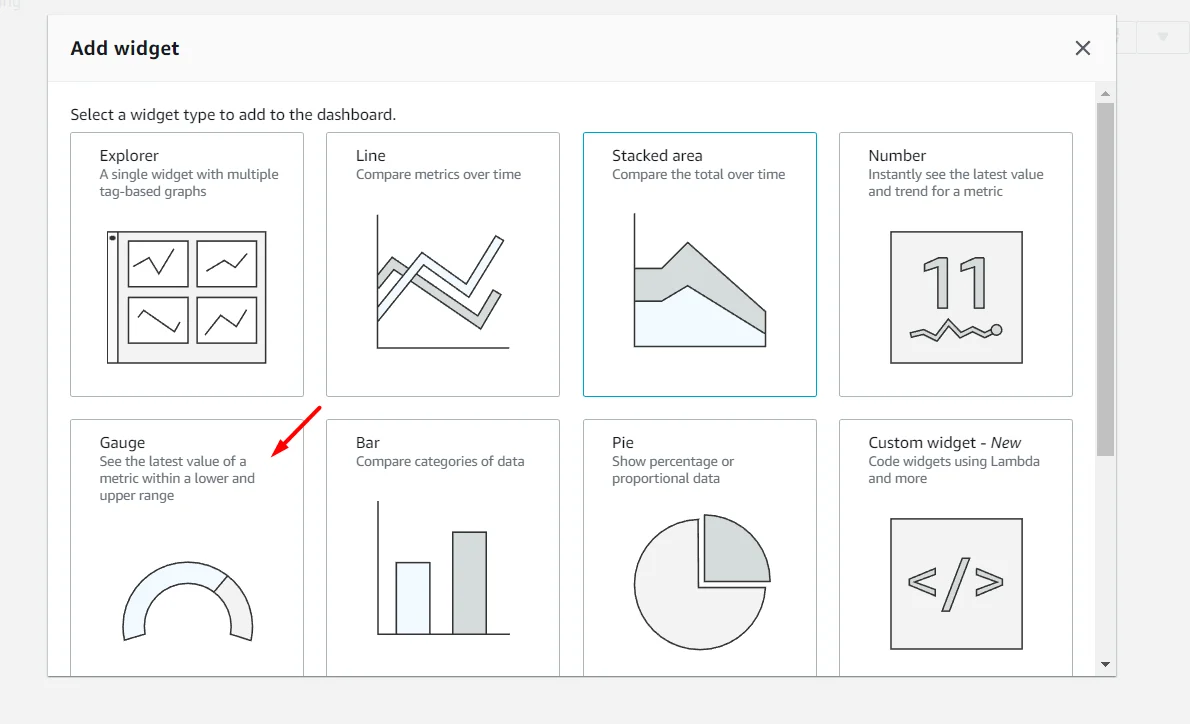
Select the type of widget you want
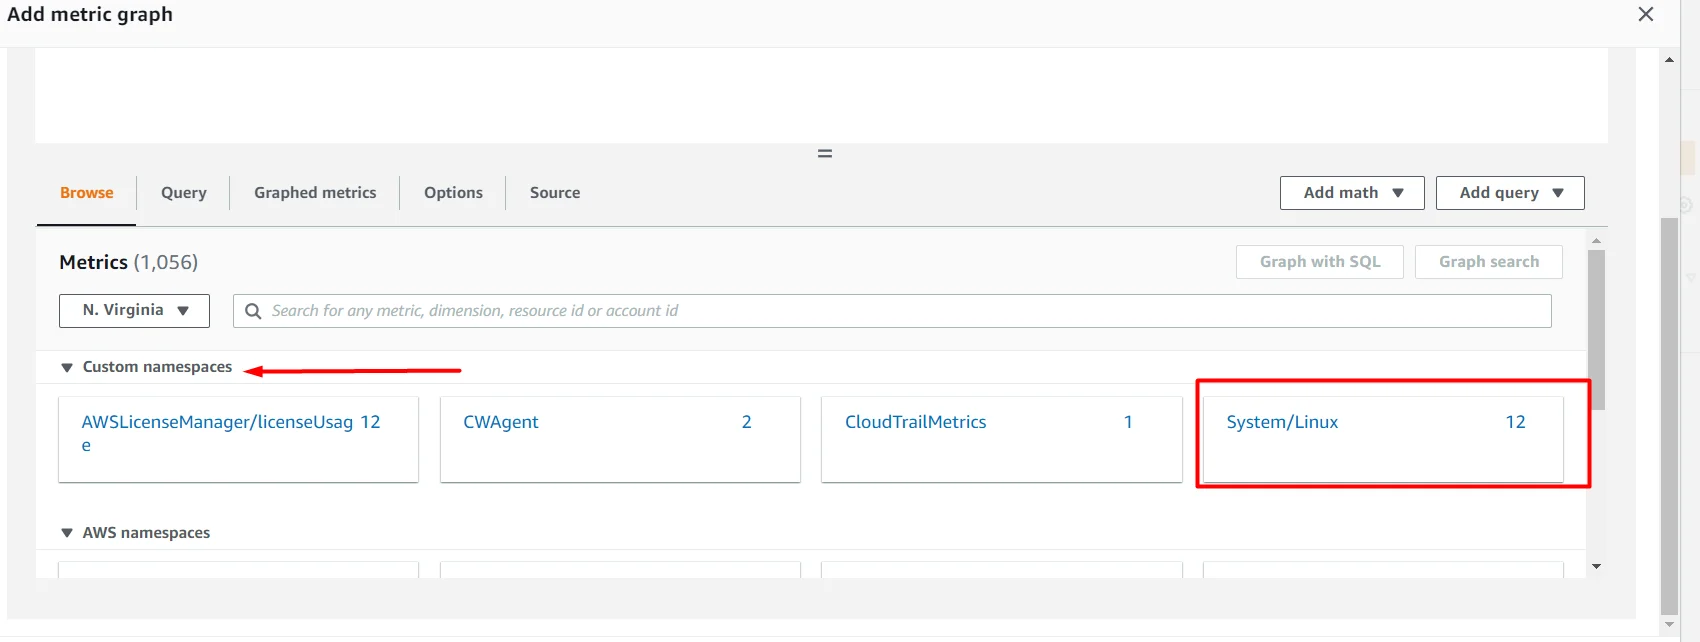
Select system/linux metrics under custom namespace
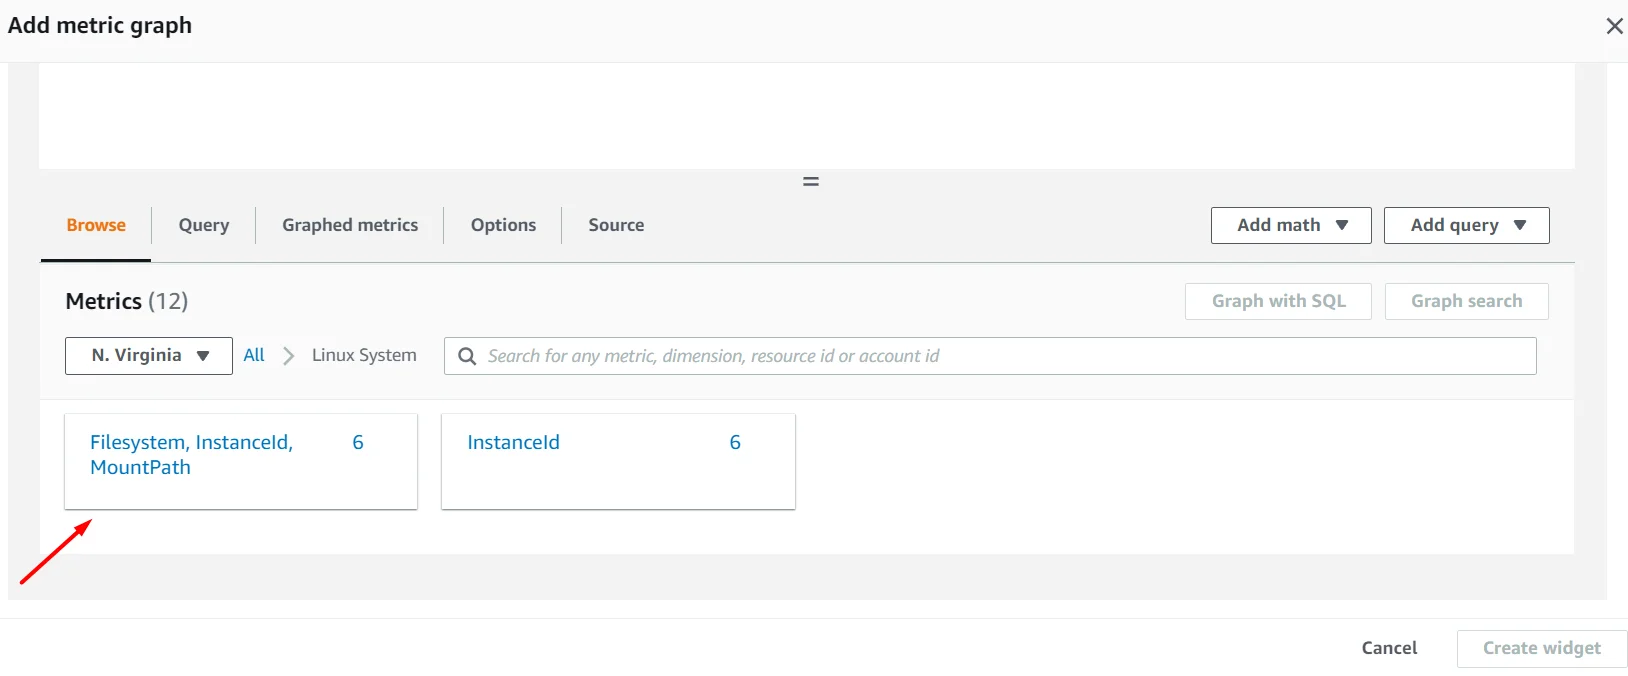
click “ Filesystem, InstanceId, MountPath “
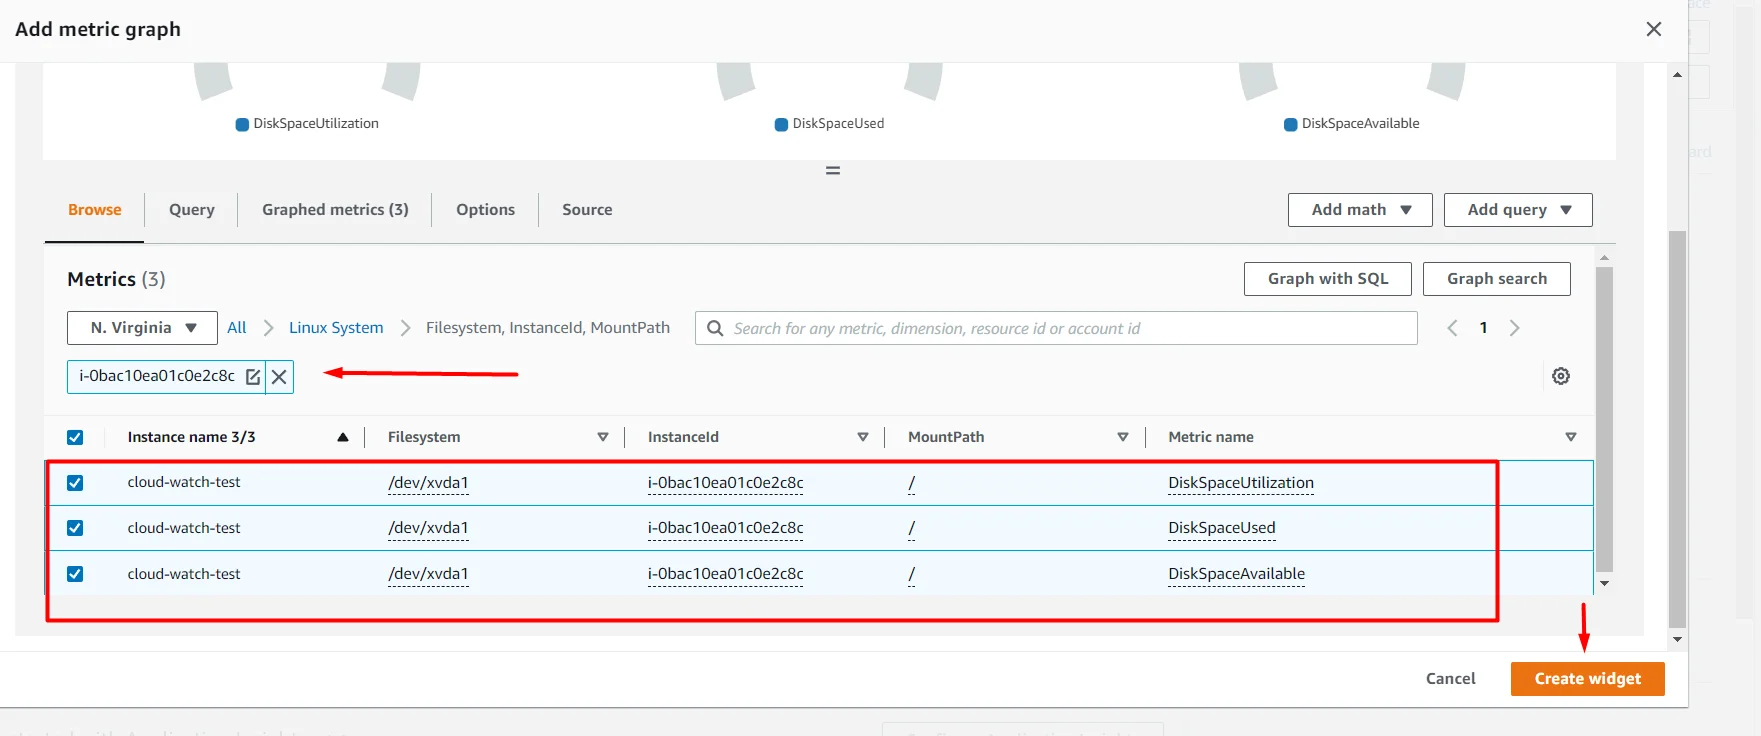
Copy your instance id and filter out your instance by search

Filter and select all the three metrics of your instance and click create widget
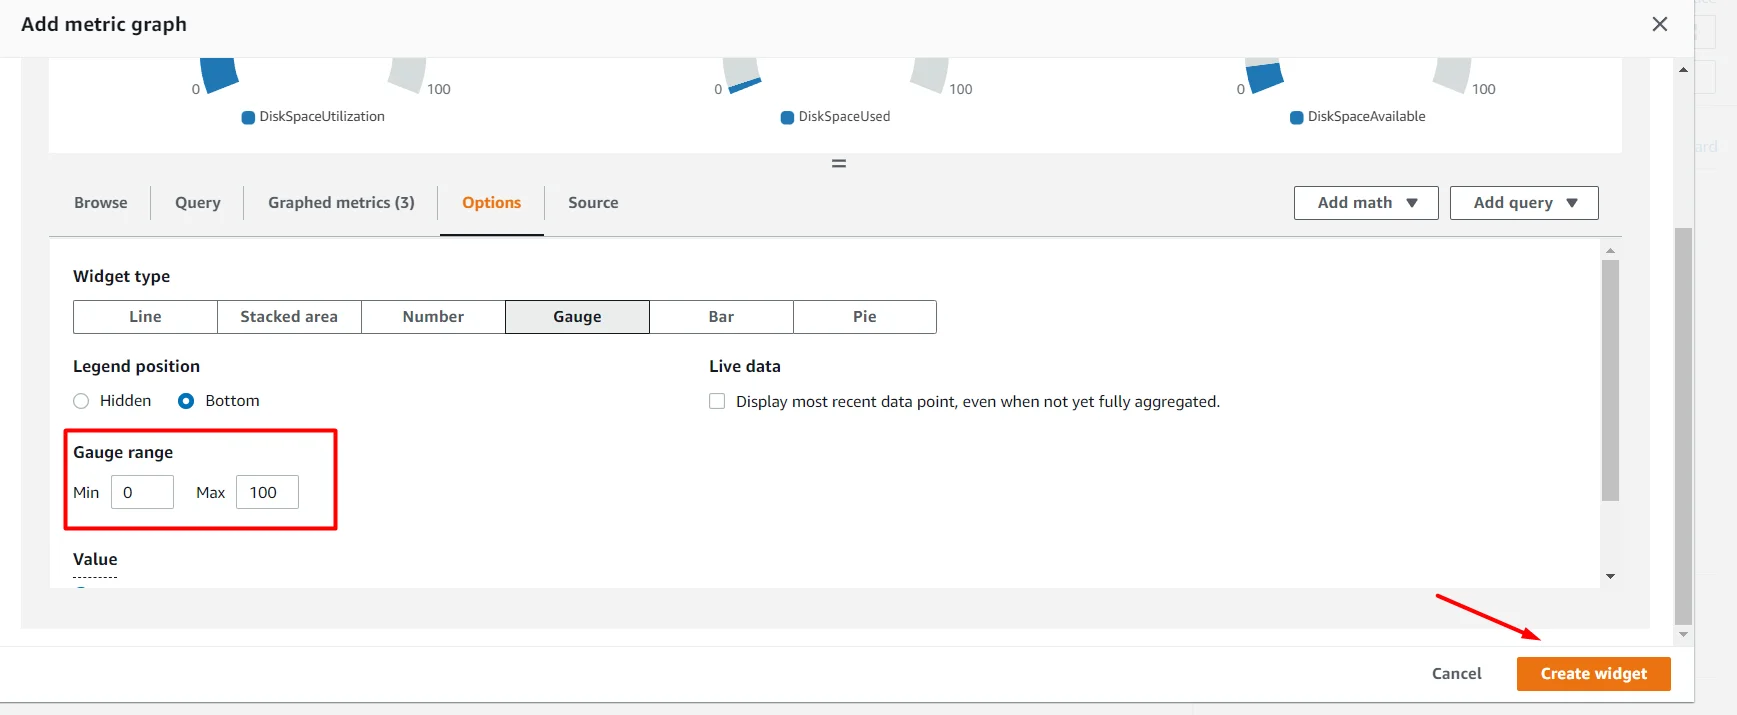
Enter the Gauge range 0 – 100 and click create widget
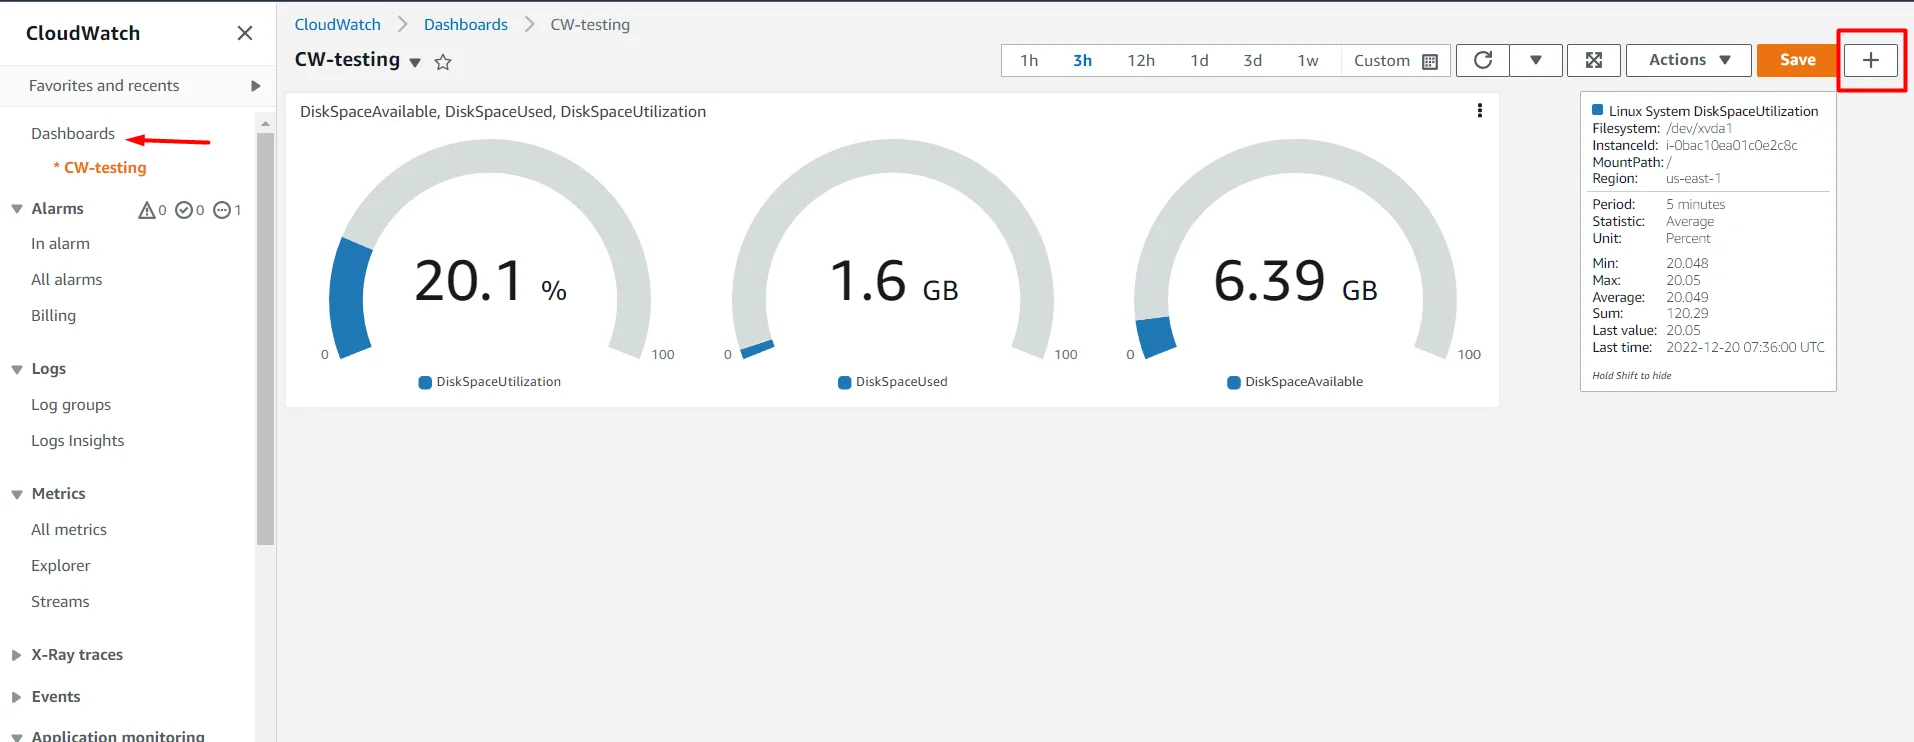
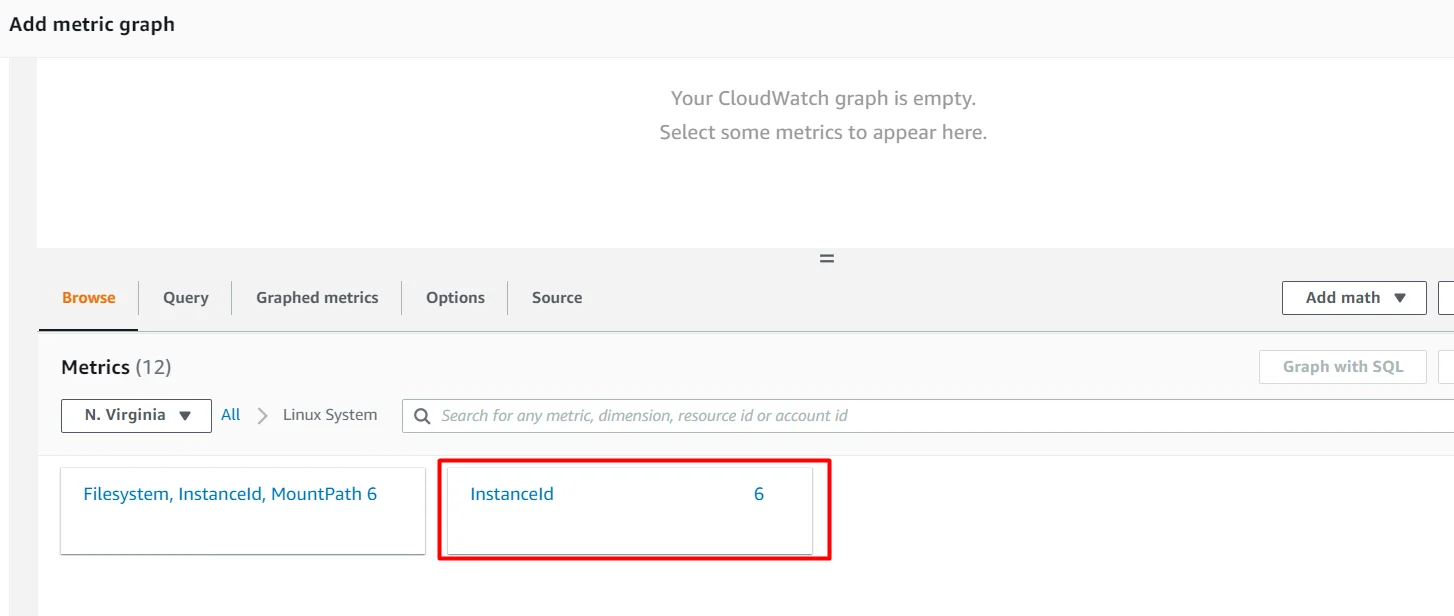
Again select type of widget → system/linux metrics → click Instanceid
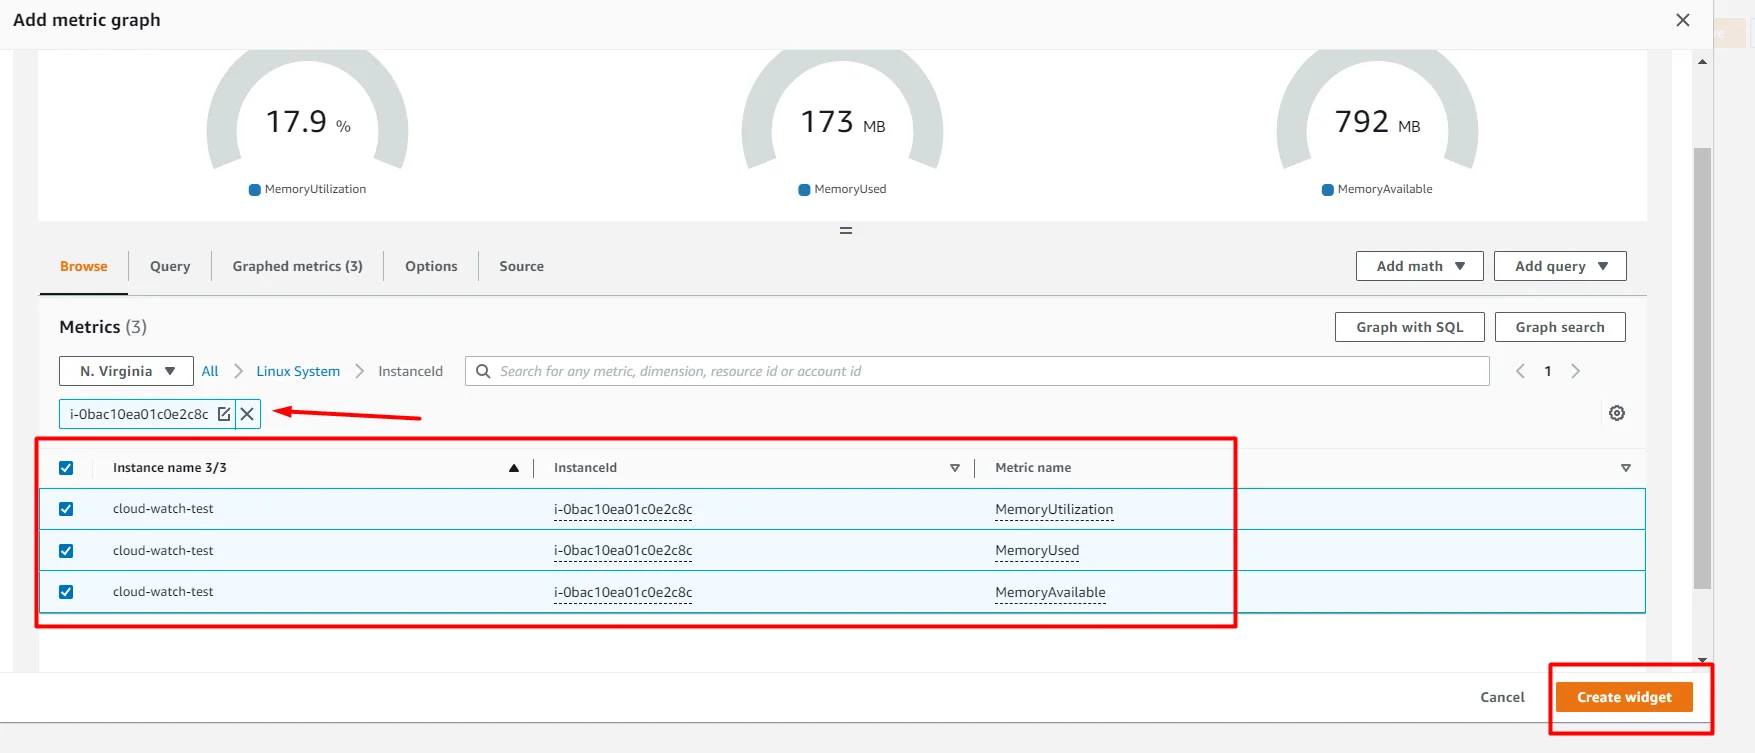
Filter out using our instance id and select all the three metrics of your instance and click create widget
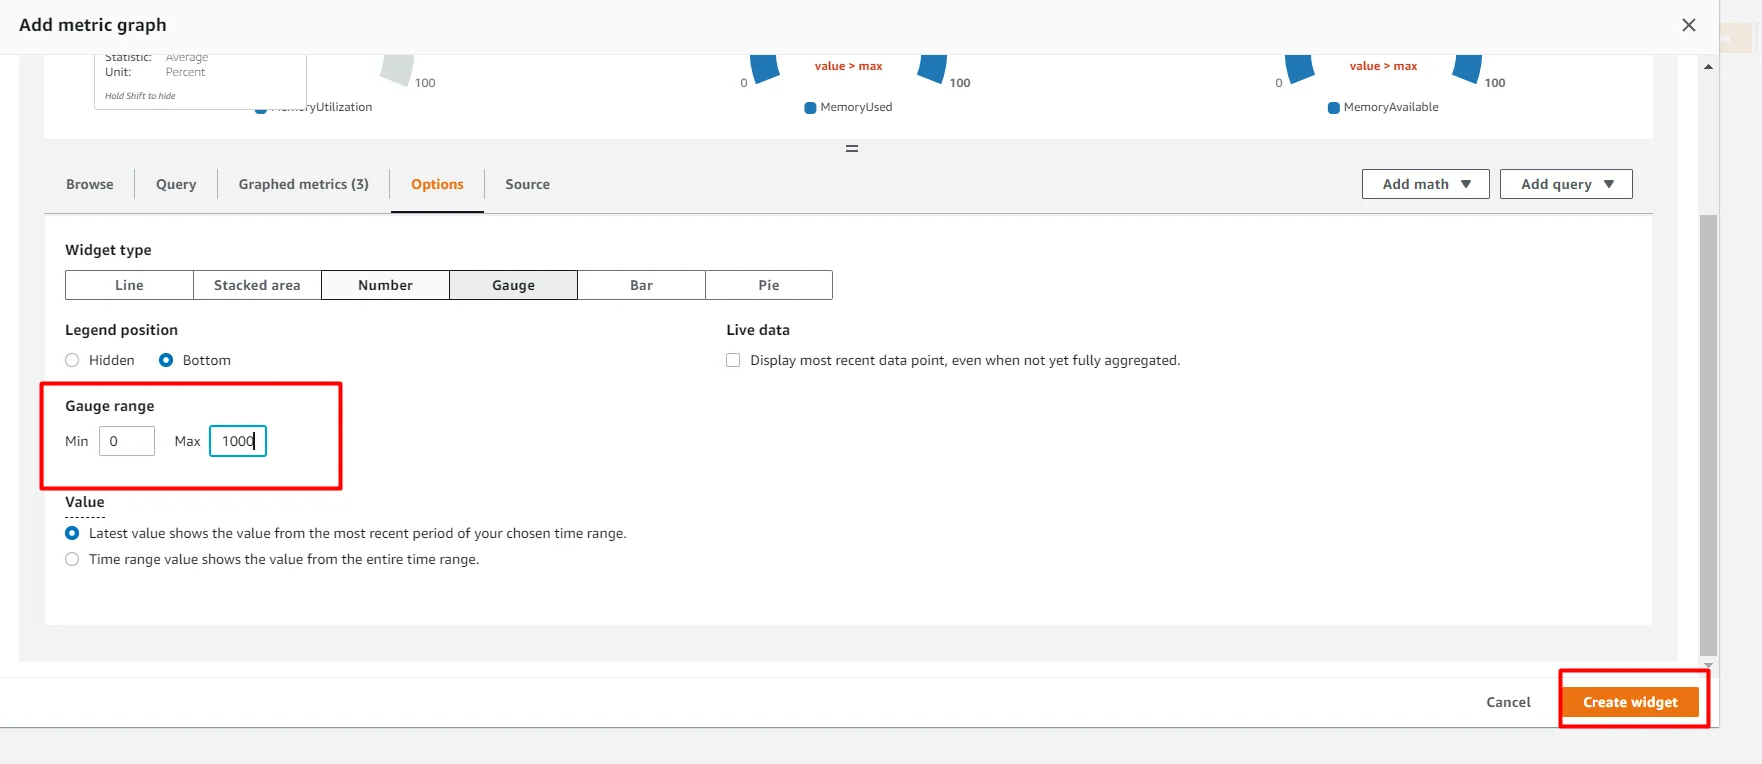
Enter the Gauge range 0 – 1000 and click create widget
Now change the custom time to 1 minute , then only all the changes in our instance RAM & memory usage will be reflect in our dashboard and then → click save
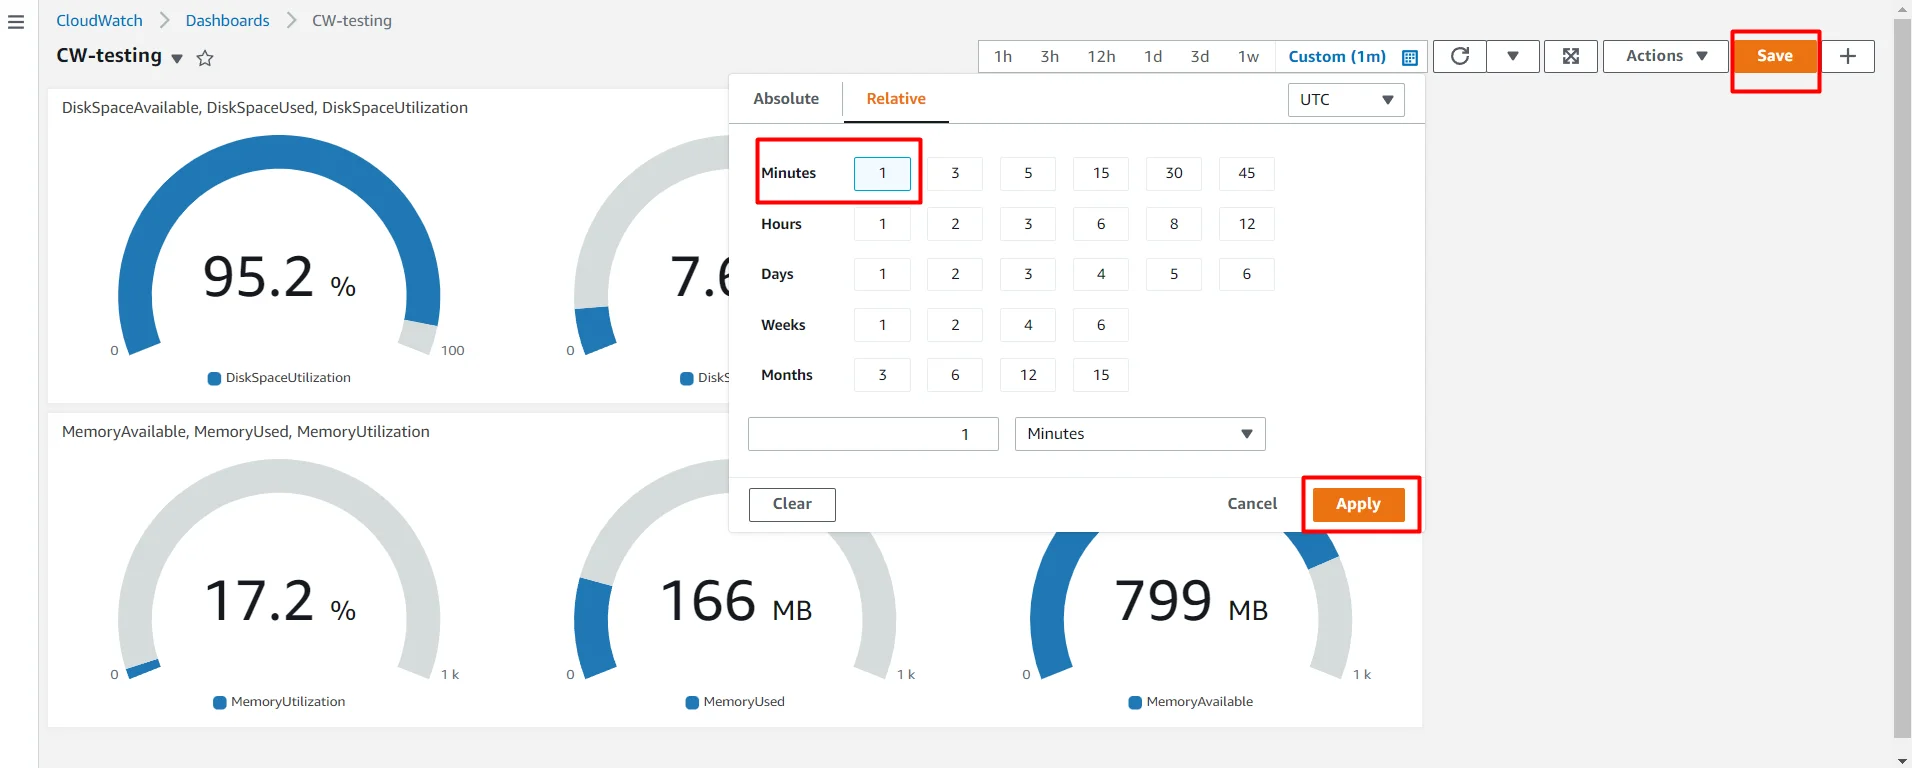
We have successfully done !! our cloud watch monitoring setup for Memory(RAM) & Disk space , here after we can easily monitor our EC2 instance’s memory and disk usages.
You can check if our cron is working or not , by using below command
cat /var/log/cron


yeah!! our cron is working properly .






Thanks for post, help me! Thx!